5 Benefits of Refueling Your Big Rig at a Truck Stop

We love our big rig because it gives us a lot of living space and has many of the creature comforts of home. However, there are some challenges that go along with owning a 45-foot motorhome. Maneuvering such a large vehicle takes some practice and getting fuel is one area where space can be a challenge. We have found that using a truck stop makes getting our diesel fuel a much easier task.

Convenience

Truck stops are conveniently located along all major highways in the US. Being able to exit right to a truck stop allows for a quicker stop and means you don’t have to get into busy city traffic or worry about low bridges or tight streets. We like to plan for our next fill up when we get down to half a tank of fuel, just to be safe. Using truck stop apps like TA, Love’s or Pilot will not only help you locate stations along your route but can also let you compare prices.
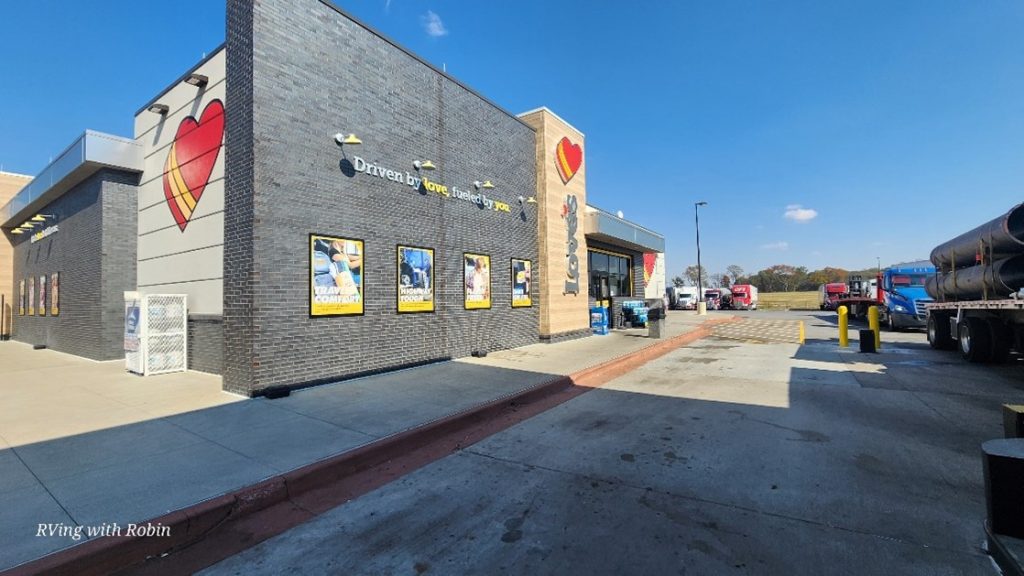
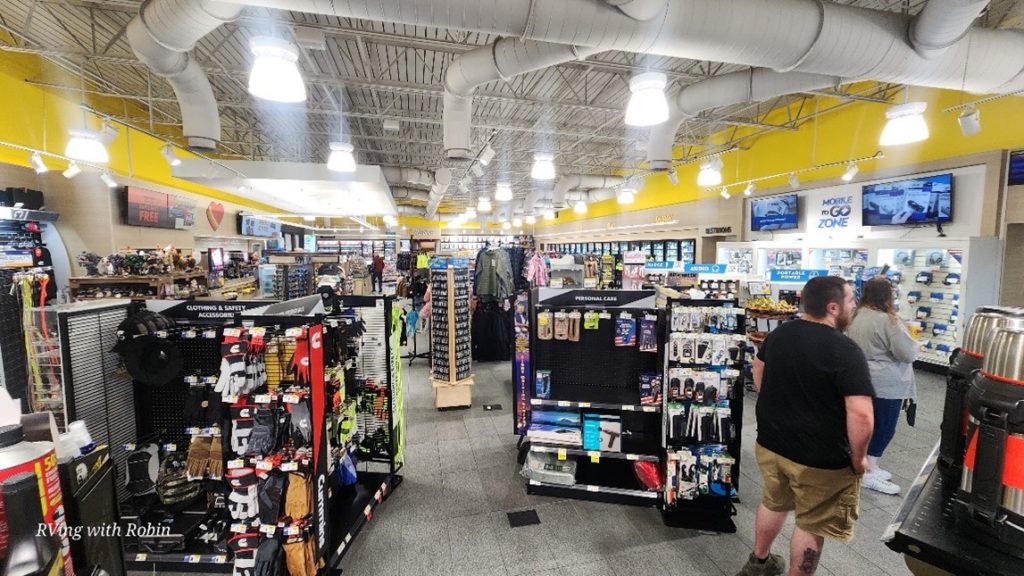
You might have noticed that many big stations are now called travel plazas or travel centers. That’s because they have a lot more conveniences all in one place. Many offer restaurants, convenience stores, truck scales, dump stations, propane refill, dog parks, truck washes, and repair service centers. In addition to truck parking, Love’s Travel Centers now offer reservable Love’s RV Stop camp spots in over 78 locations. With everything right there in one place, you can’t beat a truck stop for convenience.
More Space

We learned early on in our RV ownership that big rigs need lots of room to maneuver. While it might look like a regular gas station has enough space, it only takes one tight turn and crunching a side cargo door to let you know you were wrong! Even so-called RV lanes can be too tight for a big rig. It is easier to get into and out of truck stops because they are designed for the big size of 18-wheeler semi-trucks.
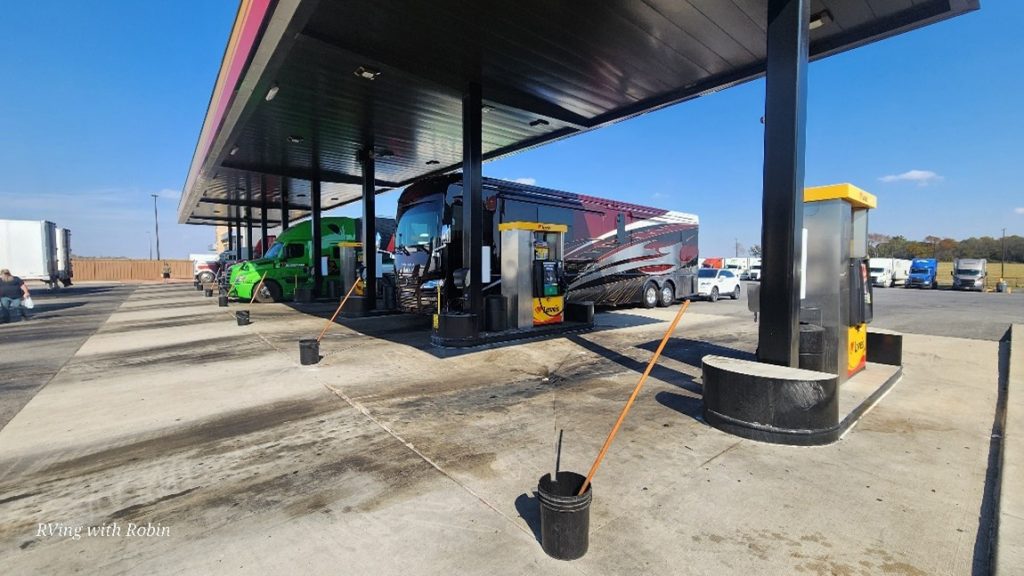
Another benefit is that truck stops have one way entrances and exits. We just look for the big signs directing the trucks or, even easier, follow the trucks heading in. Once you go in the truck entrance there is room for sweeping turns as you head into the long straight fuel lanes. You also have high overhead clearances under the canopy unlike many regular gas stations.

Quality Diesel Fuel and DEF

An advantage of large volume truck stops is that they move a LOT of fuel. Thousands of trucks using the stations each week means your fuel here will be fresher than at a station with a lower volume of business. Most truck lane pumps also offer DEF and the same goes here for freshness.
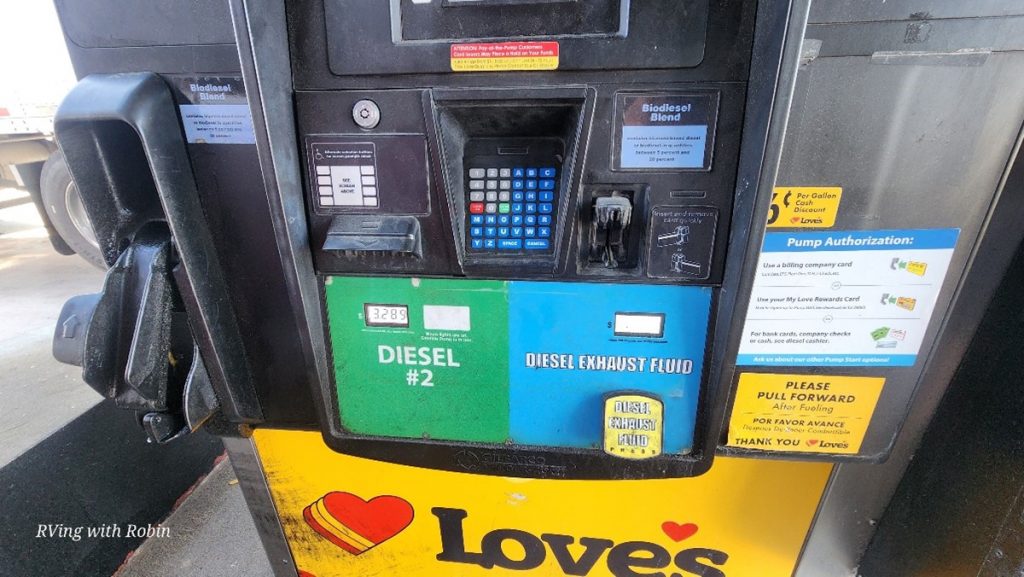
Additionally, truck stop diesel pumps have a larger diameter hose and nozzle than standard car fuel pumps. This gives the fuel a faster flow rate and lets you fill your large RV tank in a much shorter time. There is also no transaction limit as there often can be at regular gas stations. With tanks that can hold 100 to 200 gallons of diesel, RVers will have no trouble filling their tanks here.

Discount Fuel Prices

Many of the truck stop chains offer loyalty cards that will give you a set discount per gallon of fuel at their stations. They also have apps that list their locations and prices. If you don’t want to be tied to one brand, you can use apps like Open Roads, Trucker Path, or Mud Flap that will let you see and compare fuel prices at all their participating truck stop brands at a glance.
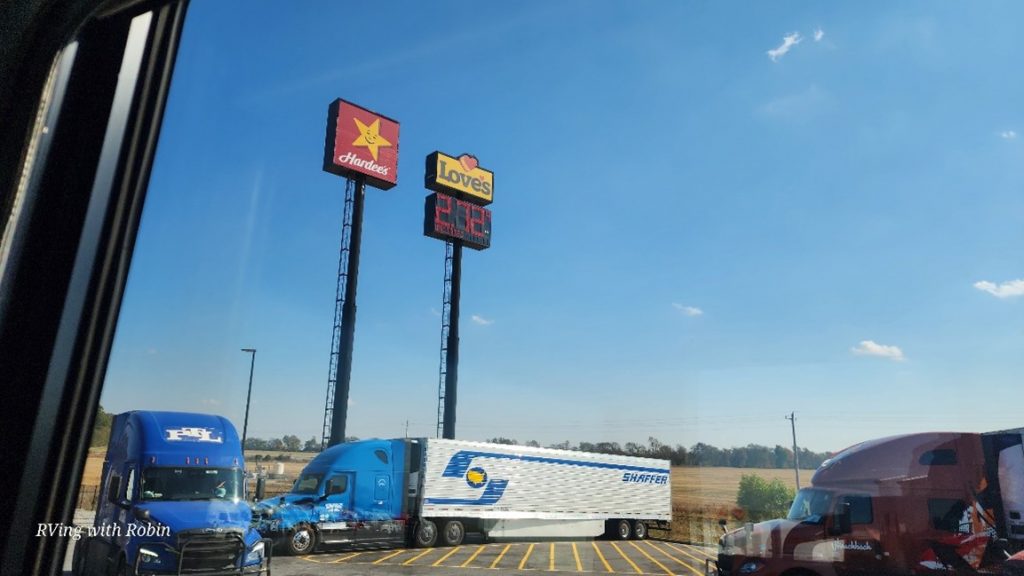
We have tried several of those methods over the past few years and found that using the Open Roads app in conjunction with our Open Roads EFS card gives us the best price. This card, similar to a trucker’s fuel card, allows RVers to pay at the pump like commercial truckers do. The program requires that the card be linked to a bank account as a fuel debit card but has been worth it for us to save up to 80 cents per gallon!

Easy to Learn

Using a truck stop fuel station for the first time can be intimidating. Most truckers don’t have a problem with RVers who use truck stops for fueling, but it’s nice to continue that goodwill by following the proper etiquette. We try to refuel during the slower periods (mid-morning/early afternoon). Once there, here are some tips to help you fit in:
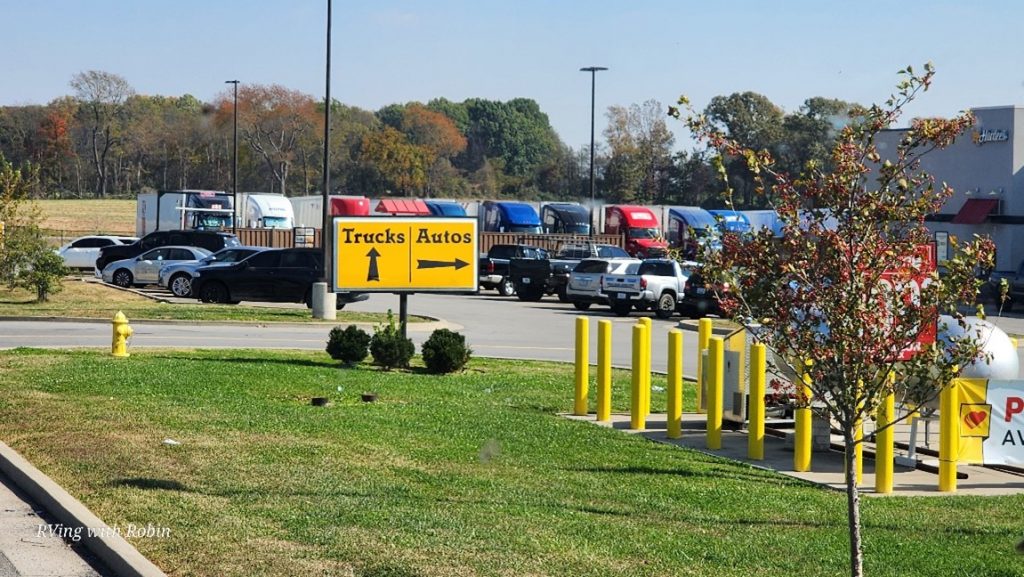
Before you arrive, it is helpful to review the overhead satellite image of the truck stop to get familiar with the flow into/out of the station. When you are entering the truck stop, follow the signs for trucks and get into an open lane. Make sure you don’t overshoot the pump because you can’t back up if you are towing a vehicle. Most people prefer to wear gloves, so they don’t get smelly diesel fuel on their hands.
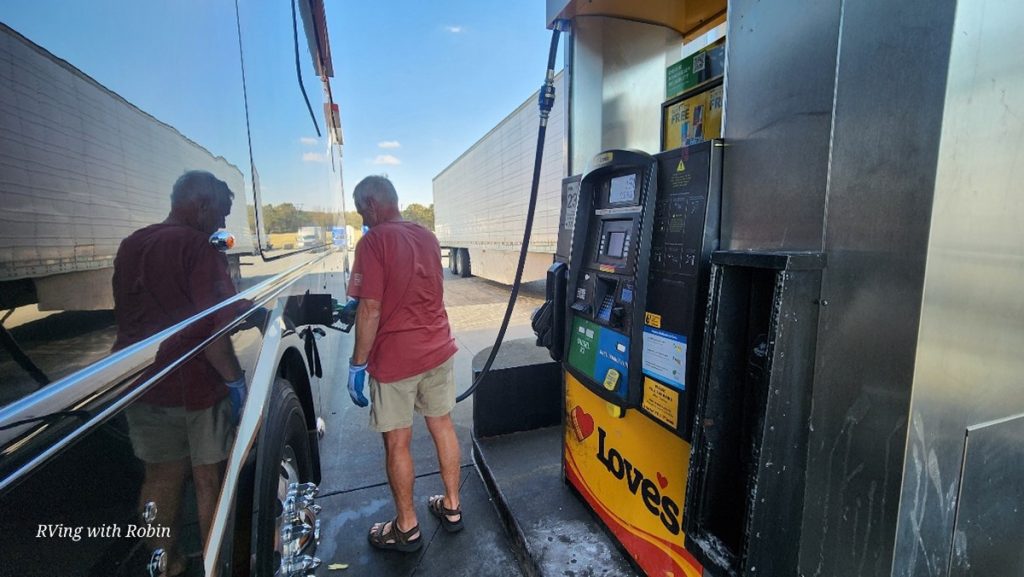
Make sure you select the correct fuel before you begin pumping. There are usually diesel and DEF pumps available, and you don’t want to put either into the wrong tank! There is no regular gasoline in the truck lanes.

You should always stay with your rig while fueling, but you can take the opportunity to use the long-handled window washer poles to clean your windshield while you wait.
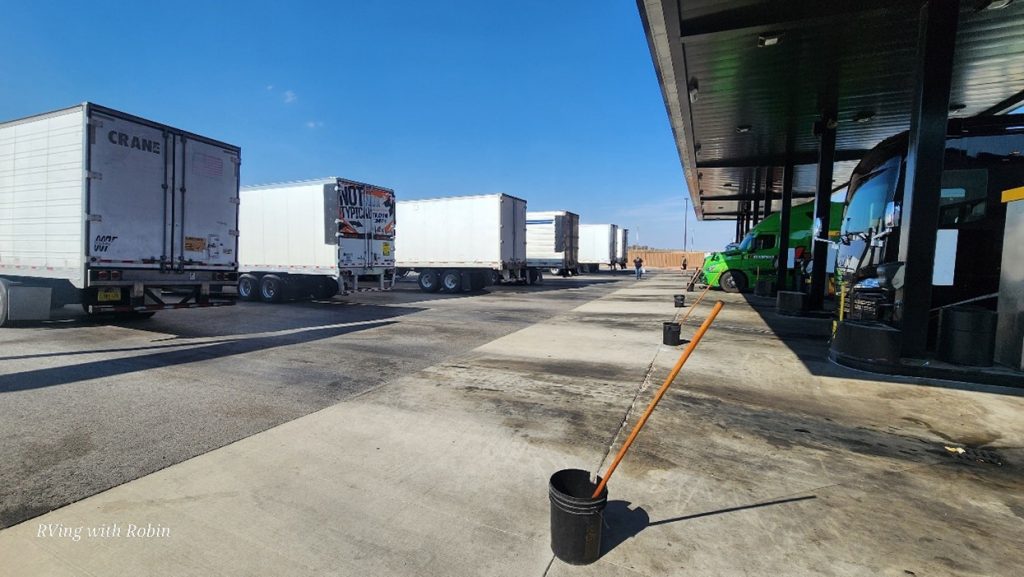
One of the most important rules is to pull your RV forward to the exit line as soon as you fill up so the next truck can begin pumping. Do this before you go in to pay or buy anything at the store! If you are going to be doing any extended activity like having lunch, you should pull into a parking spot and not sit in the gas lanes. Truckers have a schedule to keep and need to get in and out quickly so they can get back on the road.

Try a Truck Stop

Getting familiar with truck stops makes life with a big rig so much easier. You can readily find them along your travel route. They are easily accessible, offer plenty of room to get around, and have many conveniences all in one spot. The stations offer high quality fuel and DEF plus their discount programs can even save you money. Next time you need to fill your RV with diesel fuel, give a truck stop a try!

Robin and her husband, Mike, are Air Force veterans and empty nesters who have been traveling full-time in their Entegra Anthem motorhome for 5 years. Always ready to explore, they love nature and wildlife, meeting new friends and discovering America one stop at a time. Robin writes about their travel adventures, RVing tips, and the full-time RV lifestyle on her blog RVing with Robin.
6 Easy Ways to Make Your RV Feel Like Home

RV travel appeals to many for its unique blend of freedom, flexibility, and adventure. As long time RVers, we love traveling to new destinations and exploring our country’s natural beauty. One of the great benefits of RV travel is being able to take these amazing trips in our “home away from home.” We’ve discovered that creating a relaxing and comfortable space can really enhance the joy of the journey.

While a new RV comes equipped with essential kitchen, bedroom, and living areas, it may not immediately feel like your personal sanctuary the moment you drive it off the sales lot. Achieving that cozy, welcoming vibe takes a bit of effort. From clever storage solutions to decorative accents that reflect your style, you can tailor your RV to suit your needs and preferences. Here are 6 easy ways to give your RV a comfortable, inviting atmosphere that feels like home to you.

Personalize Your Living Areas

We usually spend most of our time in our living areas, so we want it to feel homey. As the first thing you see when you come into the RV, a personalized entry area can really make people feel welcome. You can use any small space near your entry door for decorations like plants, pictures, or mementos. Even if you don’t have a big entry space, you can always put a welcome sign or cheery mat at the door.

Think of little things that make you feel comfortable at home and bring a few of them on the road with you. A rug always feels good to walk on and can soften the look of the living room. Eye catching pillows and a soft throw blanket will liven up the sofa area. Try to find room for a small plant or two if you can. They really add to the décor, in addition to freshening the air and boosting your mood.

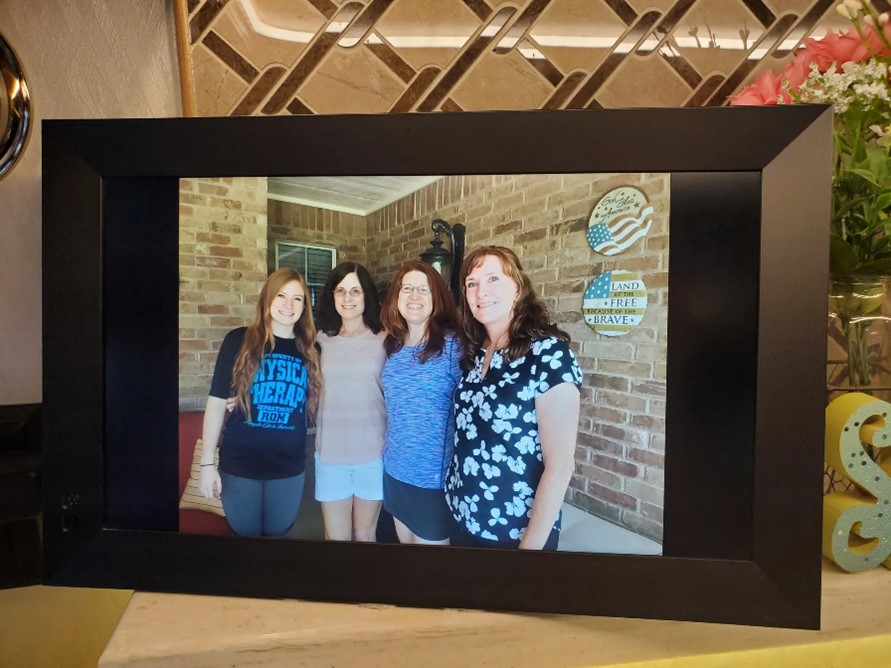
Although wall space can be at a premium in an RV, it’s worth it to find some space for hanging a few photos or special pictures just like you do at home. Personal items make you feel connected to home. I love my Nixplay digital frame which allows us to look at thousands of rotating photos in a small space. Seeing pictures of our family and friends helps us bring our memories along for the ride, even as we are having new adventures.

Maximize Storage and Organization

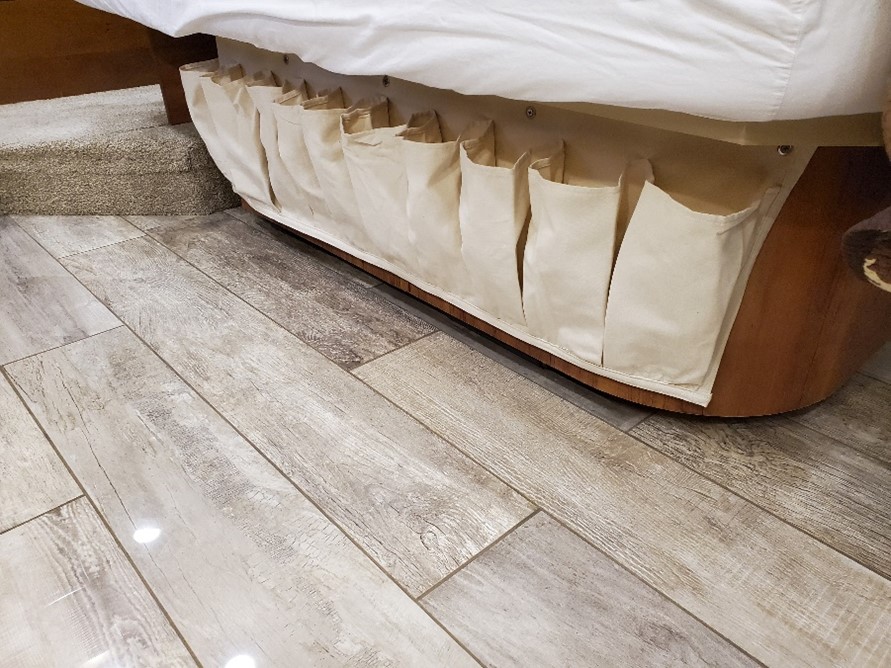
Cute organizational items like baskets, bins, and hooks help you conserve space and decorate at the same time. I love pretty baskets and use them to keep small things together and reduce clutter throughout the RV. Hooks are great for providing a place to keep towels and other toiletry items organized in small bathroom areas. A putty-type product called Quake Hold is my go-to for securing all of our decorative items while traveling. It makes life so much easier if you don’t have to put decorations away each time you move the RV to a new location.

Be sure to take advantage of unused vertical space as well. You can add shelves or hanging organizers to double storage without adding clutter to surface areas. Take advantage of dual-purpose furniture like a small ottoman. You will have a great place to put your feet up after a day of hiking, plus it can double as storage or extra seating. By keeping things organized and in their place, your RV home will look more spacious and relaxing.

Design a Comfortable Sleeping Area

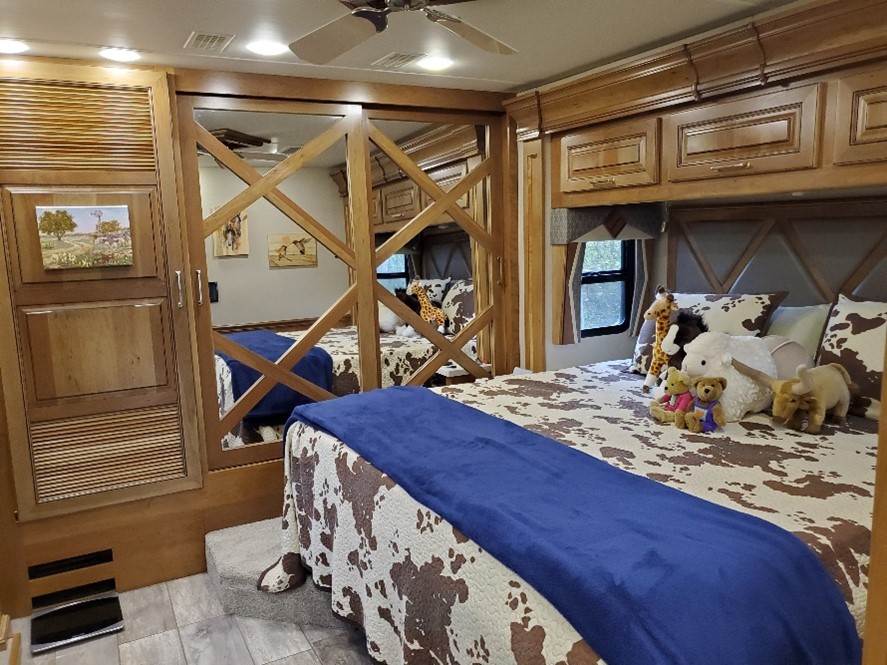
One of the best things about traveling in an RV is sleeping in your own bed. If your RV mattress is not quite up to the comfort of your bed at home, you can add a mattress topper to help you get a good night’s rest. Rested and relaxed travelers are more eager for fun adventures. Make sure to pick out a pretty bedding set that you like and colors that make you happy. Add some soft pillows and even some stuffed animals if you want. If you are traveling with kids, let them personalize their sleeping space too so they feel more at home.

One thing that helps me sleep better is making sure the bedroom is not too hot or too cold at night. In warmer climates, you can open windows or use portable fans to provide airflow. In cooler weather, a space heater or your favorite blanket will help keep the chill out of the air. Maintaining a comfortable temperature can be key to good sleep and feeling rested in the morning.

Create a Functional Kitchen

Another great thing about traveling in an RV is not having to eat out all the time. Your RV will seem more like home when you can make your family favorites on the road. Bring pots and pans that you like and know how to use. I also like to use real dishes (unbreakable ones are great) because they feel homier than using paper plates.

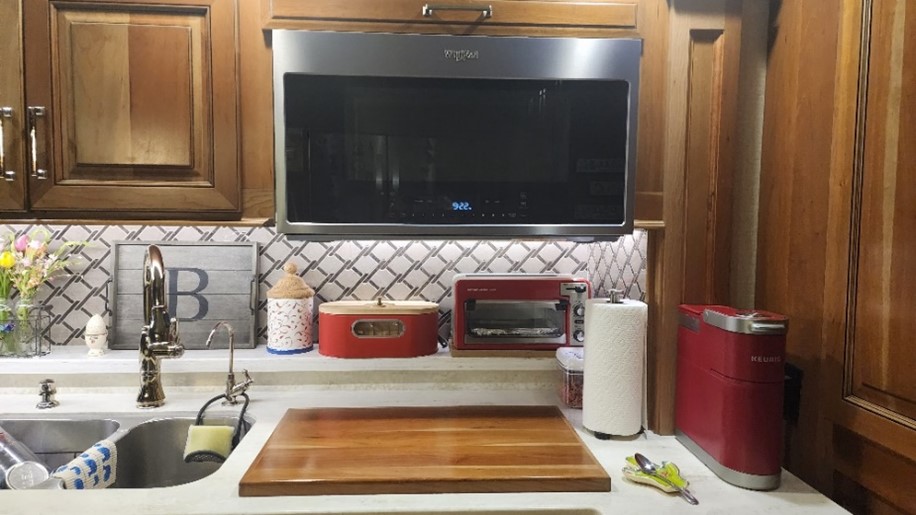
If you have any special kitchen gadgets or appliances that don’t take up too much space, bring them along. Having waffles for breakfast or your favorite ice cream scoop keeps things familiar. Fun kitchen towels hung over your refrigerator handle or sink are an easy way to dress up the cooking area. Use clear containers and labels to keep your pantry items organized and easily accessible.

Bring Entertainment Options

Camping is a wonderful way to spend time outdoors, but sometimes Mother Nature just doesn’t cooperate. Make sure to have some downtime activities available to help keep everyone happy during rest days or bad weather. Favorite books, puzzles, games, and movies are great items to have on board your RV and make it feel like home.

Don’t forget to bring some music along on your travels. Most people’s mood will perk up when listening to their favorite tunes. We like using our small wireless speakers from Bose because they work well in the RV, or we can take them outside. Just remember to keep the volume reasonable and respect campground quiet hours.

Incorporate the Outdoors

One reason you take an RV vacation is for the chance to get outside and enjoy nature and fresh air. Making wise use of your outdoor space can double your available area when you are camping. Awnings give you a nice, shaded area to set up an outdoor mat and chairs for each family member. Investing in a grill keeps the cooking outside on hot days and a nice picnic table cover makes a great eating spot.

We love to decorate our RV using our flag, personal signs, and mirror covers. Our Magne Shade window covers really help to keep the inside of the RV cool while giving us a personalized look. Some people like to add string lights, small tables, bird feeders, and plants to expand their living space and really make it their own. You’ve probably seen a stick-on map of the states on many RVs around the campground. It’s a fun way to track your travels and a great conversation starter when you meet your neighbors!

Enjoy Your RV Home!

Your RV isn’t just a vehicle; it’s an investment in years of memorable travel experiences. By infusing your personal style into its decor and functionality, you’ll create a true “home away from home.” Whether you’re exploring new destinations or revisiting favorite spots, you can embark on adventures knowing that comfort and familiarity await you wherever the road leads. Happy Travels!

Robin Buck

Robin and her husband, Mike, are Air Force veterans and empty nesters who have been traveling full-time in their Entegra Anthem motorhome for 5 years. Always ready to explore, they love nature and wildlife, meeting new friends and discovering America one stop at a time. Robin writes about their travel adventures, RVing tips, and the full-time RV lifestyle on her blog RVing with Robin.
2025 Newmar Motorhome Lineup Preview with Angie Morell

Angie Morell, NIRVC’s very own RV expert, completes a marathon performance, just for you! Join Angie as she takes you into the Newmar Dealer meeting so you can see the 2025 Newmar Class A and Super C motorhomes!

Angie gives you a sneak peek of changes for 2025, different floor plans, exterior color options, and interior design options of the 2025 Bay Star Sport, 2025 Bay Star, 2025 Northern Star, 2025 Ventana, 2025 Ventana, 2025 Dutch Star, 2025 New Aire, 2025 Super Star, 2025 Supreme Aire, 2025 Mountain Aire, 2025 London Aire, 2025 Essex, and 2025 King Aire.

2025 Newmar RV Models

We have all the details on several of the new 2025 Newmar coaches. Click on a model below for details, photos and walk-through videos featuring Angie. If you have any questions or want to know more about specific floor plans, feel free to contact us.

Spartan RV Chassis Owners Training Academy

NIRVC is proud to host the Spartan RV Chassis Owners Training Academy! These multi-day events offer comprehensive training for chassis maintenance and upkeep, overall RV inspection and service, and more. 

Participants receive hands-on help with their RV, learning the nuances of chassis sub-systems such as electrical, air suspension and more. On top of the invaluable knowledge, these sessions offer a great opportunity to connect with fellow RVers!

Spartan RV Chassis are the basis of many Class A Entegra, Newmar and Jayco RVs. Your motorhome does NOT have to be purchased from NIRVC to take advantage of this fantastic program.

Topics include:

  • An overview of chassis maintenance and upkeep
  • Instruction on weighing your RV and adjusting tire pressures accordingly
  • How to access and purchase Spartan RV Chassis aftermarket parts and accessories
  • How to operate chassis air systems
  • Information on customer support and warranty information
  • Familiarity with chassis suspensions, chassis electrical systems
  • Chassis troubleshooting
  • Weighing of your coach and tire pressures set

    Upcoming Spartan RV Chassis Owners Training Academy Sessions at NIRVC:

    Welcome to RV U! Our New Podcast Hosted by Angie Morell is Live

    Class is in session at RV U! Tune into the premier insider podcast brought to you by National Indoor RV Centers! Host and renowned RV pro Angie Morell sits down with industry experts, icons and influencers to chat about a variety of entertaining topics, including the latest RV trends, new and popular products, helpful tips, stories about guests’ adventures and more. Whether you’re an incoming freshman or have a PhD in RVing, there’s room for you in the classroom.

    New episodes will be available every Wednesday, so be sure to subscribe to RV U on your favorite podcast platforms below.

    Spotify Logo
    Pandora Logo
    Amazon Music Logo
    Audible Logo
    iHeart Radio Logo

    RV Hydronic Heating Systems

    What are hydronic heating systems and how do they work in your RV?

    Hydronic heating systems are rapidly becoming the heating system of choice on diesel pushers versus forced air furnaces. Hydronic heat offers even heat distribution and moist, comfortable heating. It utilizes a boiler that pumps antifreeze through a series of heat exchangers located throughout the coach. It also provides domestic hot water heating, eliminating the need for a traditional hot water heater. The two brands that are common in the RV industry are Aqua-Hot and Oasis.

    RV Heat Sources

    A hydronic heating system can be powered by a diesel burner as well as an electric heating element. In some cases a propane fired boiler is used in smaller RVs but for this article we’ll just stick to the diesel fired units common to most diesel pushers. Diesel fuel has more BTU per gallon than propane. Plus, the fuel tank is of greater capacity because it utilizes the coach’s diesel tank rather than a smaller LP tank mounted in the coach. Not only is this more cost efficient but it also greatly extends the run time between refueling.

    Propane has a BTU rating of 91,500 BTU per gallon while #2 diesel fuel is rated at 139,200 BTU per gallon. Operating a 50,000 BTU burner on propane for 8 hours will require 4.37 gallons of propane while running that same burner on diesel fuel will only require 2.87 of fuel due to the higher BTU content of diesel fuel. If your LP fired burner is fed from a 32 gallon propane tank you can run that burner for a maximum of 58.56 hours while running a diesel burner from a 100 gallon fuel tank will allow you 278.4 hours of run time until you’ll need to refuel.

    In addition to the diesel burner, hydronic heating systems also have an electrical heating element that can be used. A typical 1,650 watt heating element can deliver 5,630 BTU. This isn’t as great as a 50 KBTU diesel burner but it is capable of heating the coach when it’s cool (but not cold) out. It’s also possible to operate both the burner and the electric element at the same time for additional heating capacity.

    Most units are also equipped with a Motoraide or engine assist connection. This allows the hot engine coolant to be used to add additional free heat to the boiler when driving. This engine to boiler loop can also be used as an engine preheat that uses the boiler’s heat to preheat the engine for cold start assistance if so equipped.

    Aqua-Hot vs. Oasis

    Both the Aqua-Hot and Oasis systems are similar in operation. They both utilize a boiler to heat up antifreeze so that it can circulate through a closed heating loop. There are heat exchangers placed in various locations in the loop to provide heat to the coach interior as well as any basement area that needs to be protected from freezing. They also provide domestic hot water but there are a number of differences in how the units are constructed to meet these needs.

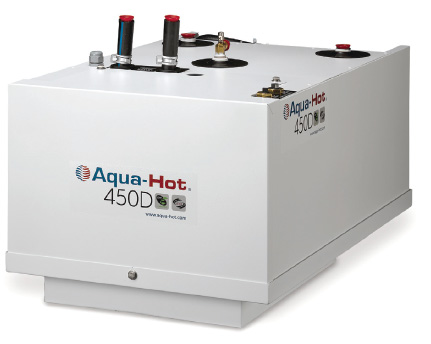
    The popular Aqua-Hot 450 supports a claimed 50,000 BTU burner, although the latest advertised specs state 65,000 BTU, and a 6 gallon boiler tank. It also sports a 1,650 watt electric heating element on a 20 amp breaker. Hot water temperature is always rated at a delta, which is the difference between the temperature of the incoming cold water to the outgoing heated water. The 450D is rated at a 60 degree delta at 1.5 GPM water flow. If the incoming water is frigidly cold then you’ll only be able to raise it by 60 degrees. If you exceed the 1.5 GPM flow rate you will also lose the ability to keep the antifreeze in the boiler tank from holding its heat so you’ll need to watch your water flow on those long hot showers or they will finish up as cold showers.

    For more more on RV water systems, read Mark’s blog, An RVers Guide To Water

    National-Indoor-RV-Centers-blog-RV-hydronic-heating-systems-for-your-motorhome-aquahot-450d

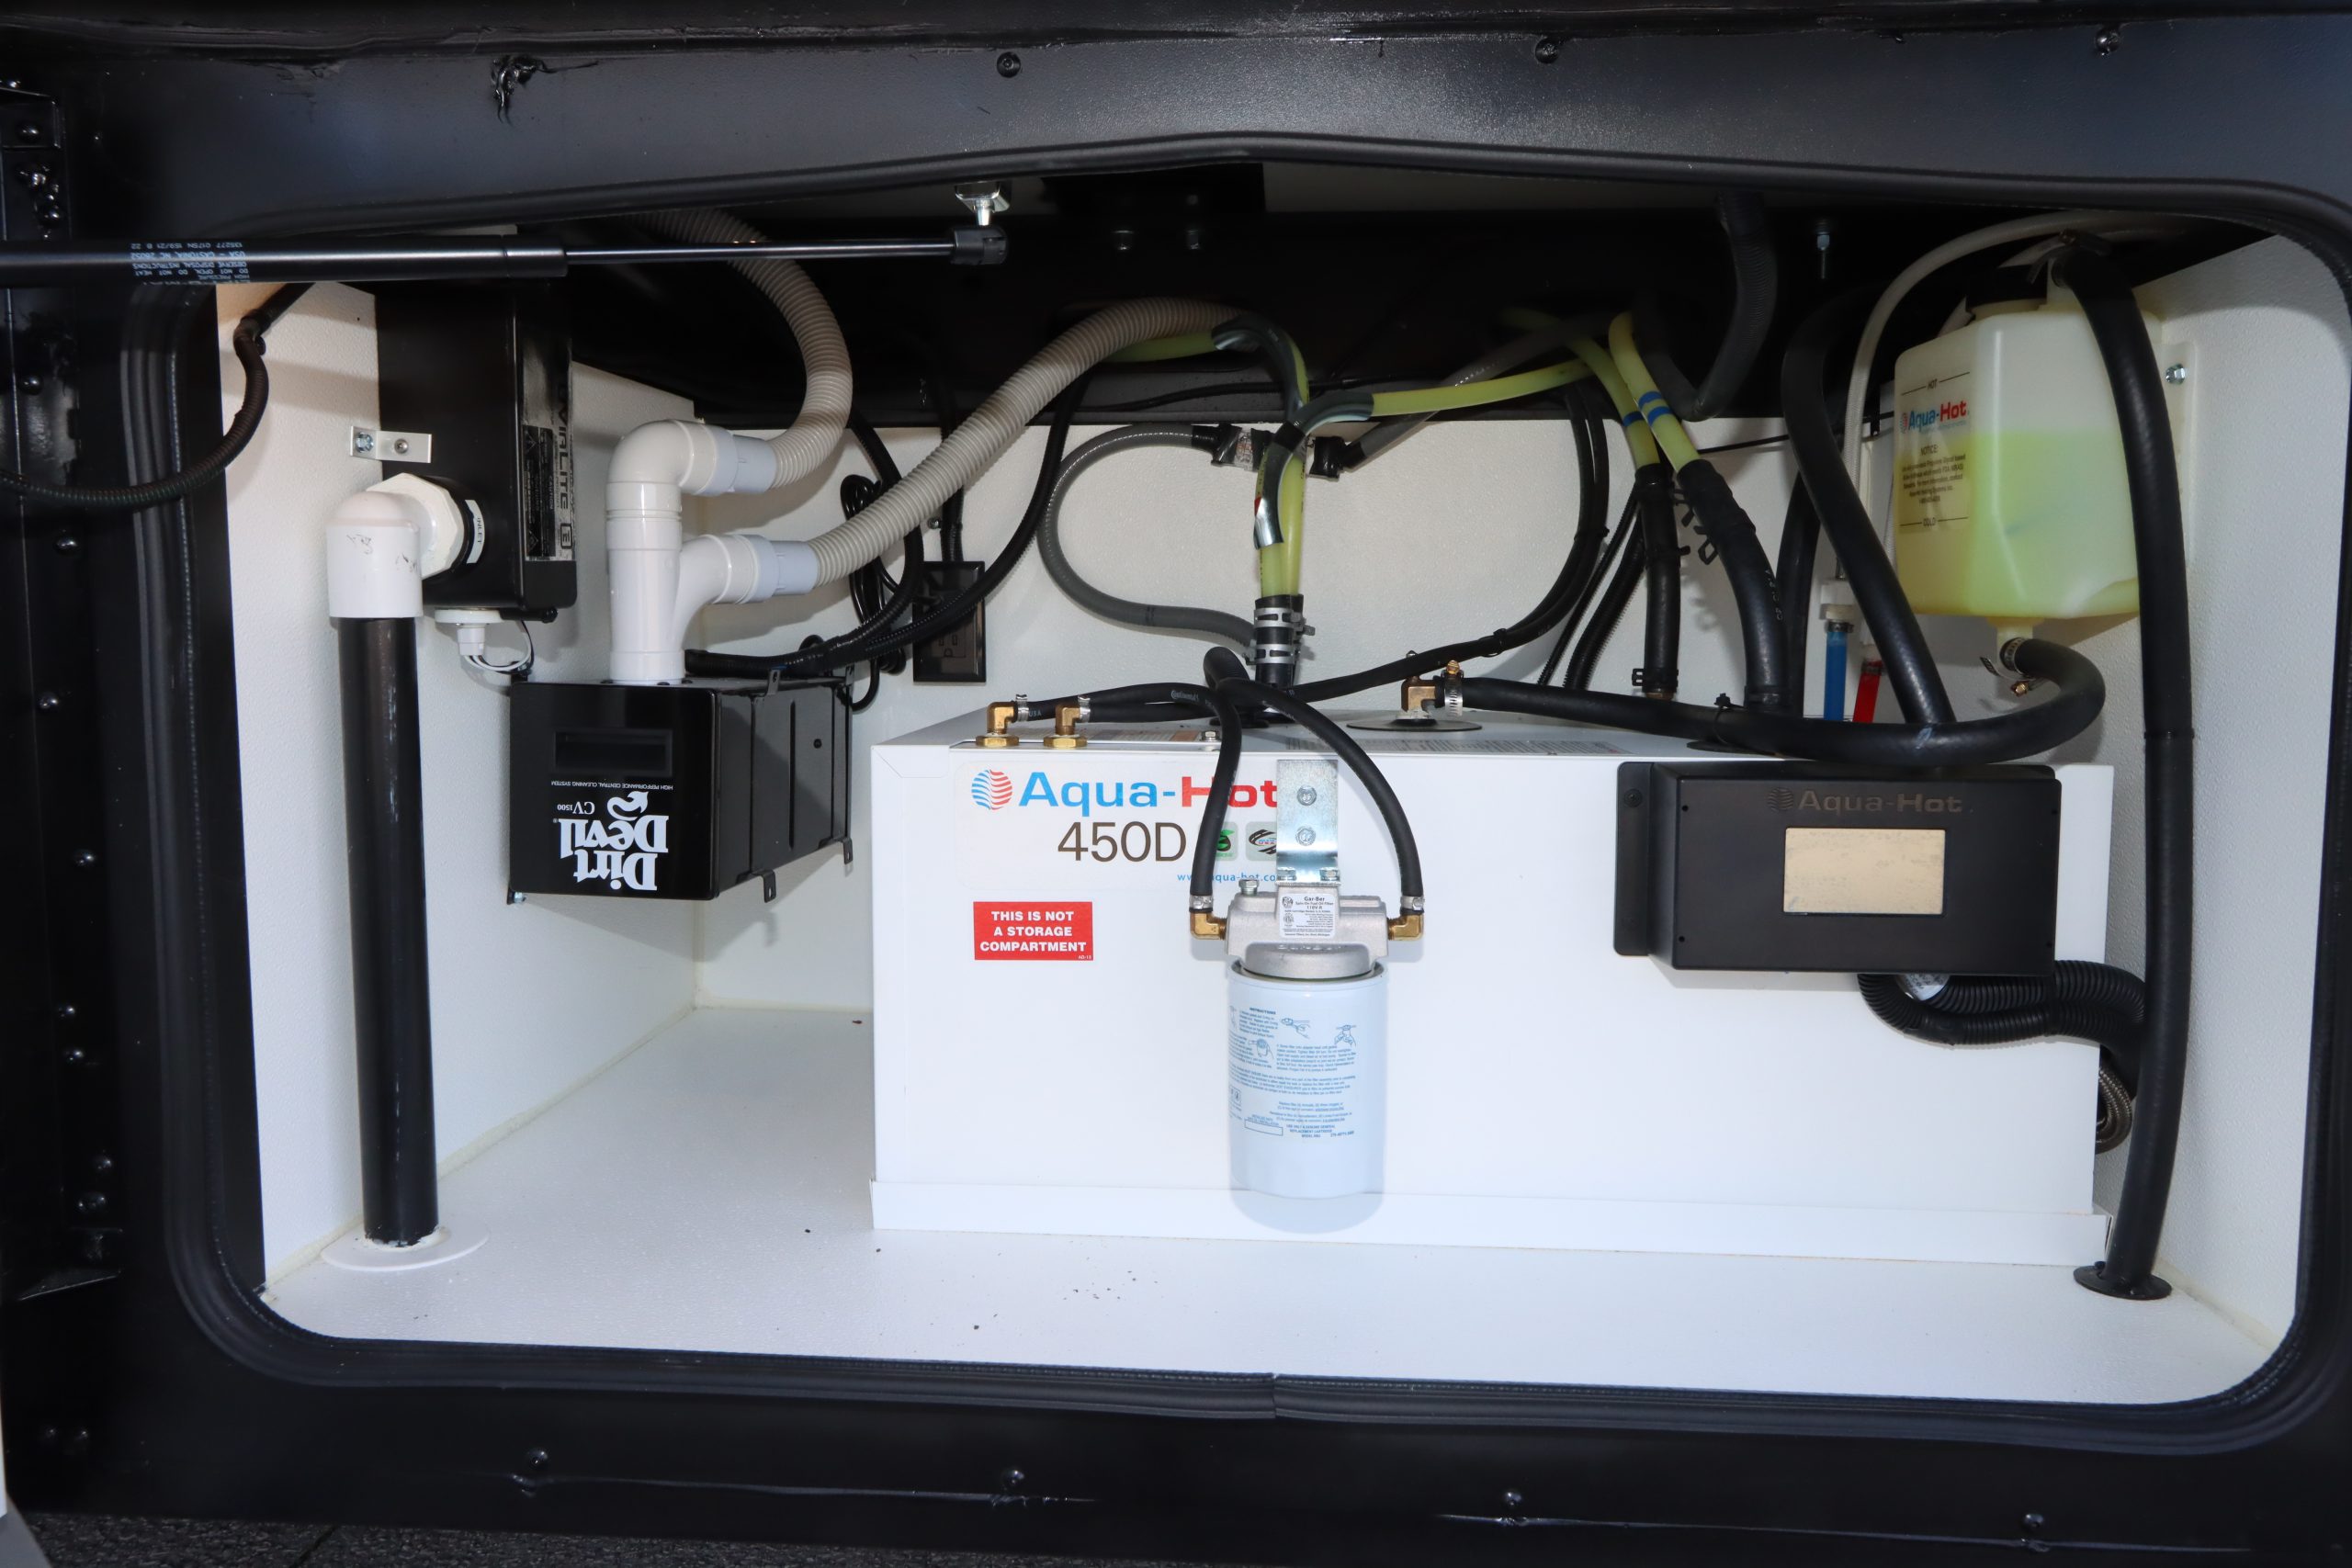
    An Aqua-Hot 450D system.

    The Aqua-Hot system also will shut off the interior heat exchangers when hot water is being used so  that all available BTU can be dedicated to heating water. The interior heating will resume once the water flow stops. The Aqua-Hot claimed BTU ratings are suspect however . The burner uses a .35 GPM burner nozzle. Doing the math you can see that this is only 39,200 BTU per hour – not 50,000 BTU. 

    National-Indoor-RV-Centers-blog-RV-hydronic-heating-systems-for-your-motorhome-aqua-hot-450d-installed-entegra-cornerstone
    National-Indoor-RV-Centers-blog-RV-hydronic-heating-systems-for-your-motorhome-aqua-hot

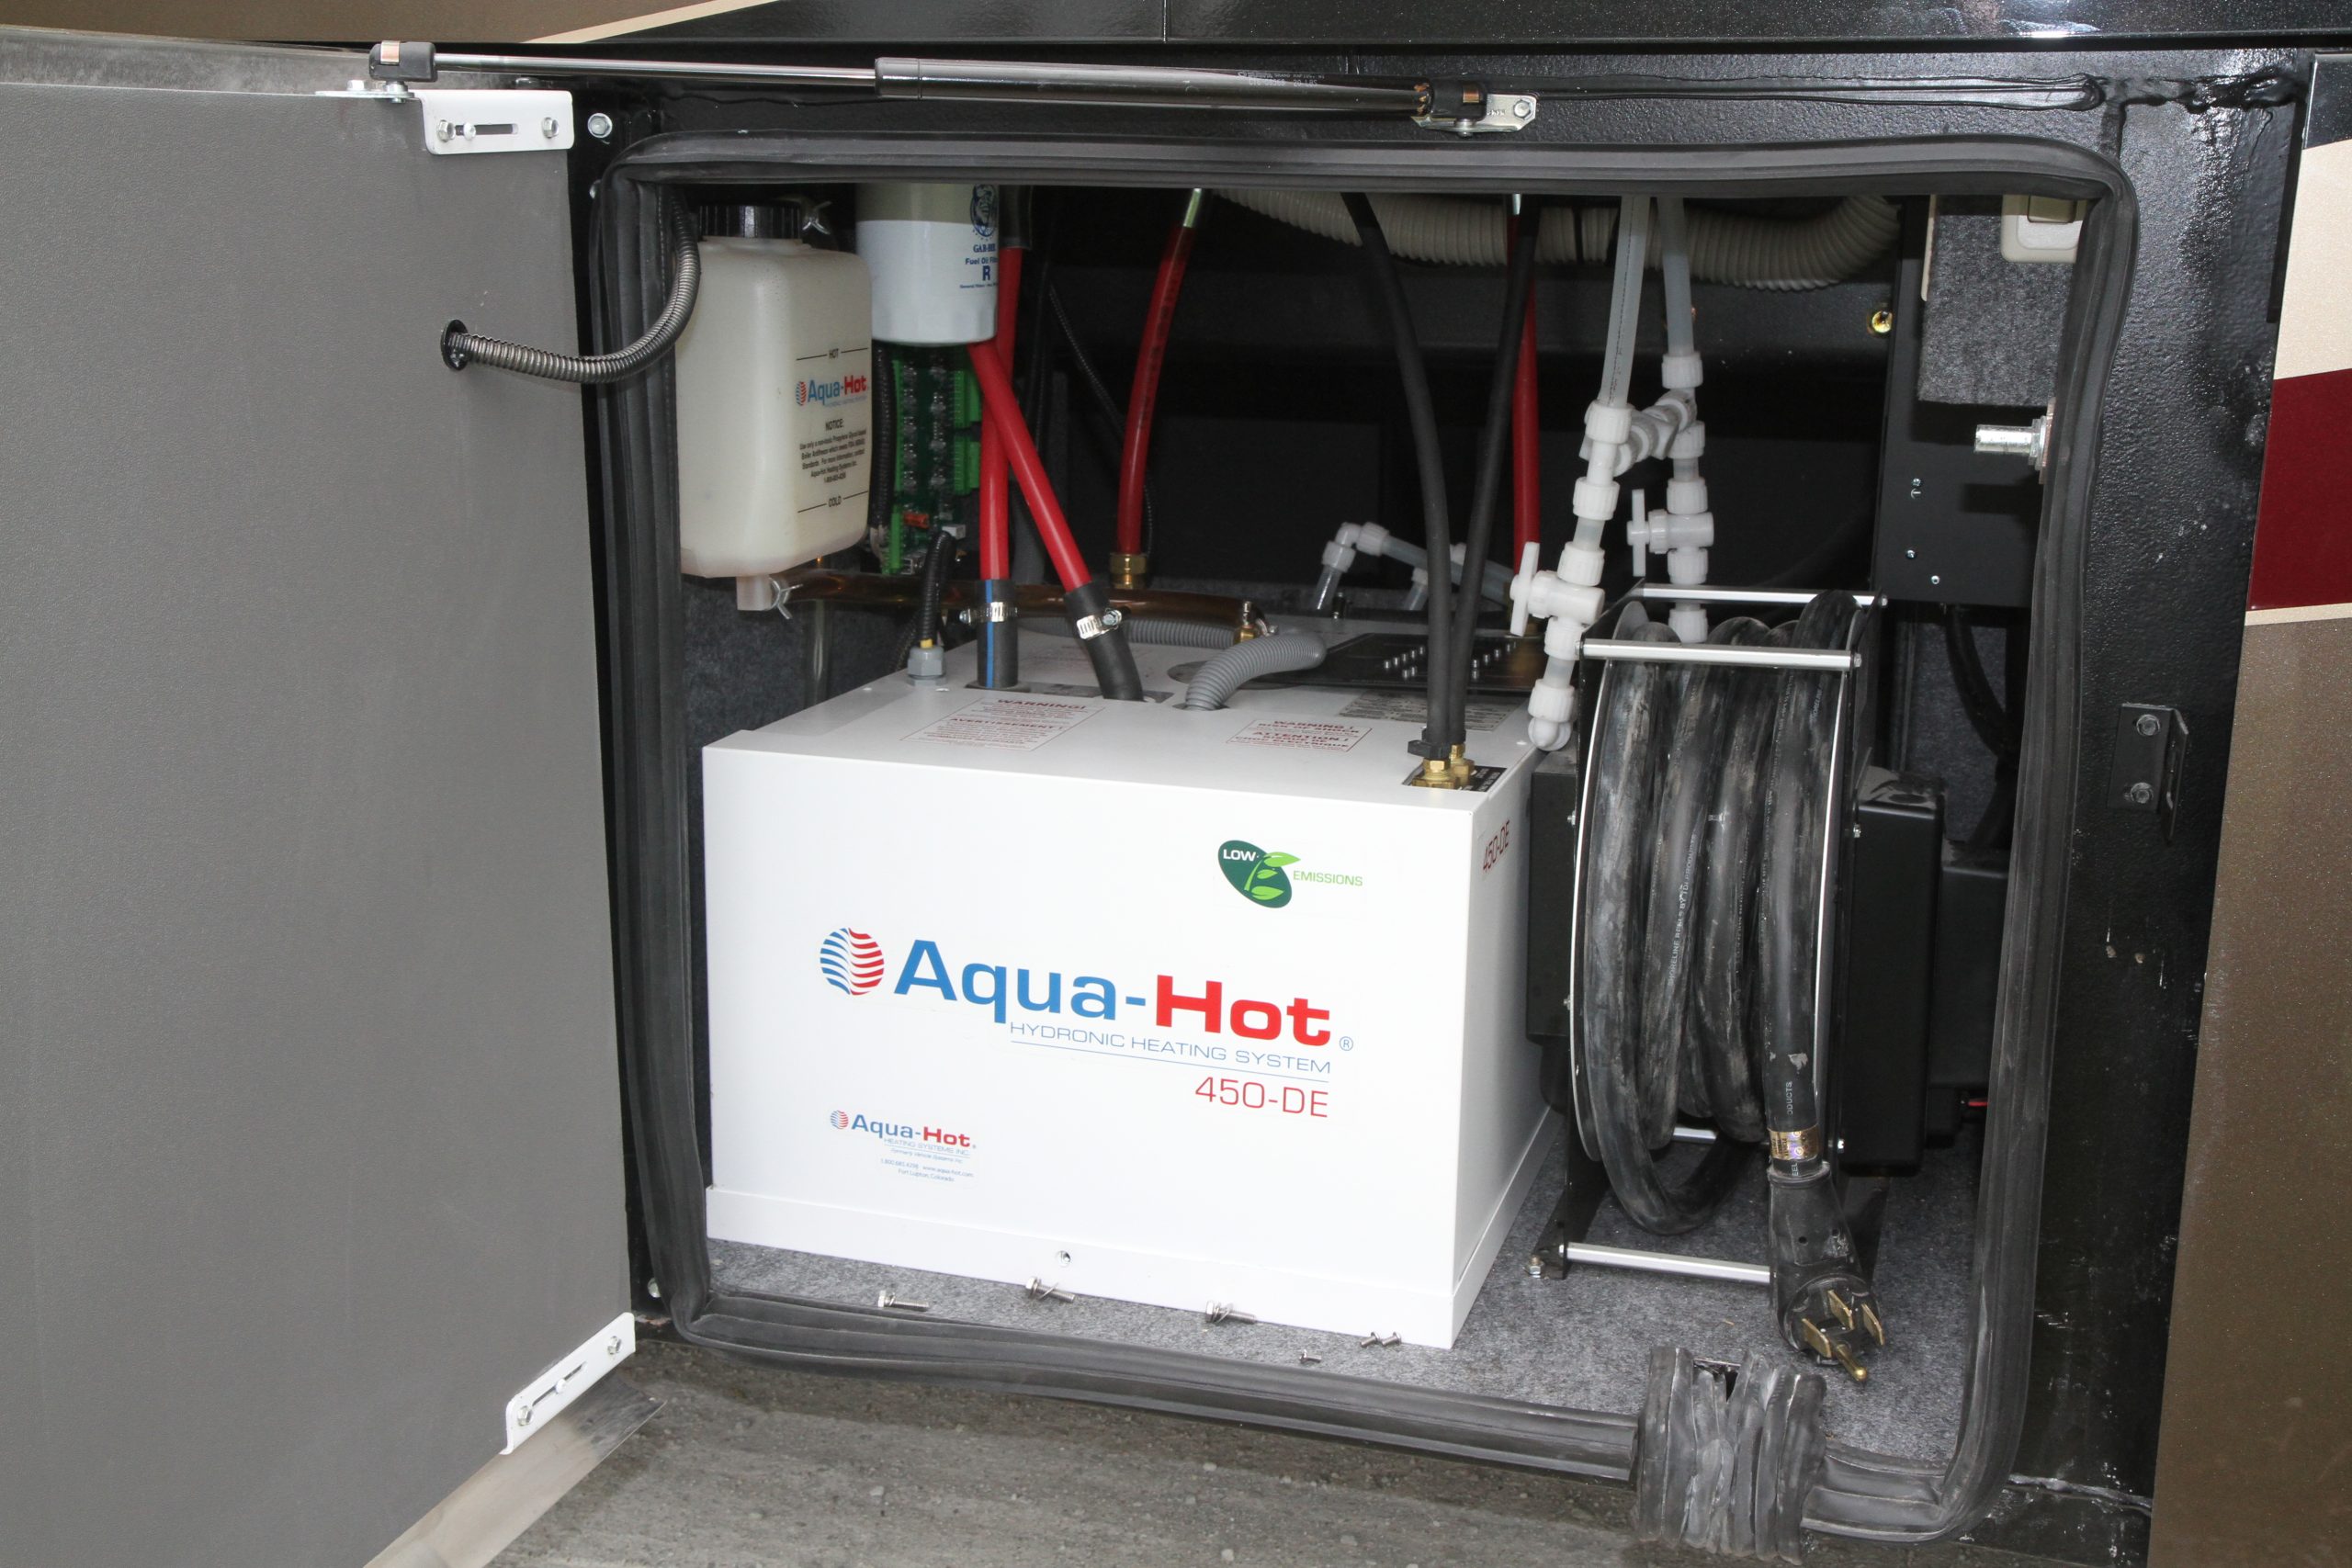
    An Aqua-Hot 450D as installed in my Entegra Cornerstone.

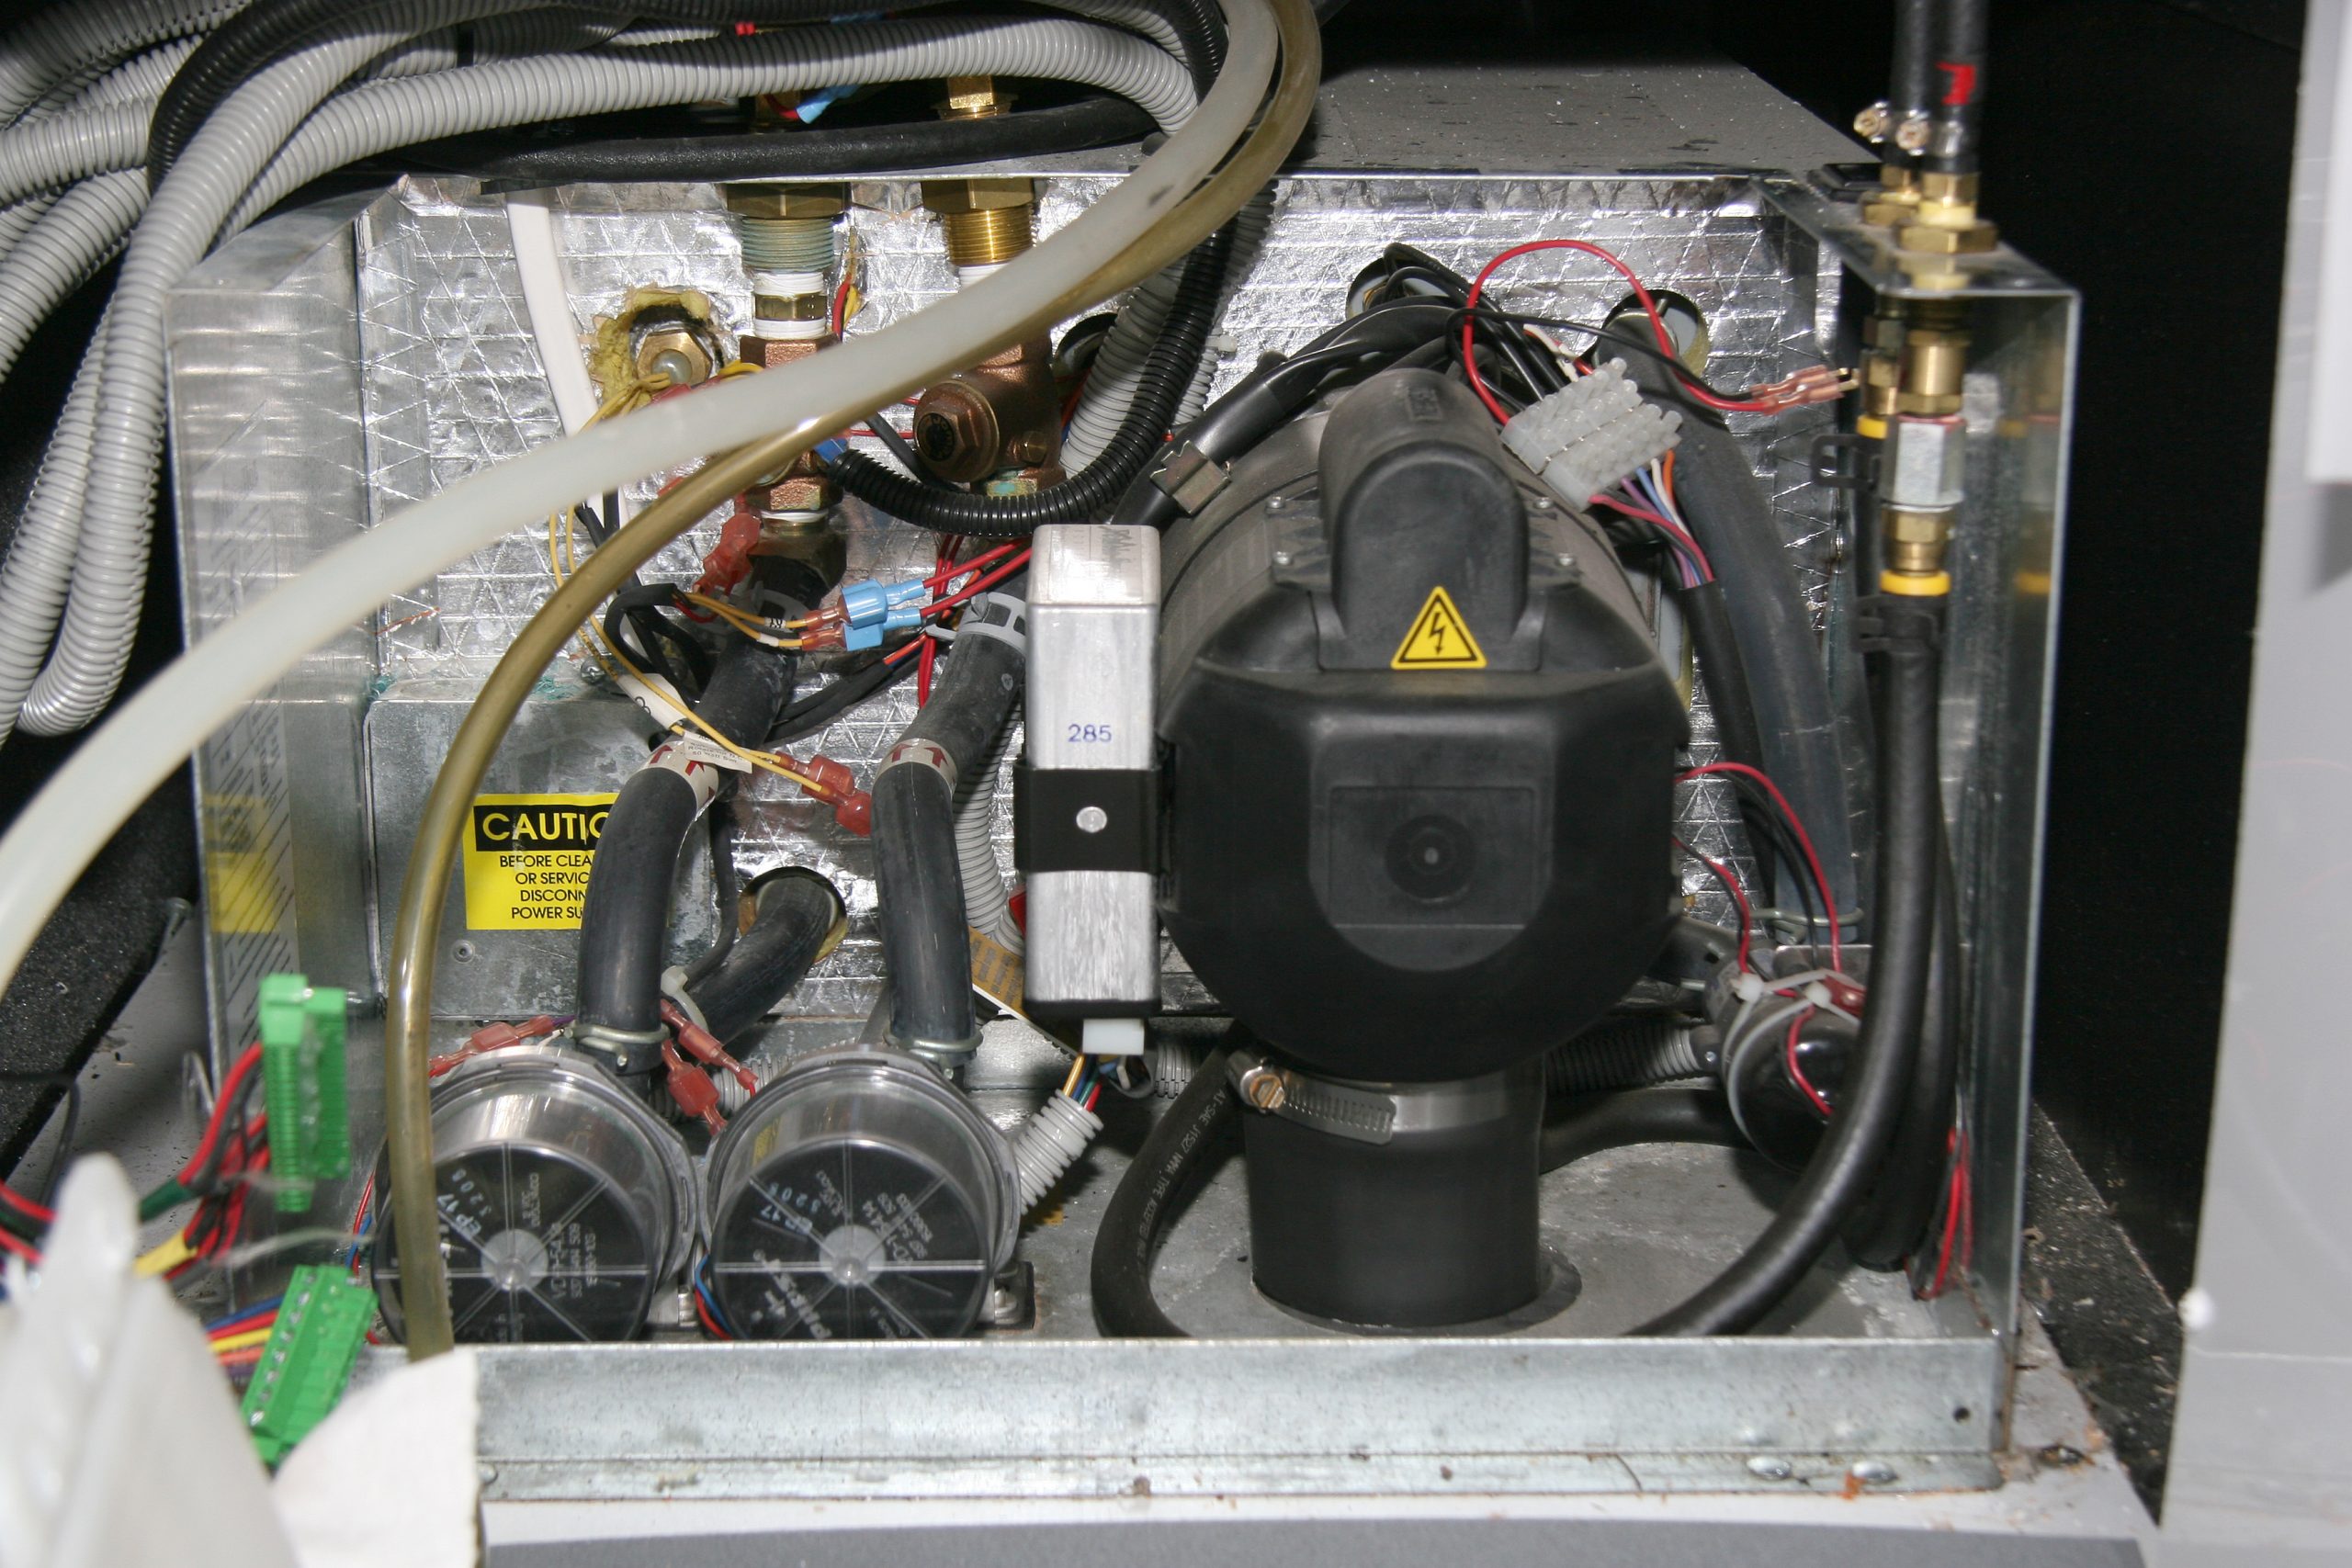
    An opened-up view of the Aqua-Hot system.

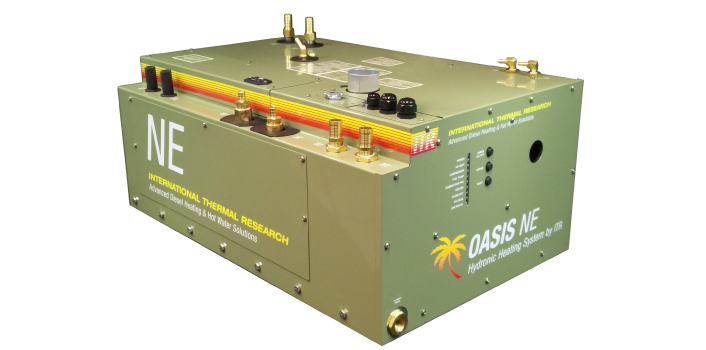
    Oasis also makes a 50,000 BTU system called the Oasis NE, which uses a 7.5 gallon boiler tank. It utilizes a pair of 1,500 watt electric heating elements, producing up to 10,236 BTU on two 15 amp breakers. You can operate one or both at the same time. This will let you utilize the electric heat to a bit lower temperatures before needing to switch on the diesel burner. Hot water heating is also rated at a 65 degree delta at 1.5 GPM although the Oasis NE does not interrupt interior floor heat while hot water is being consumed. The burners use a .44 GPM fuel nozzle, which equates to a realistic 49,280 BTU.

    National-Indoor-RV-Centers-blog-RV-hydronic-heating-systems-for-your-motorhome-oasis-NE
    The Oasis NE system

    Oasis also makes a larger Oasis NE-S version. This slightly larger version is the ultimate in hydronic heating, with a claimed 85,000 BTU burner rating and a 13.75 gallon boiler tank. It has the same dual 1,500 watt heating elements as the Oasis NE but the 60 degree delta for hot water is now increased to 3 GPM with no floor heat interruption. The burner uses a 0.79 GPM burner nozzle.

    The above calculations are based upon an 80% factor in the BTU of diesel fuel. While diesel fuel does have 140,000 BTU per gallon about 20% of that is lost as heat in the exhaust, leaving 80%  to do the actual work of heating. So I used 112,000 BTU when doing the above calculations.

    National-Indoor-RV-Centers-blog-RV-hydronic-heating-systems-for-your-motorhome-oasis-ne

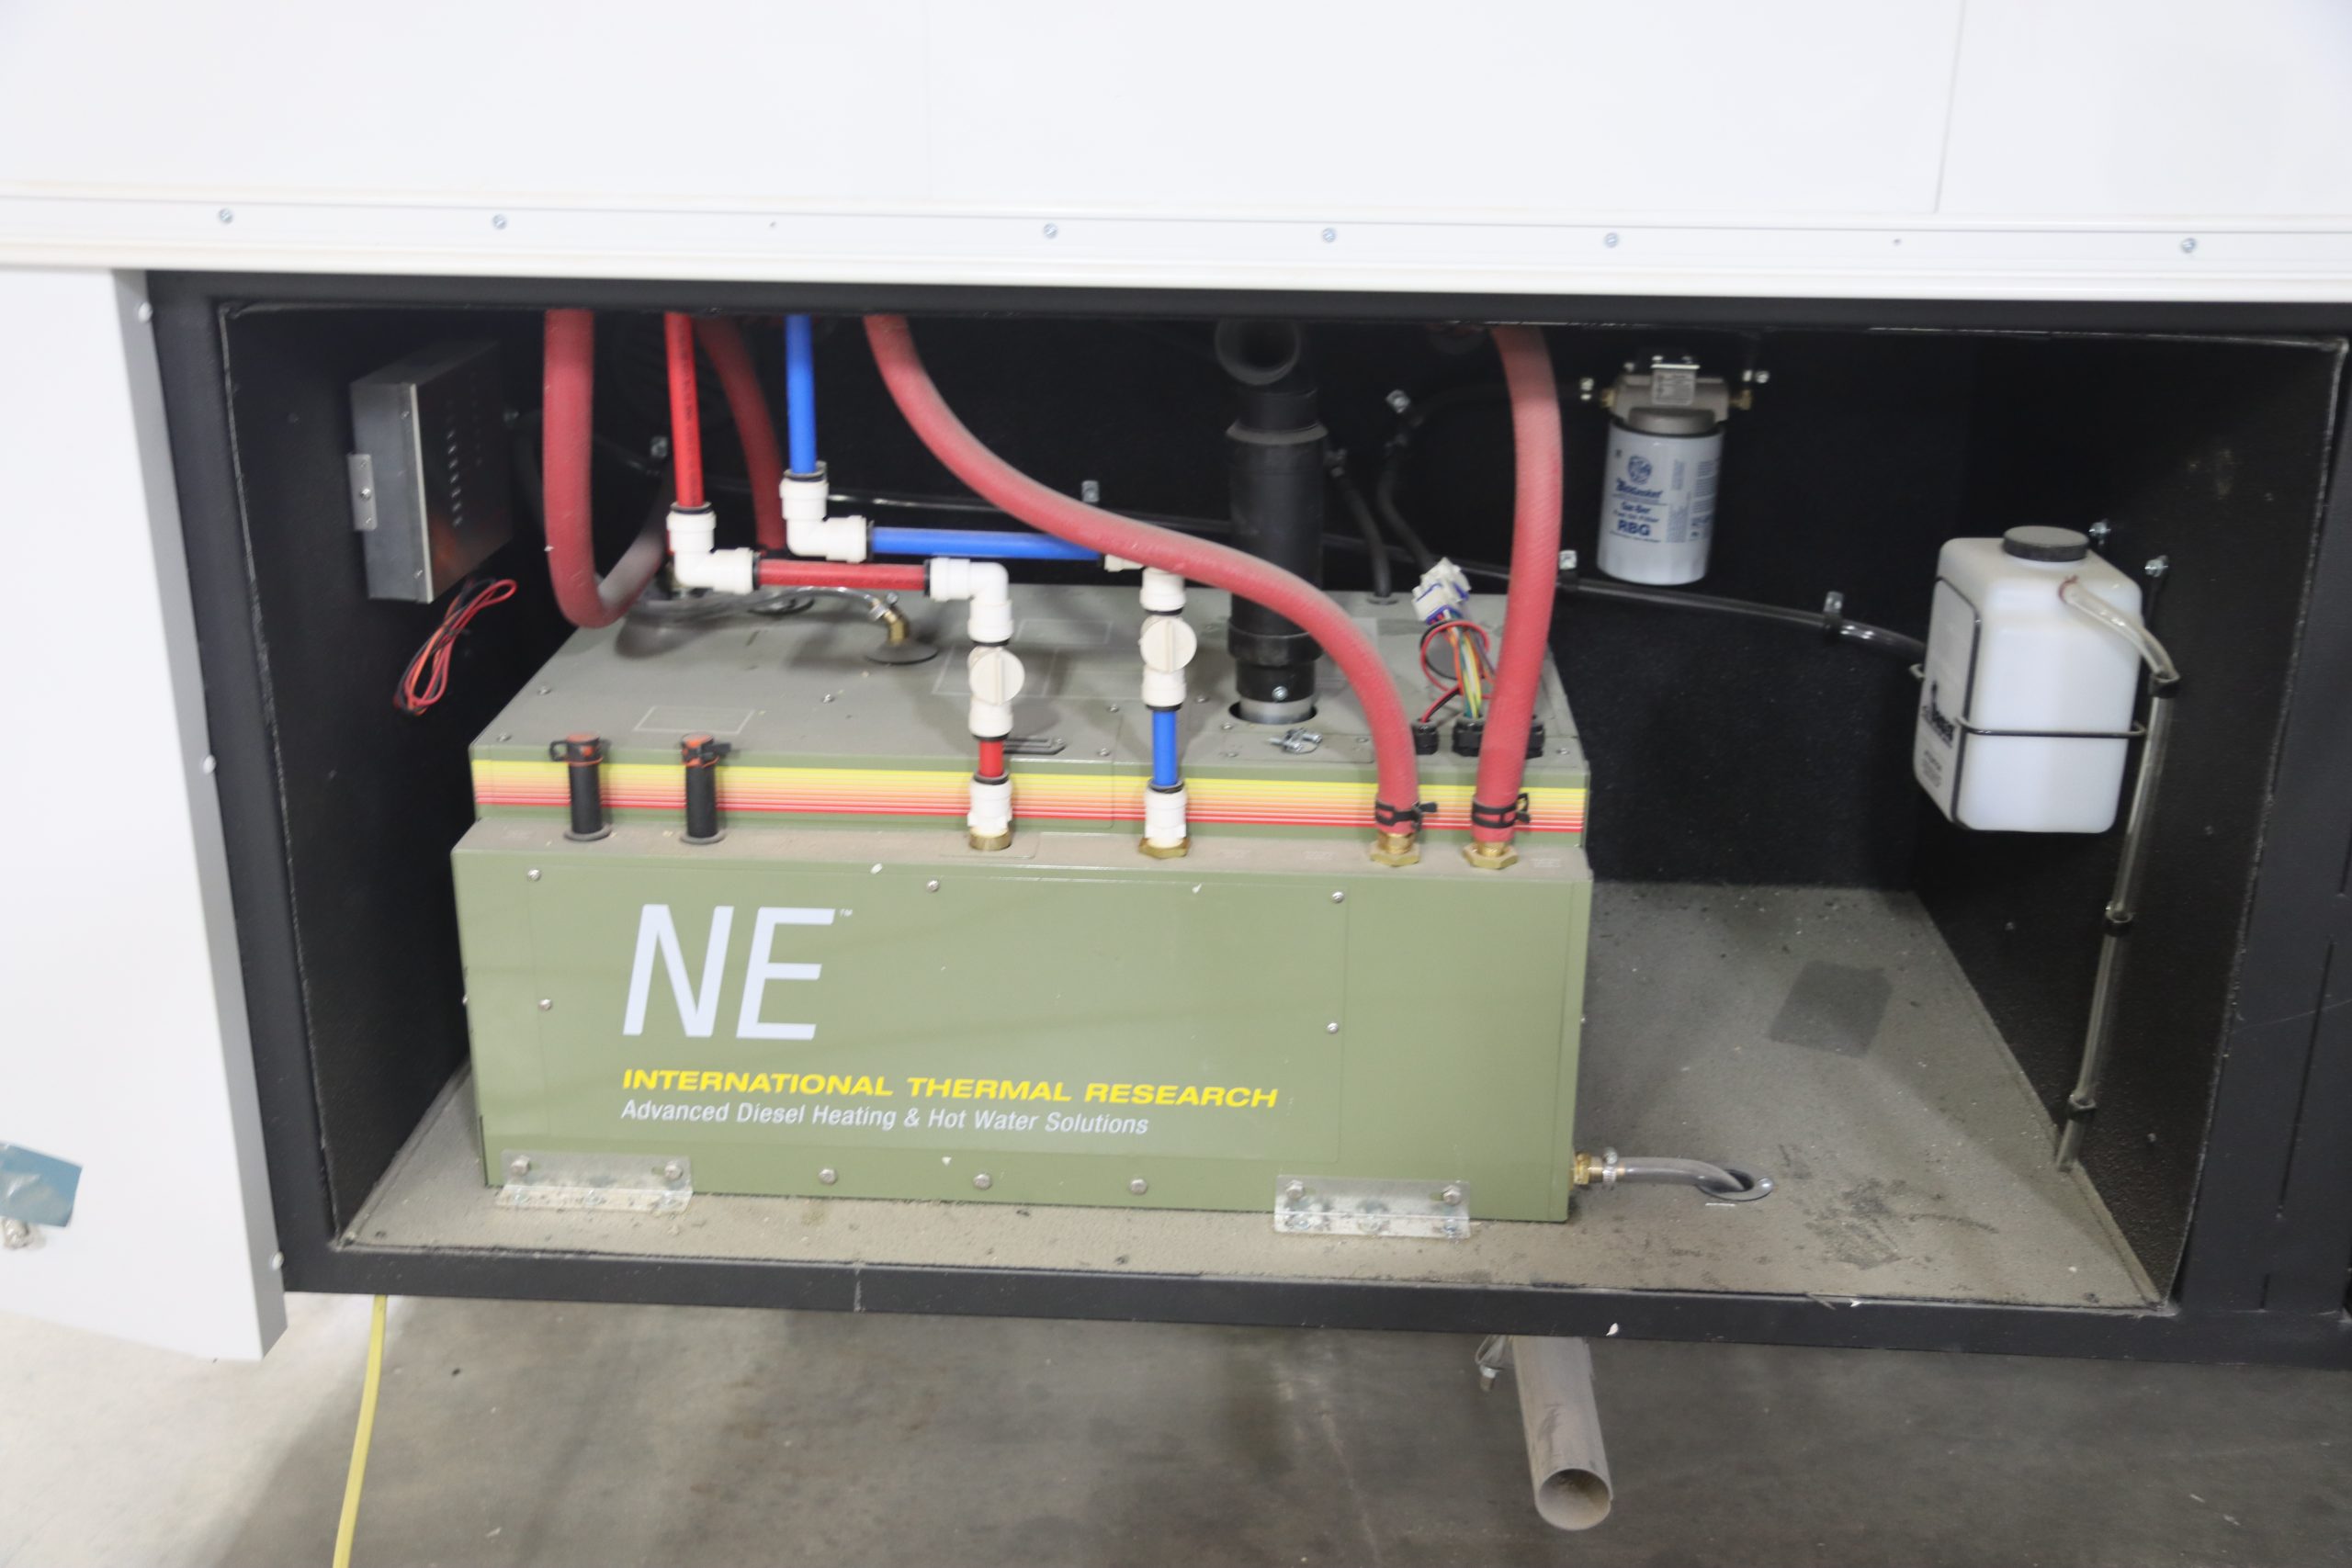
    An installed Oasis NE system in a Showhauler motorhome.

    Operation

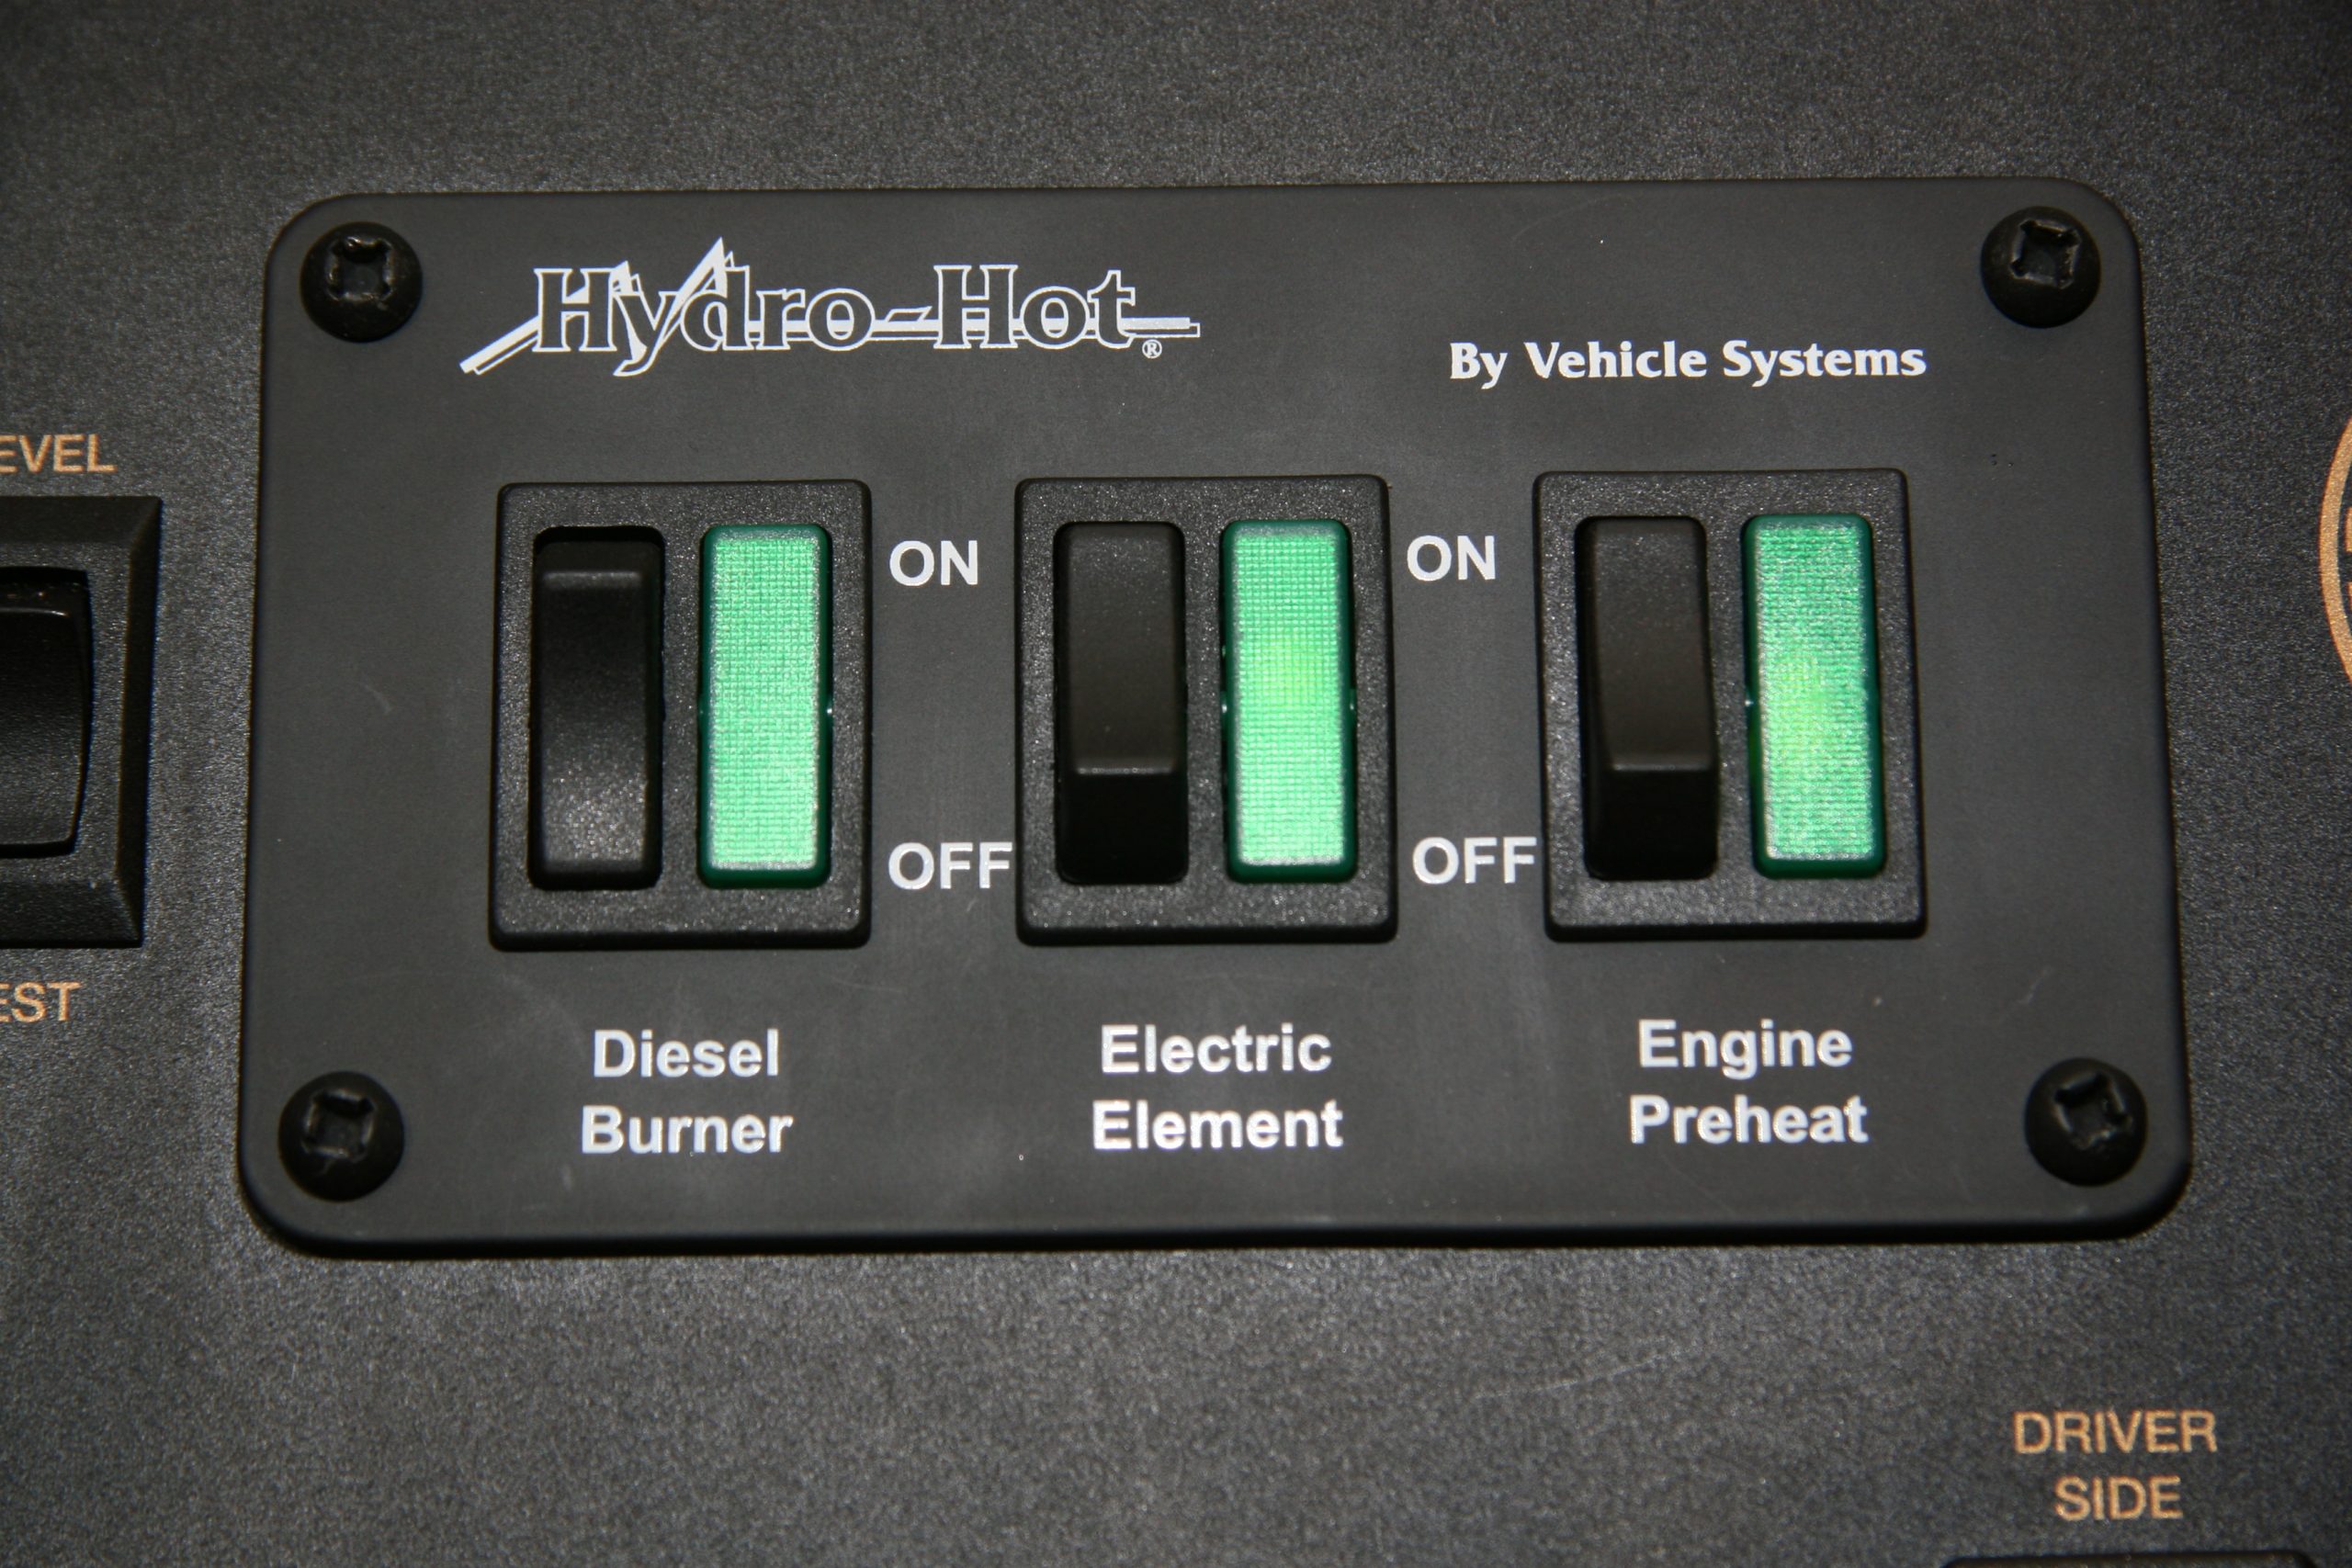
    Your system will have a few switches to operate the boiler. These switches may be rocker switches, or in a dedicated control panel or embedded in a multiplex control panel such as a VegaTouch screen. These switches are used to turn on the diesel burner and electric heating elements. There may also be a switch for an optional engine preheat feature if so equipped. These controls supply power to operate the boiler. If they are not on you won’t get any heat. Once the boiler heats up to its designated cutout temperature it will stop. Once the boiler’s temperature drops below the cut-in temperature it will start up again to raise the heat level of the boiler antifreeze.

    National-Indoor-RV-Centers-blog-RV-hydronic-heating-systems-for-your-motorhome-switch-panel

    The diesel burner and electrical heating element are controlled by a switch panel.

    The antifreeze in the boiler is used to circulate through a couple of closed loops via circulating pumps. Interior heat exchangers are inserted into these loops at key locations to evenly distribute heat throughout the coach interior. These circulating pumps are controlled by the coach’s HVAC thermostat controls. Whenever the thermostat calls for heat, the circulating pumps will circulate hot antifreeze through the heating loop and heat exchangers. The fans on the heat exchangers will switch on to deliver the heat to the interior but only if the boiler is hot. This is to prevent blowing cold air from the heat exchangers if the antifreeze hasn’t warmed up yet. Once it is warmed up, the fans will engage and heat the coach interior. If the boiler cools down the fans will stop, allowing the boiler to regain its temperature before switching on again. When first starting up a hydronic system, you will have to wait a few minutes until the boiler warms up.
    These systems have two heating loops, each powered by a circulating pump. A number of heat exchangers can be connected to these loops and these heat exchangers are connected to up to 5 heating zones. One heating zone may be used for the main cabin interior heating while a second heating zone may be used for the bedroom and rear bath heating area. A third zone may be used for basement heat while a fourth zone may be used for hydronic floor heat, in the case of  an Entegra Coach. The layout of these zones and to which circulating loop they are assigned is up to the coach manufacturer’s discretion. Each zone will have individual thermostat control with remote sensors. This can be multiple thermostats, a multi-zone thermostat or part of a VegaTouch multiplex system. In many cases, there will be a separate manually-operated thermostat in the basement to control the basement zone that protects the fresh water system from freezing. If you just want to keep minimal heat in the coach, you will still need to leave either the electric heating element or diesel burner switched on or else you won’t get any heat.
    National-Indoor-RV-Centers-blog-RV-hydronic-heating-systems-for-your-motorhome-thermostat

    Many coaches utilize a separate thermostat to control the basement heat.

    The Motoraide loop to the engine will provide a bit of heat when driving. Typical BTU output for this is in the neighborhood of 10,000 BTU but will vary from coach to coach. It will keep the boiler hot so that you will have hot water when you stop and can give you a bit of interior heat but if it’s relatively cool out you will want to use the diesel burner as well. Still, the extra 10 KBTU is a help and will give you some free heat and save some diesel fuel. This system utilizes the engine’s water pump to circulate engine coolant through an internal heat exchanger inside the boiler via regular automotive heater hoses. You do not have to switch on any engine preheat pump for this to happen.

    The optional engine preheat feature utilizes the same heater hoses but adds a circulating pump that pumps the engine antifreeze in the opposite direction. This is used to provide heat from an operating hydronic heating system boiler to a cold engine to make it easier to start. Note that this is not part of the engine block heater, which is a second preheat device supplied by the chassis manufacturer. The hydronic preheat system will actually heat up your engine faster than the block heater because it has more BTU. You can also use it when you are parked in a place where you do not have access to electricity because you can run your boiler on diesel fuel in the middle of Alaska if you need to preheat your engine. This is an optional feature so it depends on if the coach manufacturer uses it. If you stay out of cold areas it may not be of much use for you.

    Hydronic systems also provide domestic hot water in addition to heat. The hot boiler antifreeze transfers heat to a coil that heats the fresh water as it passes through the coil on its way to your hot water faucets. A traditional water heater that uses a tank to store hot water will quickly run out of hot water once the tank is depleted so no long hot showers are possible. The hydronic system is a true on-demand system that will heat the water as it passes through the heating coil. The only caveat is that you have to limit the flow so that the boiler can keep up. The typical system has the ability to raise the water’s temperature 60 degrees over the temperature of the incoming water. If your water is very cold you’ll be limited in how hot you can get the water but if the incoming water is warmer you’ll be able to heat it to a higher temperature. Typically, this is rated at a 1.5 GPM flow rate. If you exceed that rate, the boiler won’t be able to keep up and as the boiler temperature begins to drop – so will the temperature of your hot water output. Using higher flow rates can work for a short time but if you really need a long hot shower, you’ll want to keep the flow rate beneath 1.5 GPM.

    Maintenance

    Anything mechanical will require a bit of maintenance every now and then. A hydronic heating system isn’t a high-maintenance item but when you consider that these systems have a diesel-powered flame that heats a boiler and circulating pumps that cycle antifreeze through heat exchangers, there are a few points to watch for.

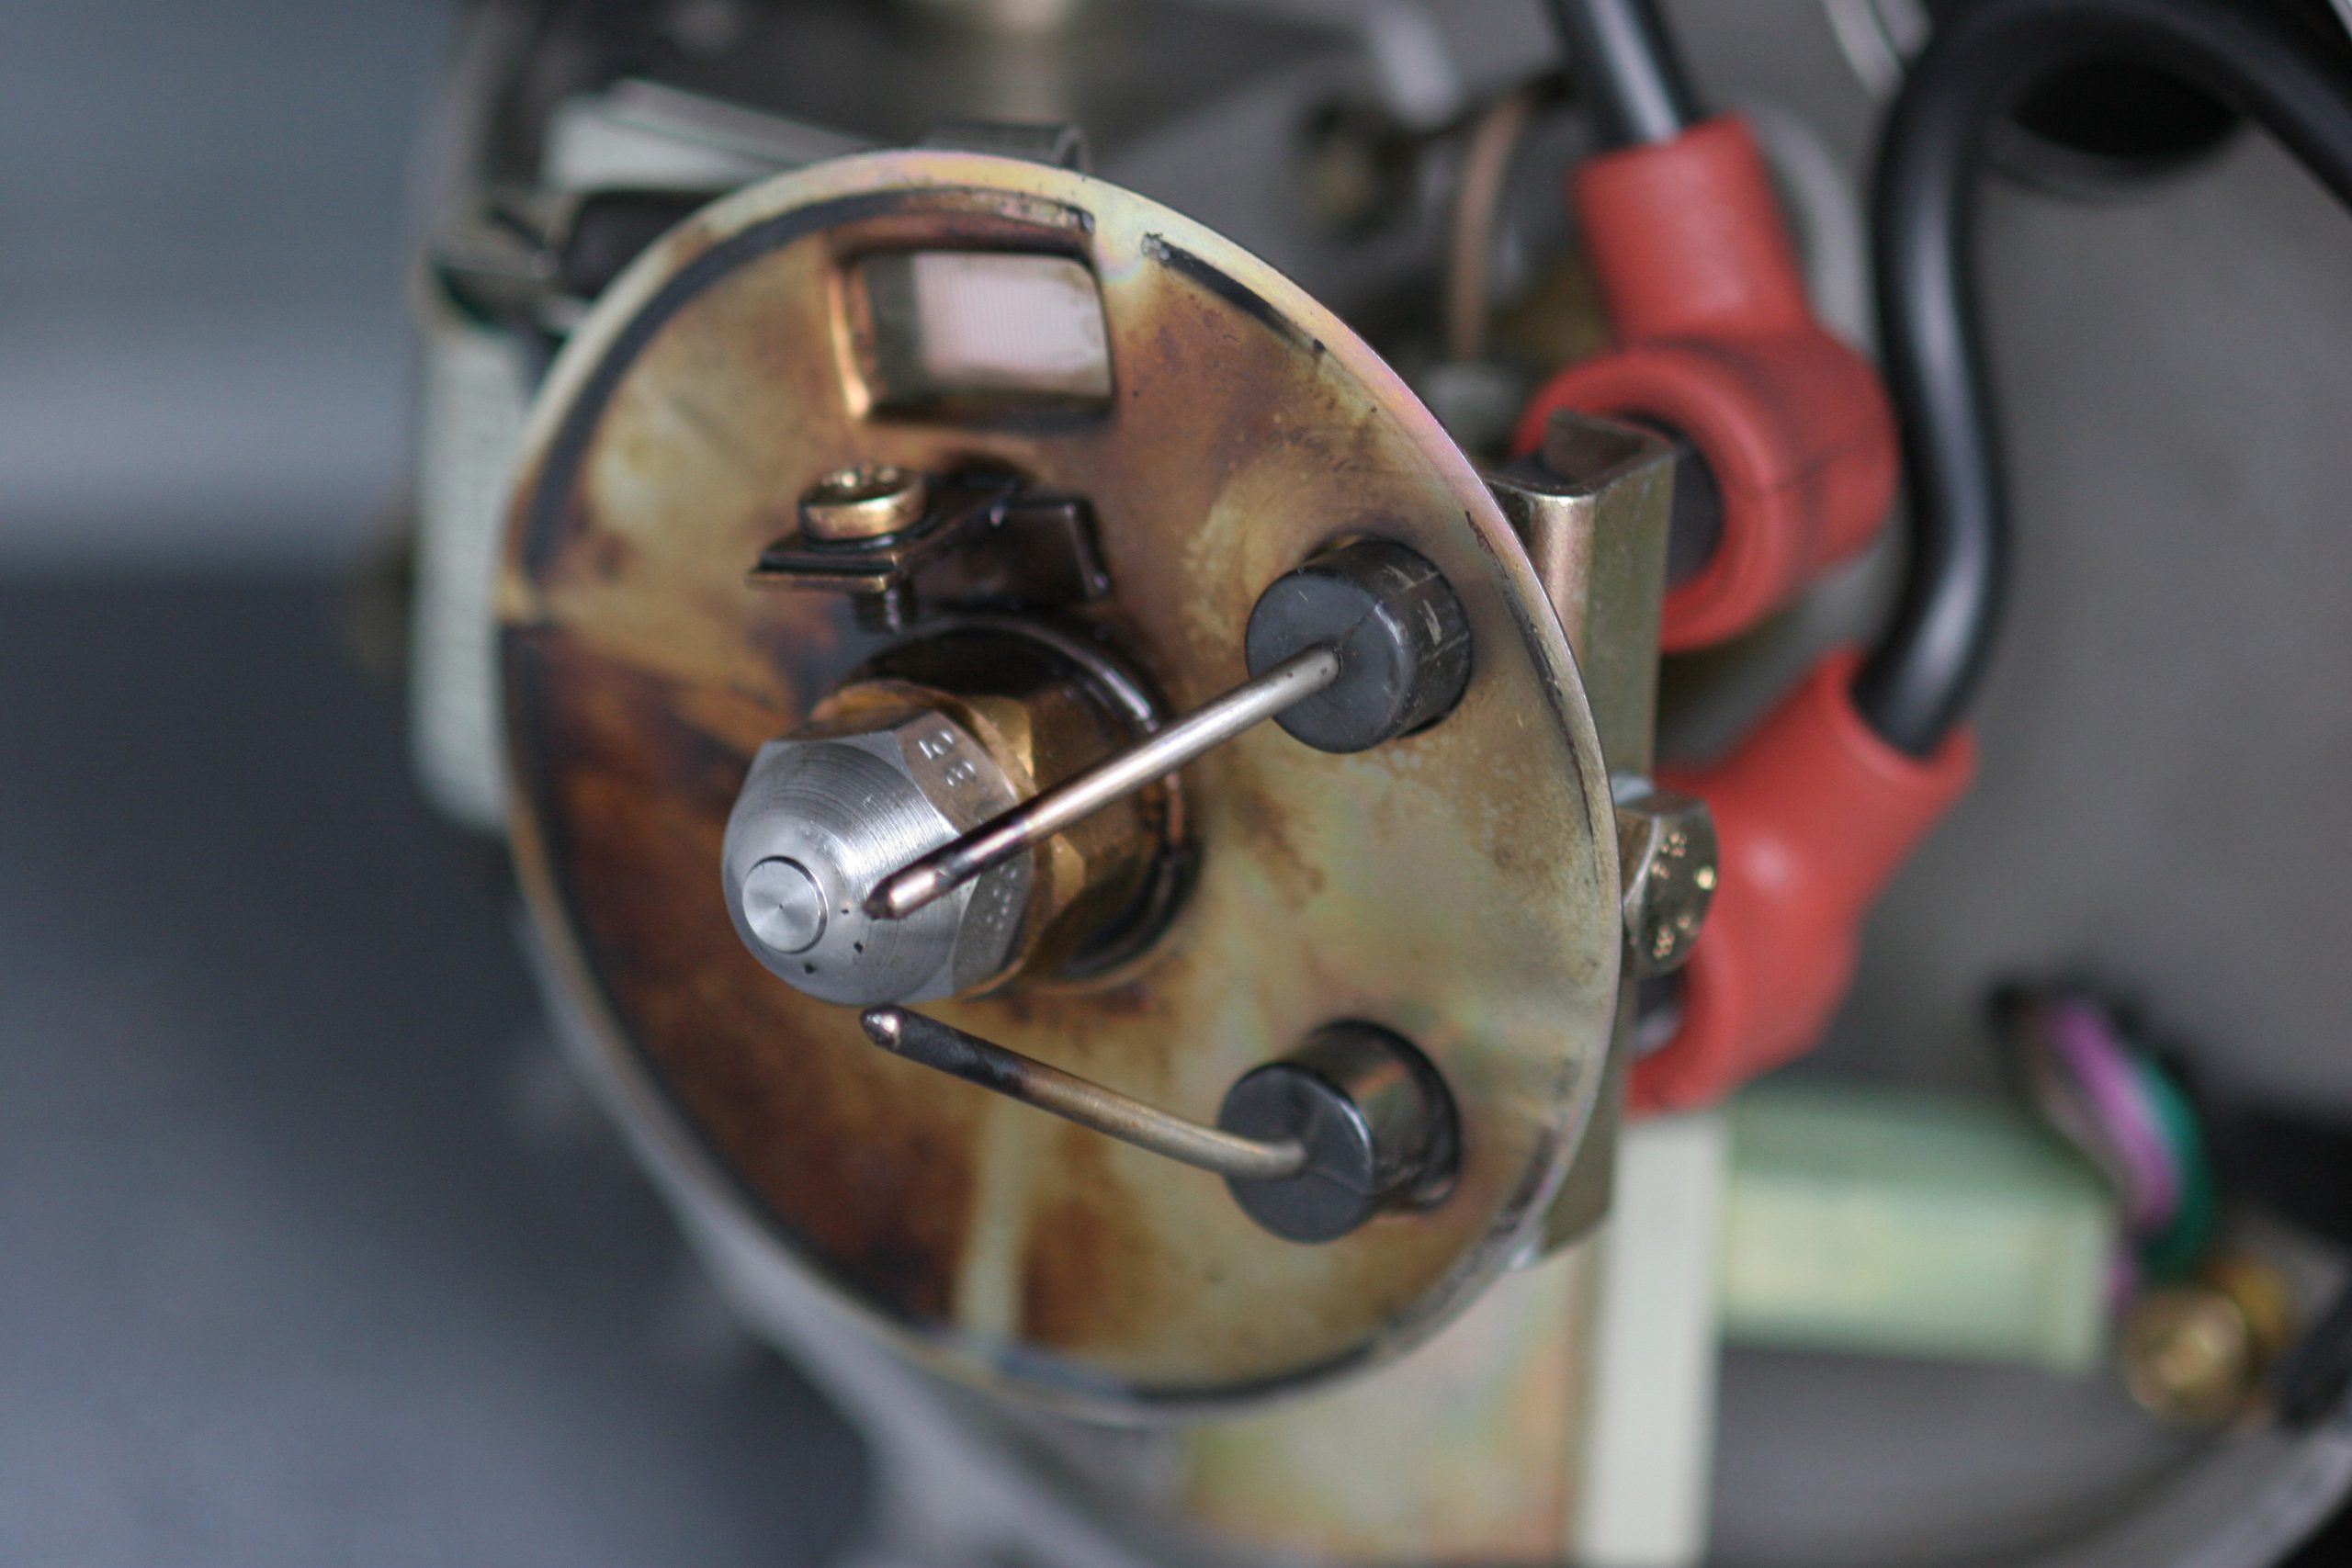
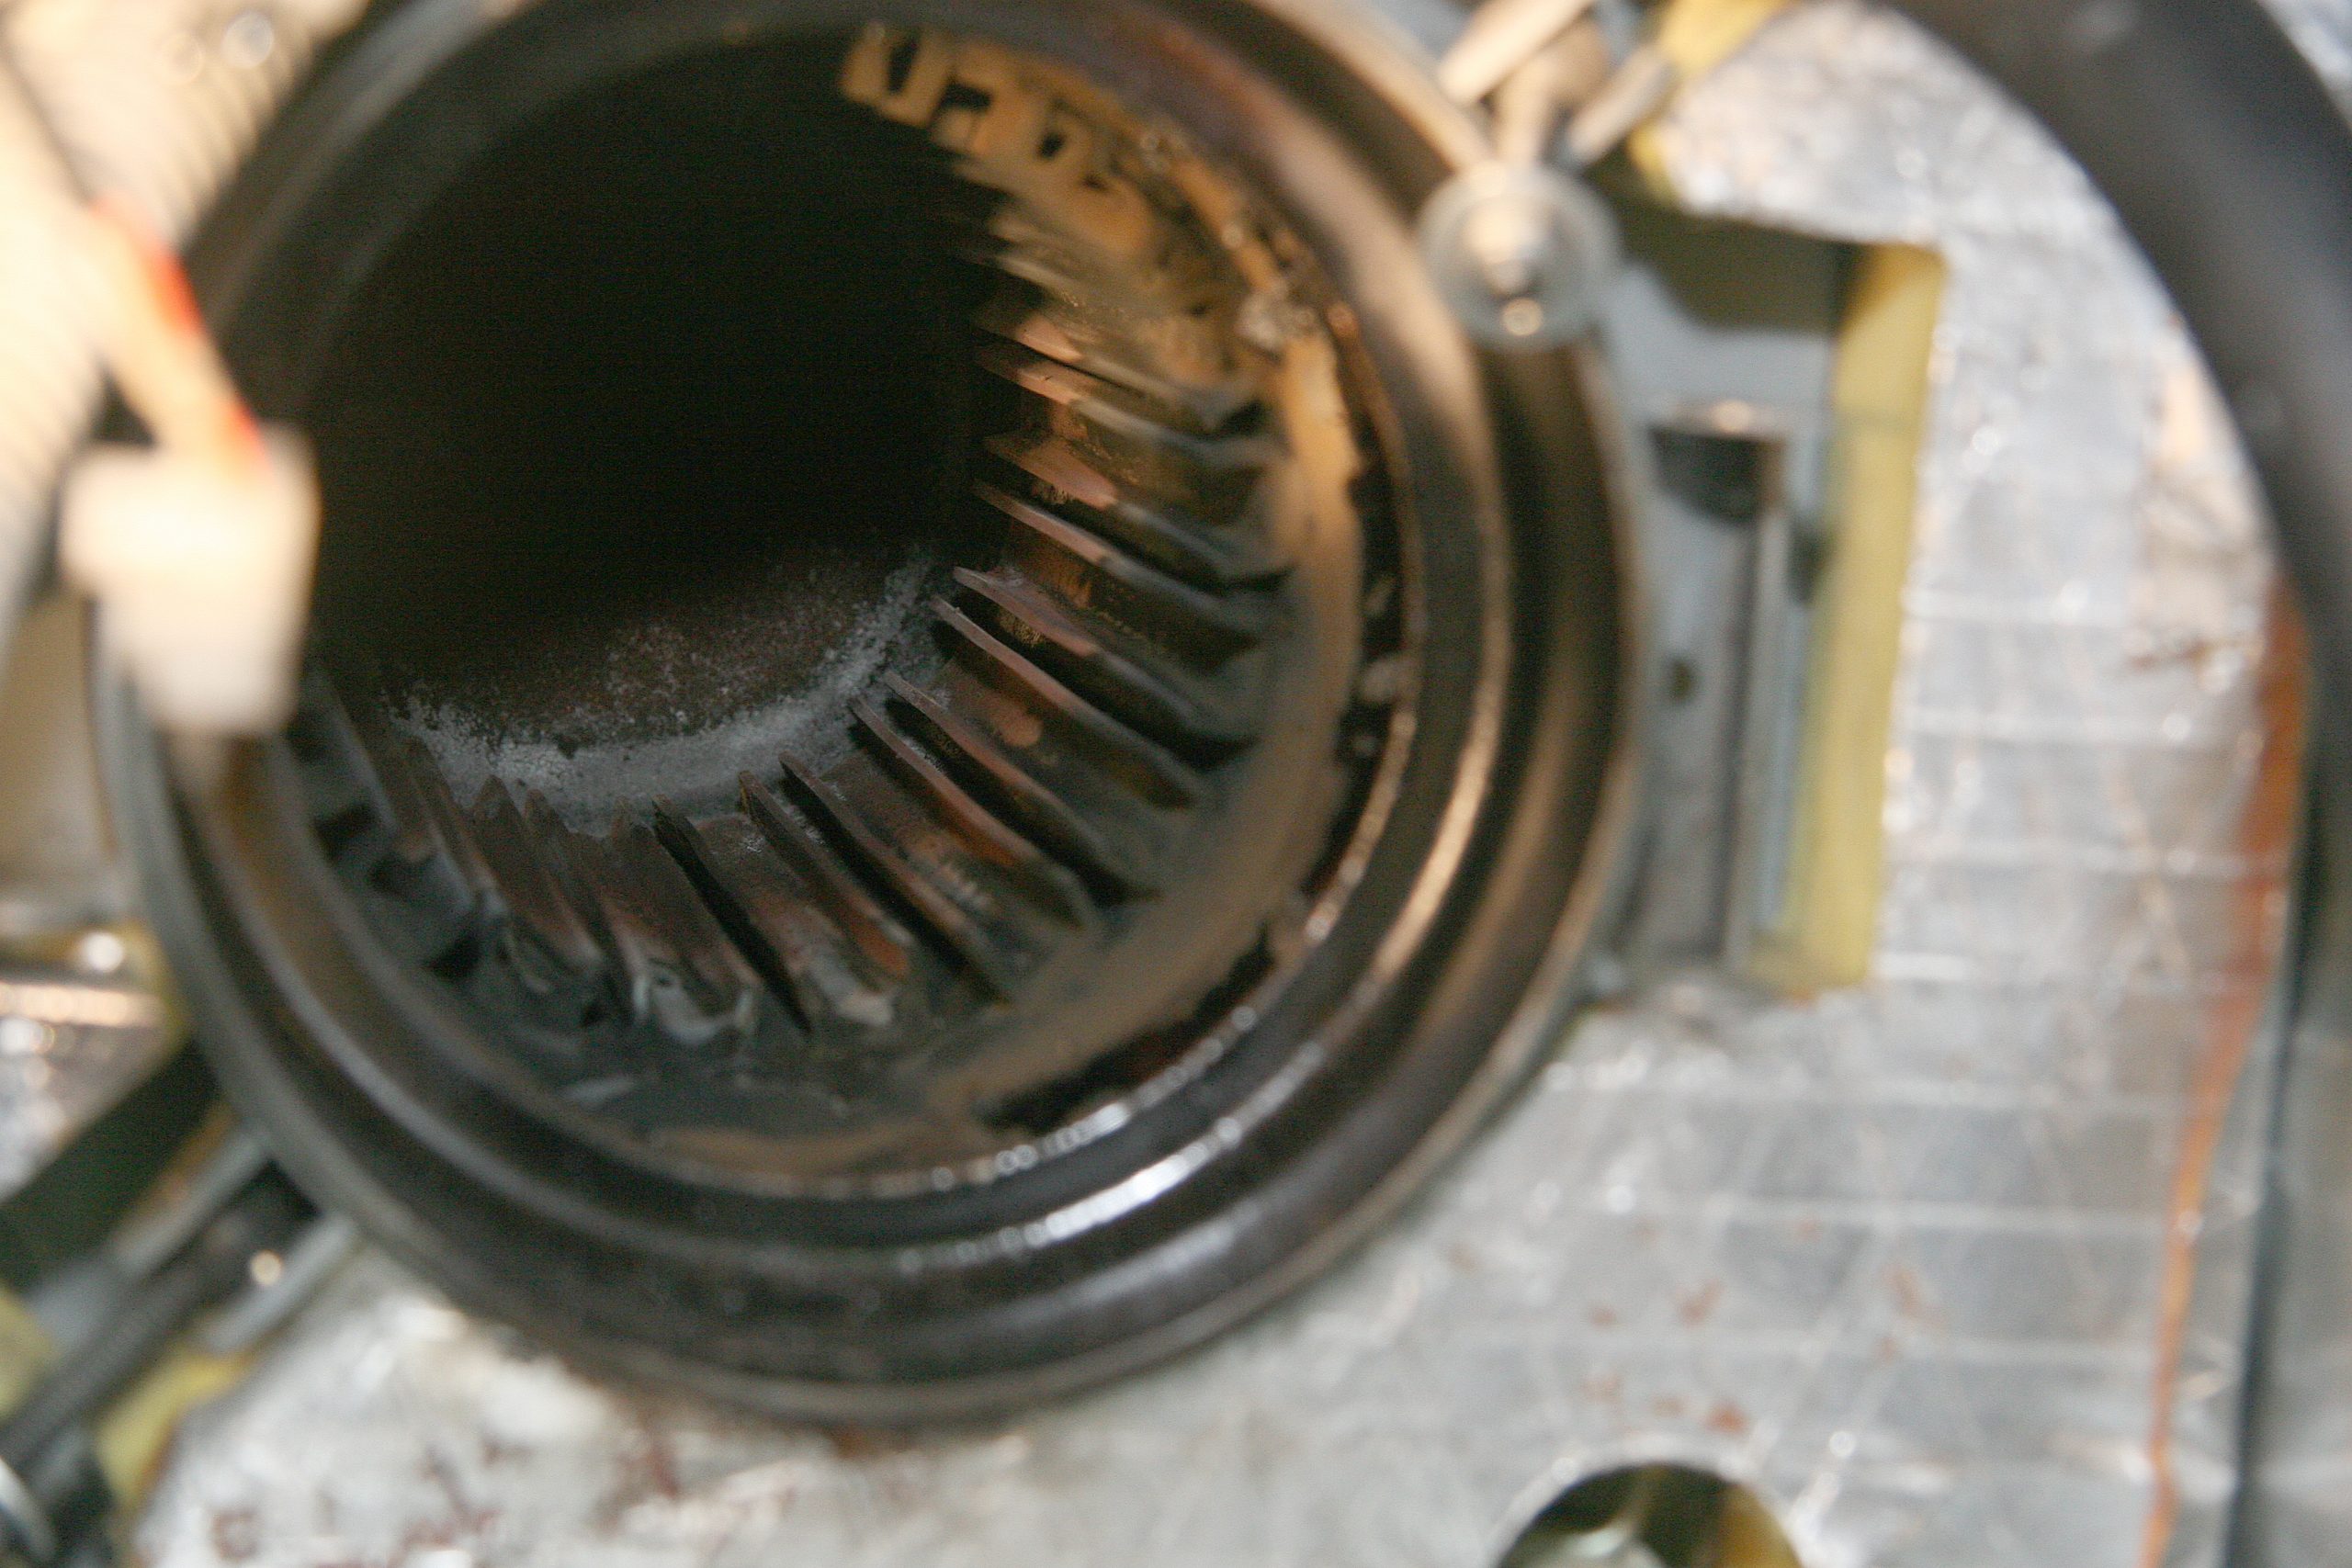
    A typical system requires an annual service, which pretty much centers on the diesel burner. The diesel burner pumps fuel through a small nozzle into the burner chamber and is ignited by a spark. The nozzle itself has a minute orifice that is designed for a specific flow rate and a precise conical pattern. During normal use, the diesel fuel that passes through the nozzle will wear out the orifice, resulting in excess diesel fuel flow. This excess fuel will cause fouling of the swirler flues that are designed to create the correct circular airflow inside the burner’s combustion chamber. The end result is that your hydronic heating system runs rich, causing stinky exhaust and puffs of smoke. This wear occurs from use, not time, so if you run your diesel burner quite often you might require service sooner than the arbitrary one year interval.

    National-Indoor-RV-Centers-blog-RV-hydronic-heating-systems-for-your-motorhome-burner-nozzle
    National-Indoor-RV-Centers-blog-RV-hydronic-heating-systems-for-your-motorhome-combustion-chamber

    The burner nozzle, electrodes and flame sensor are part of the annual service.

    The combustion chamber needs to be cleaned and vacuumed as part of the service..

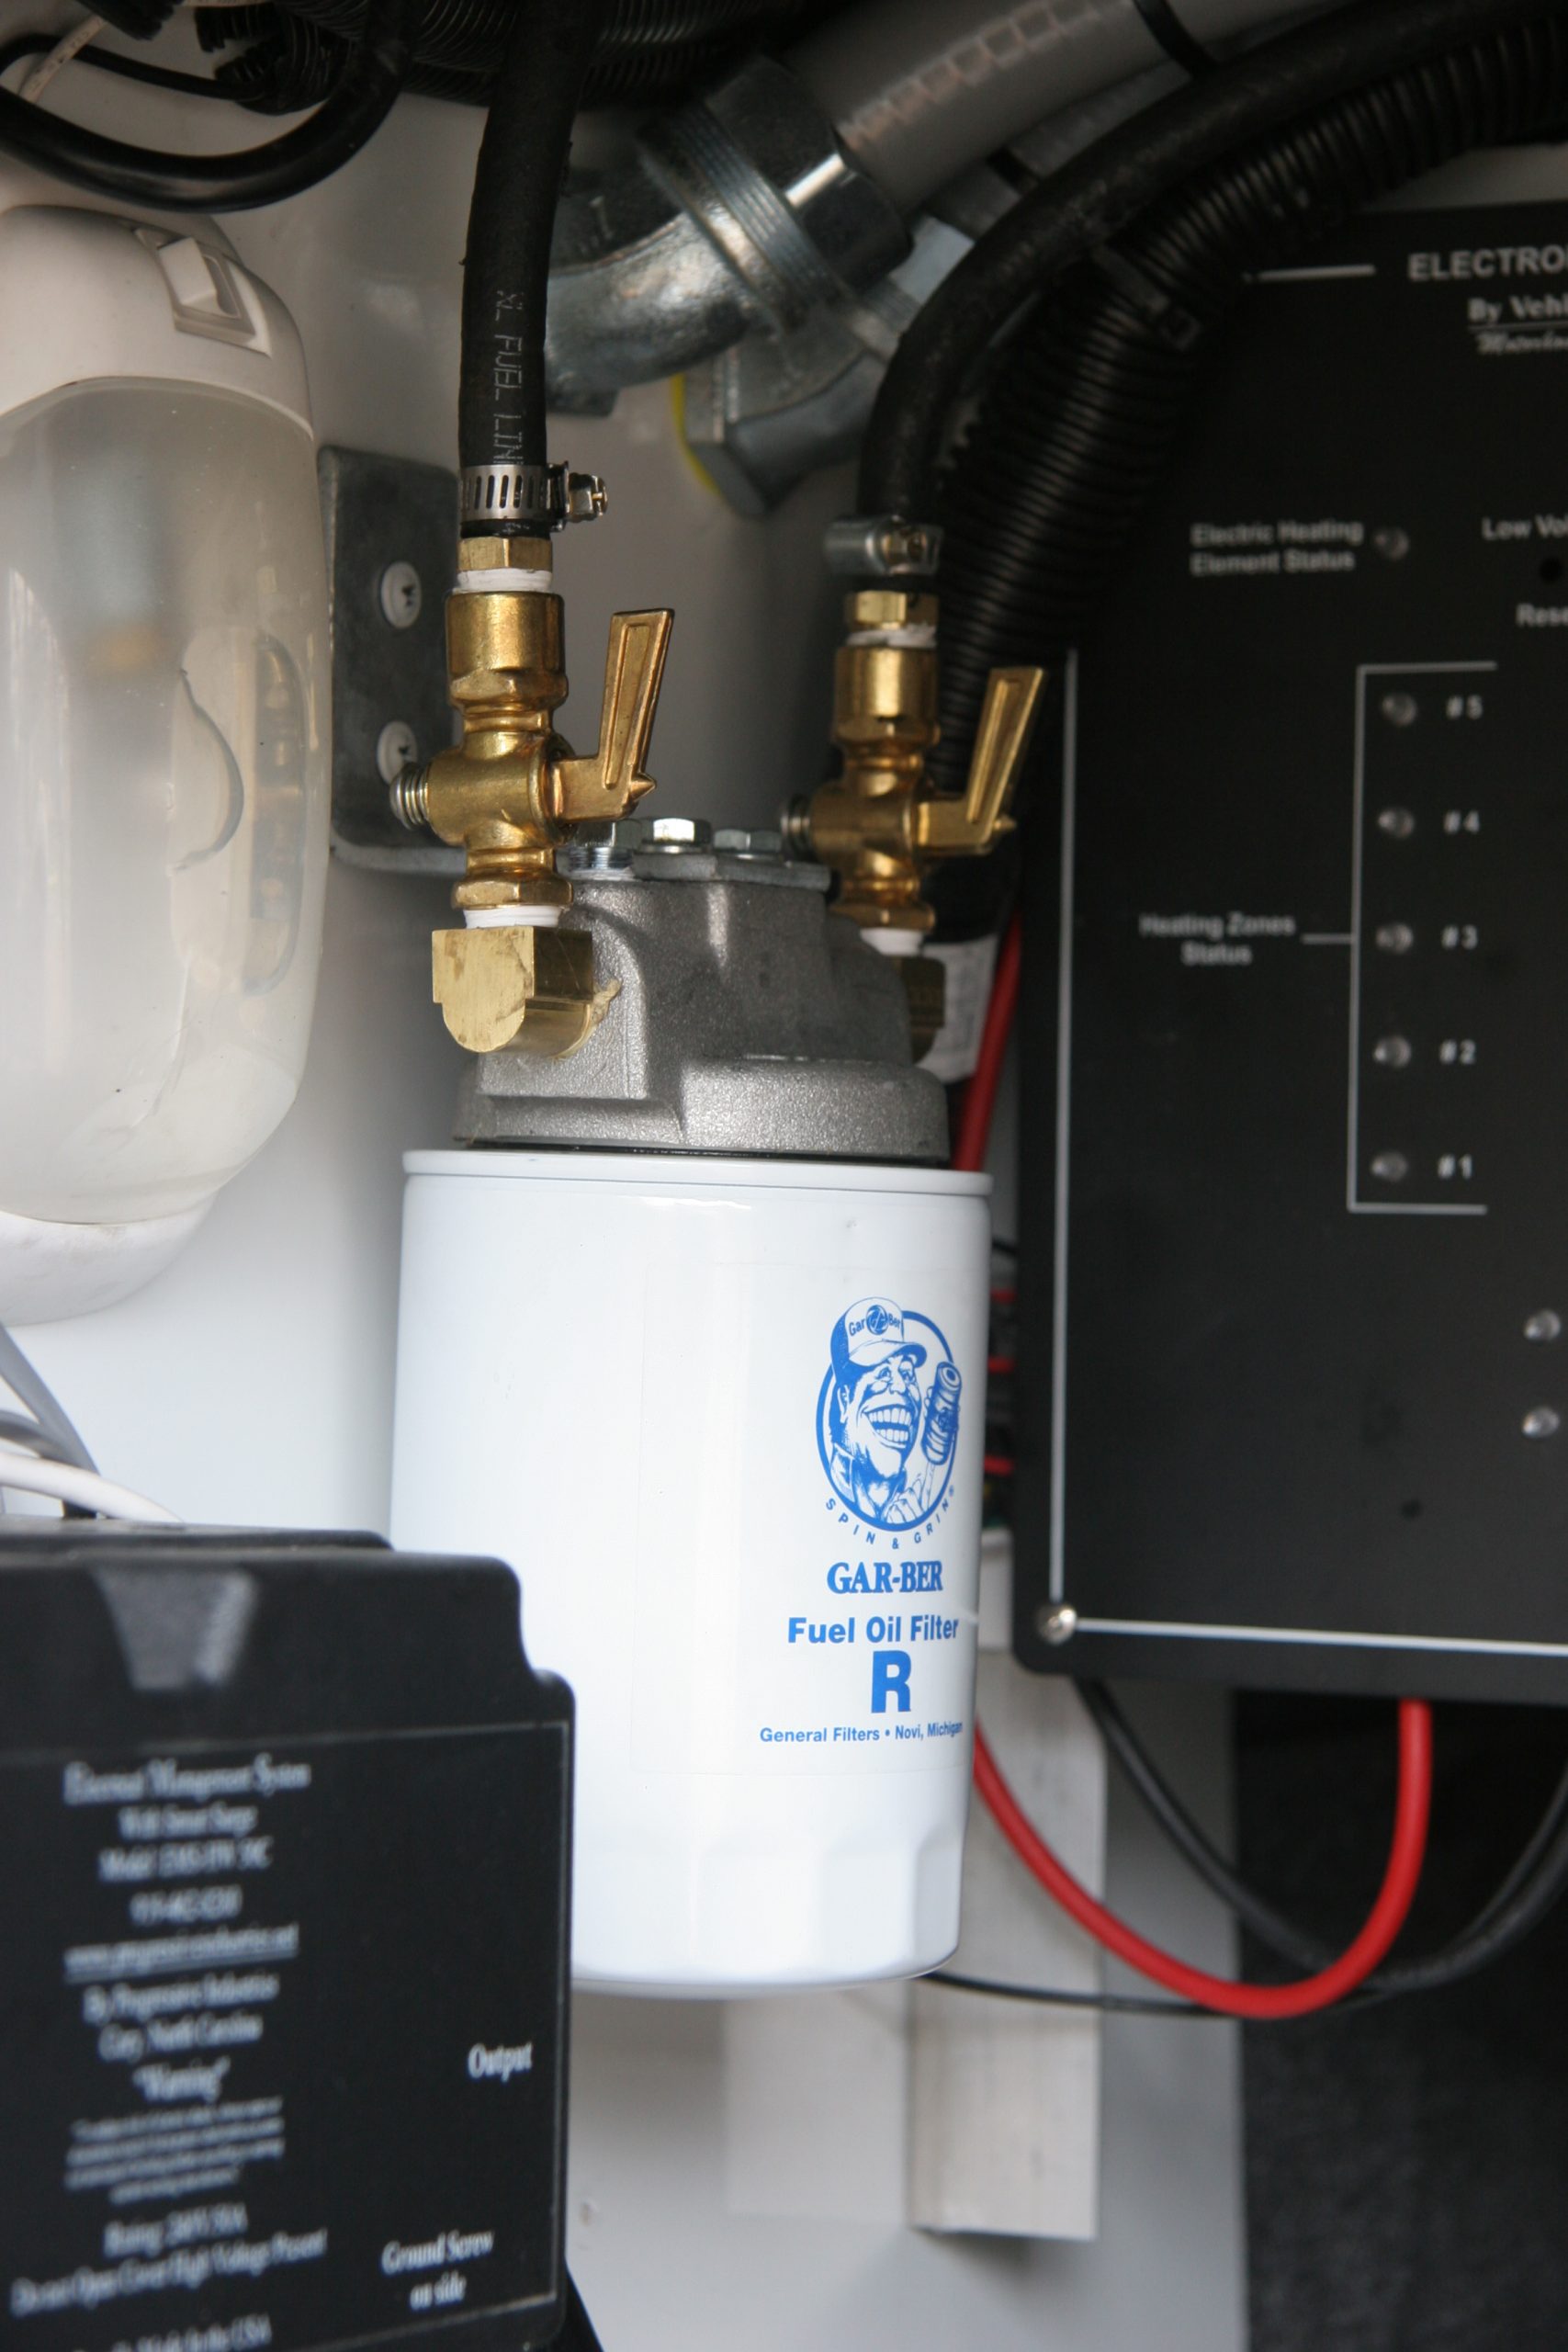
    Nozzles cannot be cleaned but they are inexpensive and should be replaced. The annual service also entails replacing the fuel filter and a thorough inspection of the burner. It’s important to keep the burner head clean, especially the electrodes and flame sensor photocell. At the same time a good vacuuming of the combustion chamber and cleaning of the swirler to ensure the ports are clean is necessary. Finally, a quick check of the fuel pump pressure will ensure that everything is up to snuff.

    National-Indoor-RV-Centers-blog-RV-hydronic-heating-systems-for-your-motorhome-fuel-filter

    The fuel filter for the diesel burner needs to be changed annually.

    Assuming that your system is functioning without any major issues, the only thing left is the antifreeze. Hydronic heating systems do not use automotive antifreeze, which includes water pump lubricants, anti-corrosion inhibitors and other additives designed for engines as well as freeze protection. A hydronic heating system uses an antifreeze that protects against freeze damage but it is designed for the best heat transfer. While most automotive antifreeze is Ethylene Glycol (EG), hydronic systems require Propylene Glycol (PG). The correct antifreeze will be available from Camco or Century and they are labeled as GRAS, which means Generally Recognized As Safe because they are not toxic, unlike EG. Your hydronic heating system will be equipped with a poly overflow tank so that you can see the level in your boiler. If it becomes discolored and smells burnt, it may be time to have your RV tech flush the system and replace the antifreeze.

    While the boiler and heating loops are a sealed system, it always seems that they need a little topping off every now and then, so most owners carry a spare jug along. Pure antifreeze needs to be mixed with water about 50/50. Antifreeze is available in jugs filled with concentrated antifreeze that needs to be mixed with water or as a preformulated 50/50 mix. If you do buy the concentrated antifreeze, be sure to use distilled or deionized water when diluting it to a 50/50 mix to prevent minerals from tap water from accumulating in your hydronic system. You can dilute it a bit beyond the 50/50 mix which covers to -42F. In fact, the best heat transfer is at 60% water and 40% antifreeze. That will drop the freeze temperature a bit, but not significantly. A quick check of your antifreeze’s freeze point with a refractometer will verify your current freeze point. If the freeze point is too high, you can add a bit of concentrated antifreeze to bring the freeze protection level back to where it needs to be.

    Really, with a little bit of care and understanding you’ll be able to enjoy your hydronic heat for a long time.

    National Indoor RV Centers blogger Mark Quasius profile picture

    Mark Quasius is the founder of RVtechMag.com, the past Midwest editor of RV Magazine, writes for numerous RV-related publications and a regular Contributor to FMCA’s Family RVing Magazine. Mark and his wife Leann travel in their 2016 Entegra Cornerstone.

    RV Numbers – Ratings, Limits and Capacity

    Every RV has specific ratings, limits and capacities related to weight distibution. 

    We’ve all heard the saying – “It just looks like his number was up”. Well motorhomes have numbers too – lots of them in fact, which can be a bit confusing to a prospective RV buyer. It’s easy to view a spec sheet or brochure and understand how large the holding tanks are, how many gallons the fuel tank holds or how many BTUs the furnace puts out, but there is a wide array of chassis-related numbers that may take a while to grasp their meanings. Once you have narrowed down whether you want gas or diesel, a Class A or Class C and the approximate length you want, it’s important to understand the various weight ratings to ensure that the RV you are choosing is capable of operating safely within its design parameters. Following is a summary of those ratings that will help you to better understand what they mean.

    Gross Vehicle Weight Rating (GVWR)

    The Gross Vehicle Weight Rating, or GVWR, is usually the first number that anyone pays attention to on a motorhome. It represents just how big this RV is. In actuality, it represents how heavy an RV can be within safe design parameters – so it’s really a “not to exceed” weight rating. Every motorhome is designed with a chassis frame, tires, engine, suspension, brakes, transmission and other components to operate in a given environment. A heavier vehicle will have stronger components to prevent failure at higher weight loads and deliver satisfactory performance when in operation. If you load your coach up with full cargo, occupants, full fuel and water the total weight should not exceed the GVWR. This is why it’s important to weigh your coach when fully loaded to ensure that you do not exceed the GVWR of that motorhome. Note that this is the resting weight and does not count any towed vehicles or trailers other than the amount of any tongue weight resting on the hitch. Although, if you have a motorcycle carrier or golf cart mounted on your trailer hitch that weight may be a significant amount.

    Unloaded Vehicle Weight (UVW)

    The Unloaded Vehicle Weight, or UVW, represents the actual weight of the vehicle when empty as it left the factory. You may see this listed on some manufacturer brochures or webpages but keep in mind these are generalizations and your actual will vary according to what options are chosen on your coach. Your vehicle’s actual UVW will be shown on a placard within the motorhome. The UVW includes a full tank of fuel and any chassis related fluids, such as coolant and oil, but does not include any water or propane. Once you know your RV’s GVWR and the UVW, you can calculate the CCC.

    Sleeping Capacity Weight Rating (SCWR)

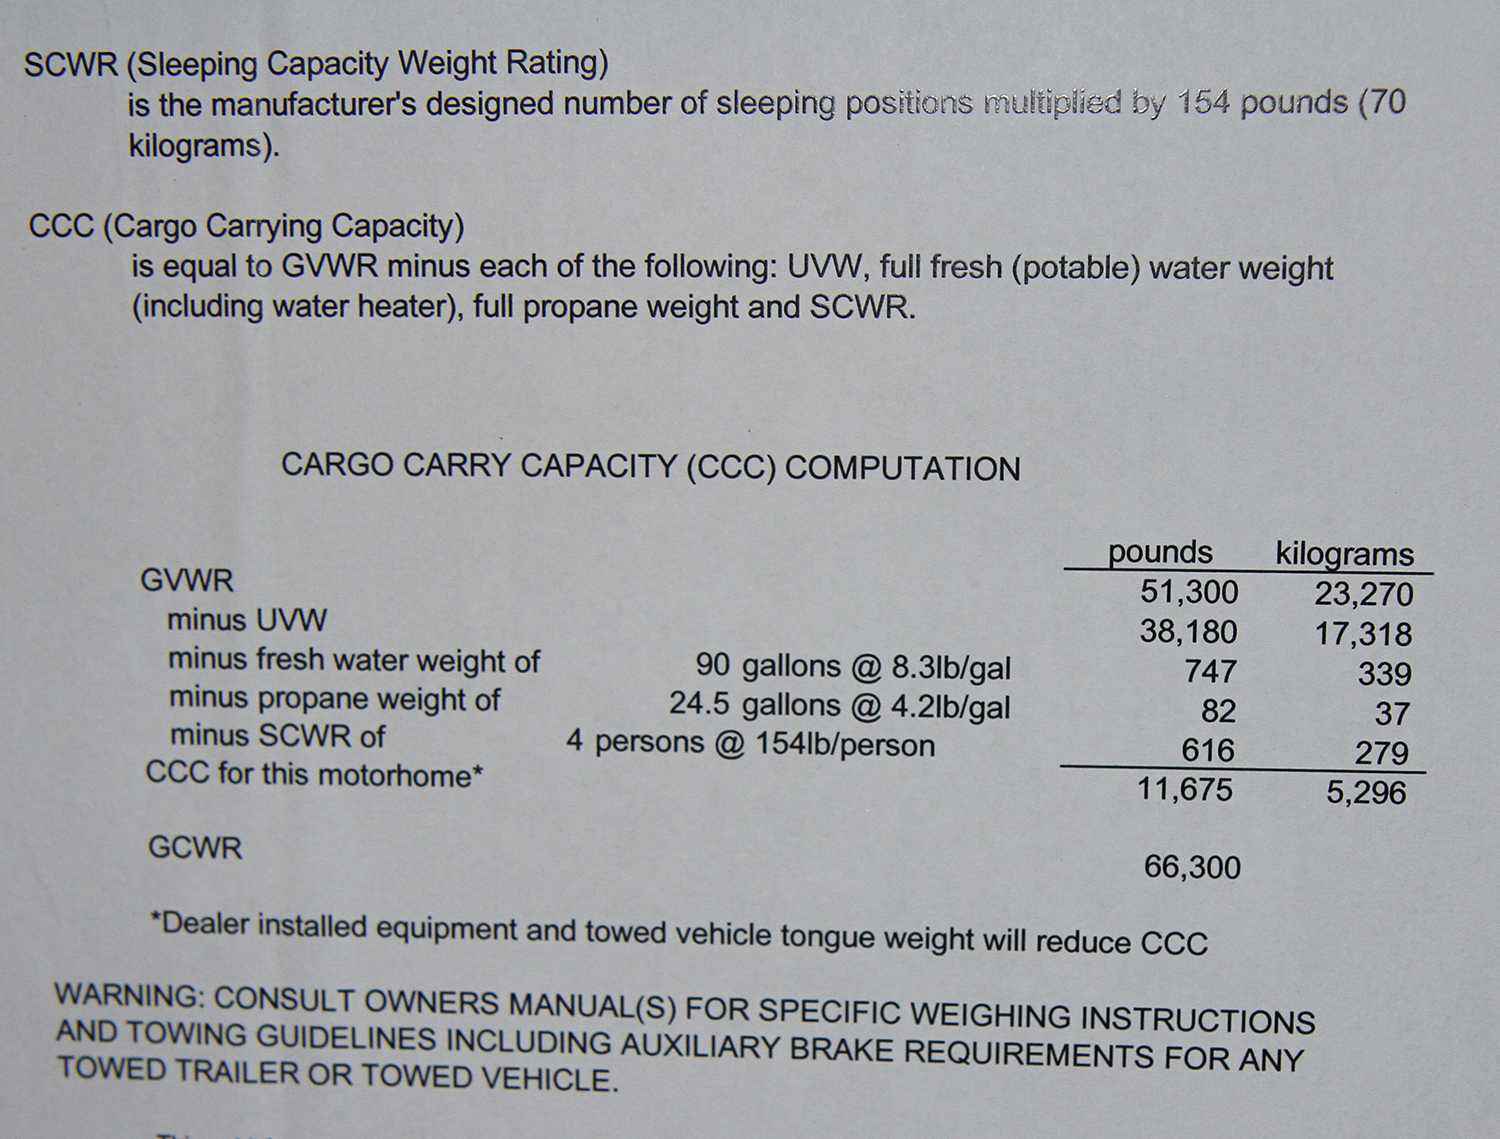
    The Sleeping Capacity Weight Rating, or SCWR, is calculated by multiplying the number of sleeping positions by 154 pounds. Every coach will state how many sleeping positions are in the coach. The RVIA came up with 154 lbs. as an average number. The SCWR number isn’t all that important any more, as we’ll see later.

    Cargo Carrying Capacity (CCC)

    The Cargo Carrying Capacity, or CCC, represents how much stuff you can carry. It’s calculated by subtracting the UVW from the GVWR and then subtracting the SCWR, weight of the fresh water in your coach and the weight of the propane. The end result is the cargo carrying capacity.

    It’s not the most useful because the SCWR is an arbitrary number at best. CCC is still used in towable RVs but is no longer used in motorhomes, being replaced by OCCC.

    Occupant and Cargo Carrying Capacity (OCCC)

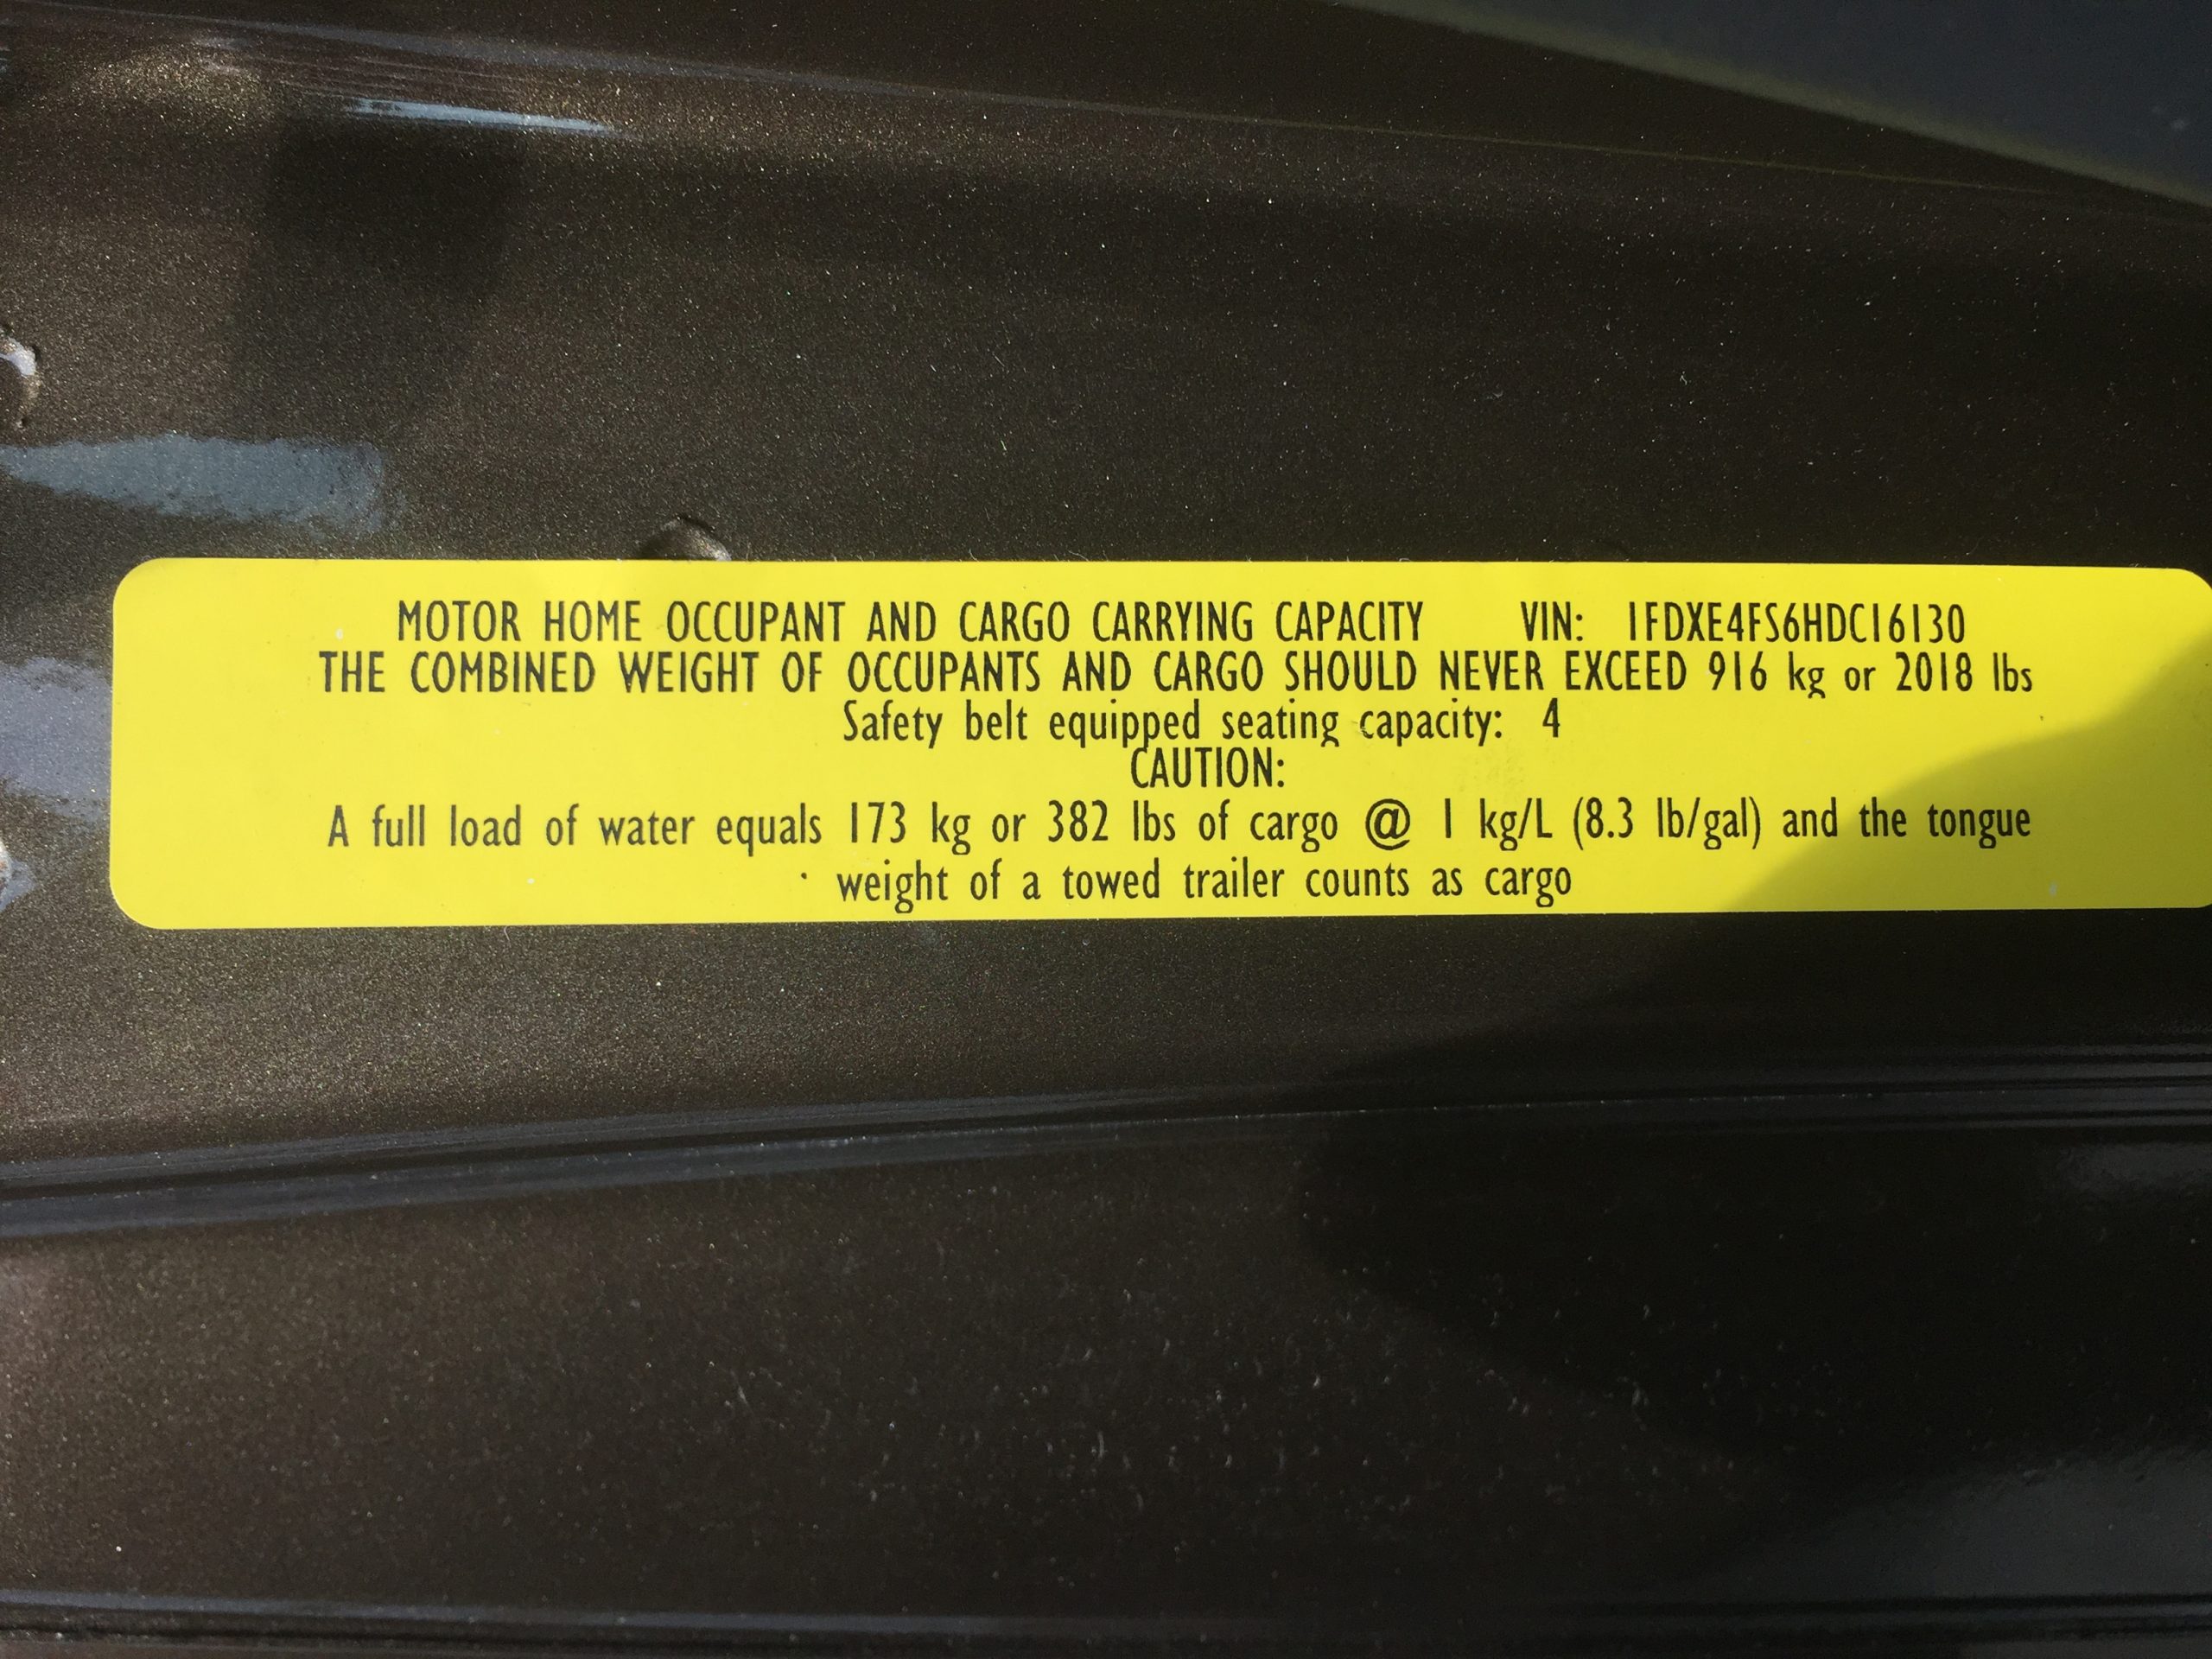
    Occupant and Cargo Carrying Capacity, or OCCC, has been used in motorized RVs since 2008. It includes the weight of occupants, water and propane as well. If you have a pair of 250 lb. persons in their coach, a full tank of water (100 gallons equals 834 lbs.) and 100 lbs. of propane on board you’ll already have 1,434 lbs. used up and you haven’t yet loaded up any food, clothing or recreational equipment. Some motorhomes may only have a couple of  thousand pounds of cargo capacity while some of the large tag axle coaches may have over 10,000 lbs. It’s definitely something you need to consider and compare to your traveling habits when buying a motorhome.

    National-Indoor-RV-Centers-blog-numbers-weight-ratings

    This example shows the OCCC as well as defining the weight of water used in its calculation.

    Gross Axle Weight Rating (GAWR)

    The Gross Axle Weight Rating, or GAWR, is a weight rating of an axle. You’ll have both a front axle GAWR as well as a rear axle GAWR. If you have a tag axle coach, you’ll also have a tag axle GAWR. Most of the time your two or three axle ratings will add up to the GVWR but that is not always the case. In some cases an axle may be rated higher but the GVWR of the coach itself will be less due to limitations of the suspension, brakes, etc.

    GAWRs come into play in regard to weight distribution. You may have a coach that is loaded up to the full GVWR, but if the cargo weight isn’t distributed evenly you may have one axle overweight while the other end of the coach is lightly loaded. This can lead to excessive stress on the suspension components and tires that are overloaded. This underscores the importance of having your motorhome weighed on scales when fully loaded. Ideally, you should have a 4-corner weighing at a facility such as National Indoor RV Centers. That will show you if you have any side-to-side imbalance where you may need to shift some cargo from one side to the other. But if that’s not possible, at least have a per-axle scale reading taken at a truck stop.

    As a rule of thumb, single rear axle coaches tend to have most of the weight on the rear axle. The Federal Bridge Law limited the maximum weight of any axle to 20,000 lbs. This caused issues with the larger 37-40’ diesel pushers because all of the new amenities and ceramic tile floors added too much weight to the rear axle, leaving the front axle lightly loaded. Fortunately, the NHTSA changed the rules in 2008, allowing motorhomes to have higher axle rating. Currently most of the larger single-axle diesel pushers are equipped with upgraded 24K rated axles to restore some cargo capacity. If you have a tag axle coach, just the opposite is true. The addition of the tag axle gives you greater cargo capacity so you’ll be hard pressed to overload the rear axles on a tag axle coach. But the tag axle also acts as a fulcrum, shifting more weight to the front steer axle, which can cause it to exceed its GAWR. When looking to buy a tag axle coach, pay close attention to the GAWR on the front axle.,

    National-Indoor-RV-Centers-blog-numbers-weight-ratings

    A typical placard, this one from a 2007 Allegro Bus, showing GVWR, GCWR, CCC and SCWR.

    RV Hitch Rating

    Your trailer hitch should be stamped with a pair of ratings, although you might have crawl under the hitch to find it. The first is the tongue weight and the second is the rating of how much you can pull. Tongue weights aren’t a problem if you are flat towing with a towbar because the towbar merely acts as a connector between the two vehicles and the only weight that is applied to the motorhome is part of the weight of just the towbar. If you have a trailer you will need to check  the tongue weight of that trailer when loaded to ensure that it doesn’t exceed what is stamped on the hitch. You may have to shift some of the trailer’s cargo rearward if excessive. If you utilize a hitch mounted carrier for a motorcycle lift, you’ll also need to ensure that your hitch is rated to carry that additional weight.

    Gross Combined Weight Rating (GCWR)

    The Gross Combined Weight Rating, or GCWR, is the total weight of the combination of motorhome and anything it is towing. The GCWR will exceed the GVWR by anywhere from 3,000 to 10,000 lbs. It’s not strictly an indication of how much you can tow but it is designed to prevent damage to the engine and its cooling system, the transmission and other components. If you are loaded up to the full GVWR when traveling, the difference between the GCWR and GVWR will be your maximum towing ability. If you are traveling at less than your GVWR, you can add those additional pounds to your towing rating. However, your ability to tow is limited by two factors.

    First of all, the motorhome’s trailer hitch has a rating which you cannot exceed – so your towing capacity will be the least of either the hitch rating or the difference between the GCWR and GVWR. It’s like a chain where the weakest length determines how much the chain can lift. You may have a 5,000 lb. hitch with an 8,000 lb. GCWR/GVWR delta so you’ll be limited to 5,000 lbs. because the trailer hitch is the weakest point. Conversely, you may have a heavy-duty 20,000 lb. hitch on that vehicle, but you’ll still be limited to the 8,000 lb. delta between the GCWR and GVWR

    Lastly, the GCWR is based upon having trailer brakes on your trailer. The brakes on the motorhome are not designed to safely bring your coach to a stop in the required distance when towing. Most RV owners prefer to tow four down with a tow bar so you will need to use a supplemental braking system with your towed vehicle.

    Maximum Inflation Pressure (MIP)

    Your tires have a Maximum Inflation Pressure, or MIP. The sidewall of the tire will designate the maximum inflation pressure as well how many pounds that tire is capable of supporting. Again, this is why it’s important to have your coach weighed on a four corner or per axle basis when fully loaded. Your tire manufacturer will have an inflation table for each specific size or  tire that they make. This chart will tell you what the cold inflation pressure, or CIP, should be  for that weight rating.

    Once you have your coach weighed you can determine how much pressure is needed in your tires. If the tire is designed for more weight than what you will be carrying you don’t have to inflate it to the maximum inflation pressure. Reducing the pressure will give you a better ride and improve traction. It’s always good to run about 5 psi over what the chart states though to allow for any changes in the future. It also allows for a slight weight imbalance between the left and right tires. You must always use the same pressure on both tires on the same axle though, but you can have different pressures between the steer and drive axles. Always keep a minimum pressure of 85 PSI on large drive or tag axles tires to ensure the tire’s bead stays seated on the wheel rim.

    By ensuring that all of these ratings are not exceeded you’ll be sure that you can safely operate your motorhome. Following is a list of links to inflation charts for RV tires from some of the major manufacturers:

    National Indoor RV Centers blogger Mark Quasius profile picture

    Mark Quasius is the founder of RVtechMag.com, the past Midwest editor of RV Magazine, writes for numerous RV-related publications and a regular Contributor to FMCA’s Family RVing Magazine. Mark and his wife Leann travel in their 2016 Entegra Cornerstone.

    RV Sanitation Systems

    Understanding your RV sanitation systems can prevent some foul problems

    Motorhomes are self-contained with a fresh water system as well as holding tanks to handle waste water from the various plumbing fixtures. While dealing with waste water isn’t the most glamorous part of owning a motorhome, it is nonetheless an important part. Unlike a residential plumbing system like in your home, an RV has a number of things that have to be kept in mind and taken care of or else you’ll be in for a few messy and smelly problems. Fortunately, it’s not that bad if you understand how things work and pick up a few tips to help keep them working as it should. Let’s first look at how an RV’s waste water system is constructed.

    Your RV Has Two Water Systems – Not One

    To begin with, there are really two systems, not just one. The gray water system handles the waste water from the sink drains, shower drain and dishwasher, if equipped. The black water system handles the waste from the toilets. This method provides for two separate holding tanks, one to hold the black water and one to hold the gray. The reasoning behind this began in the early days of RV use. Drainage from sinks and showers contributed more volume than waste water from the toilets and needed to be drained more frequently. In addition, the gray water was relatively clean and could oftentimes be allowed to drain onto the ground, although many locations no longer allow that due to local public health laws. On the other hand, the black water wasn’t very sanitary and needed to be disposed of in a proper dump station or sewer connection. Having the two separate tanks made it possible to have multiple dump cycles rather than dumping all the waste at the same time. Another benefit to the two-tank system is that the gray water tank is relatively clean because it’s mostly soapy water while the human waste and toilet paper found in the black tank can cake up inside the tank walls, causing tank level sensors to foul and give errant readings.

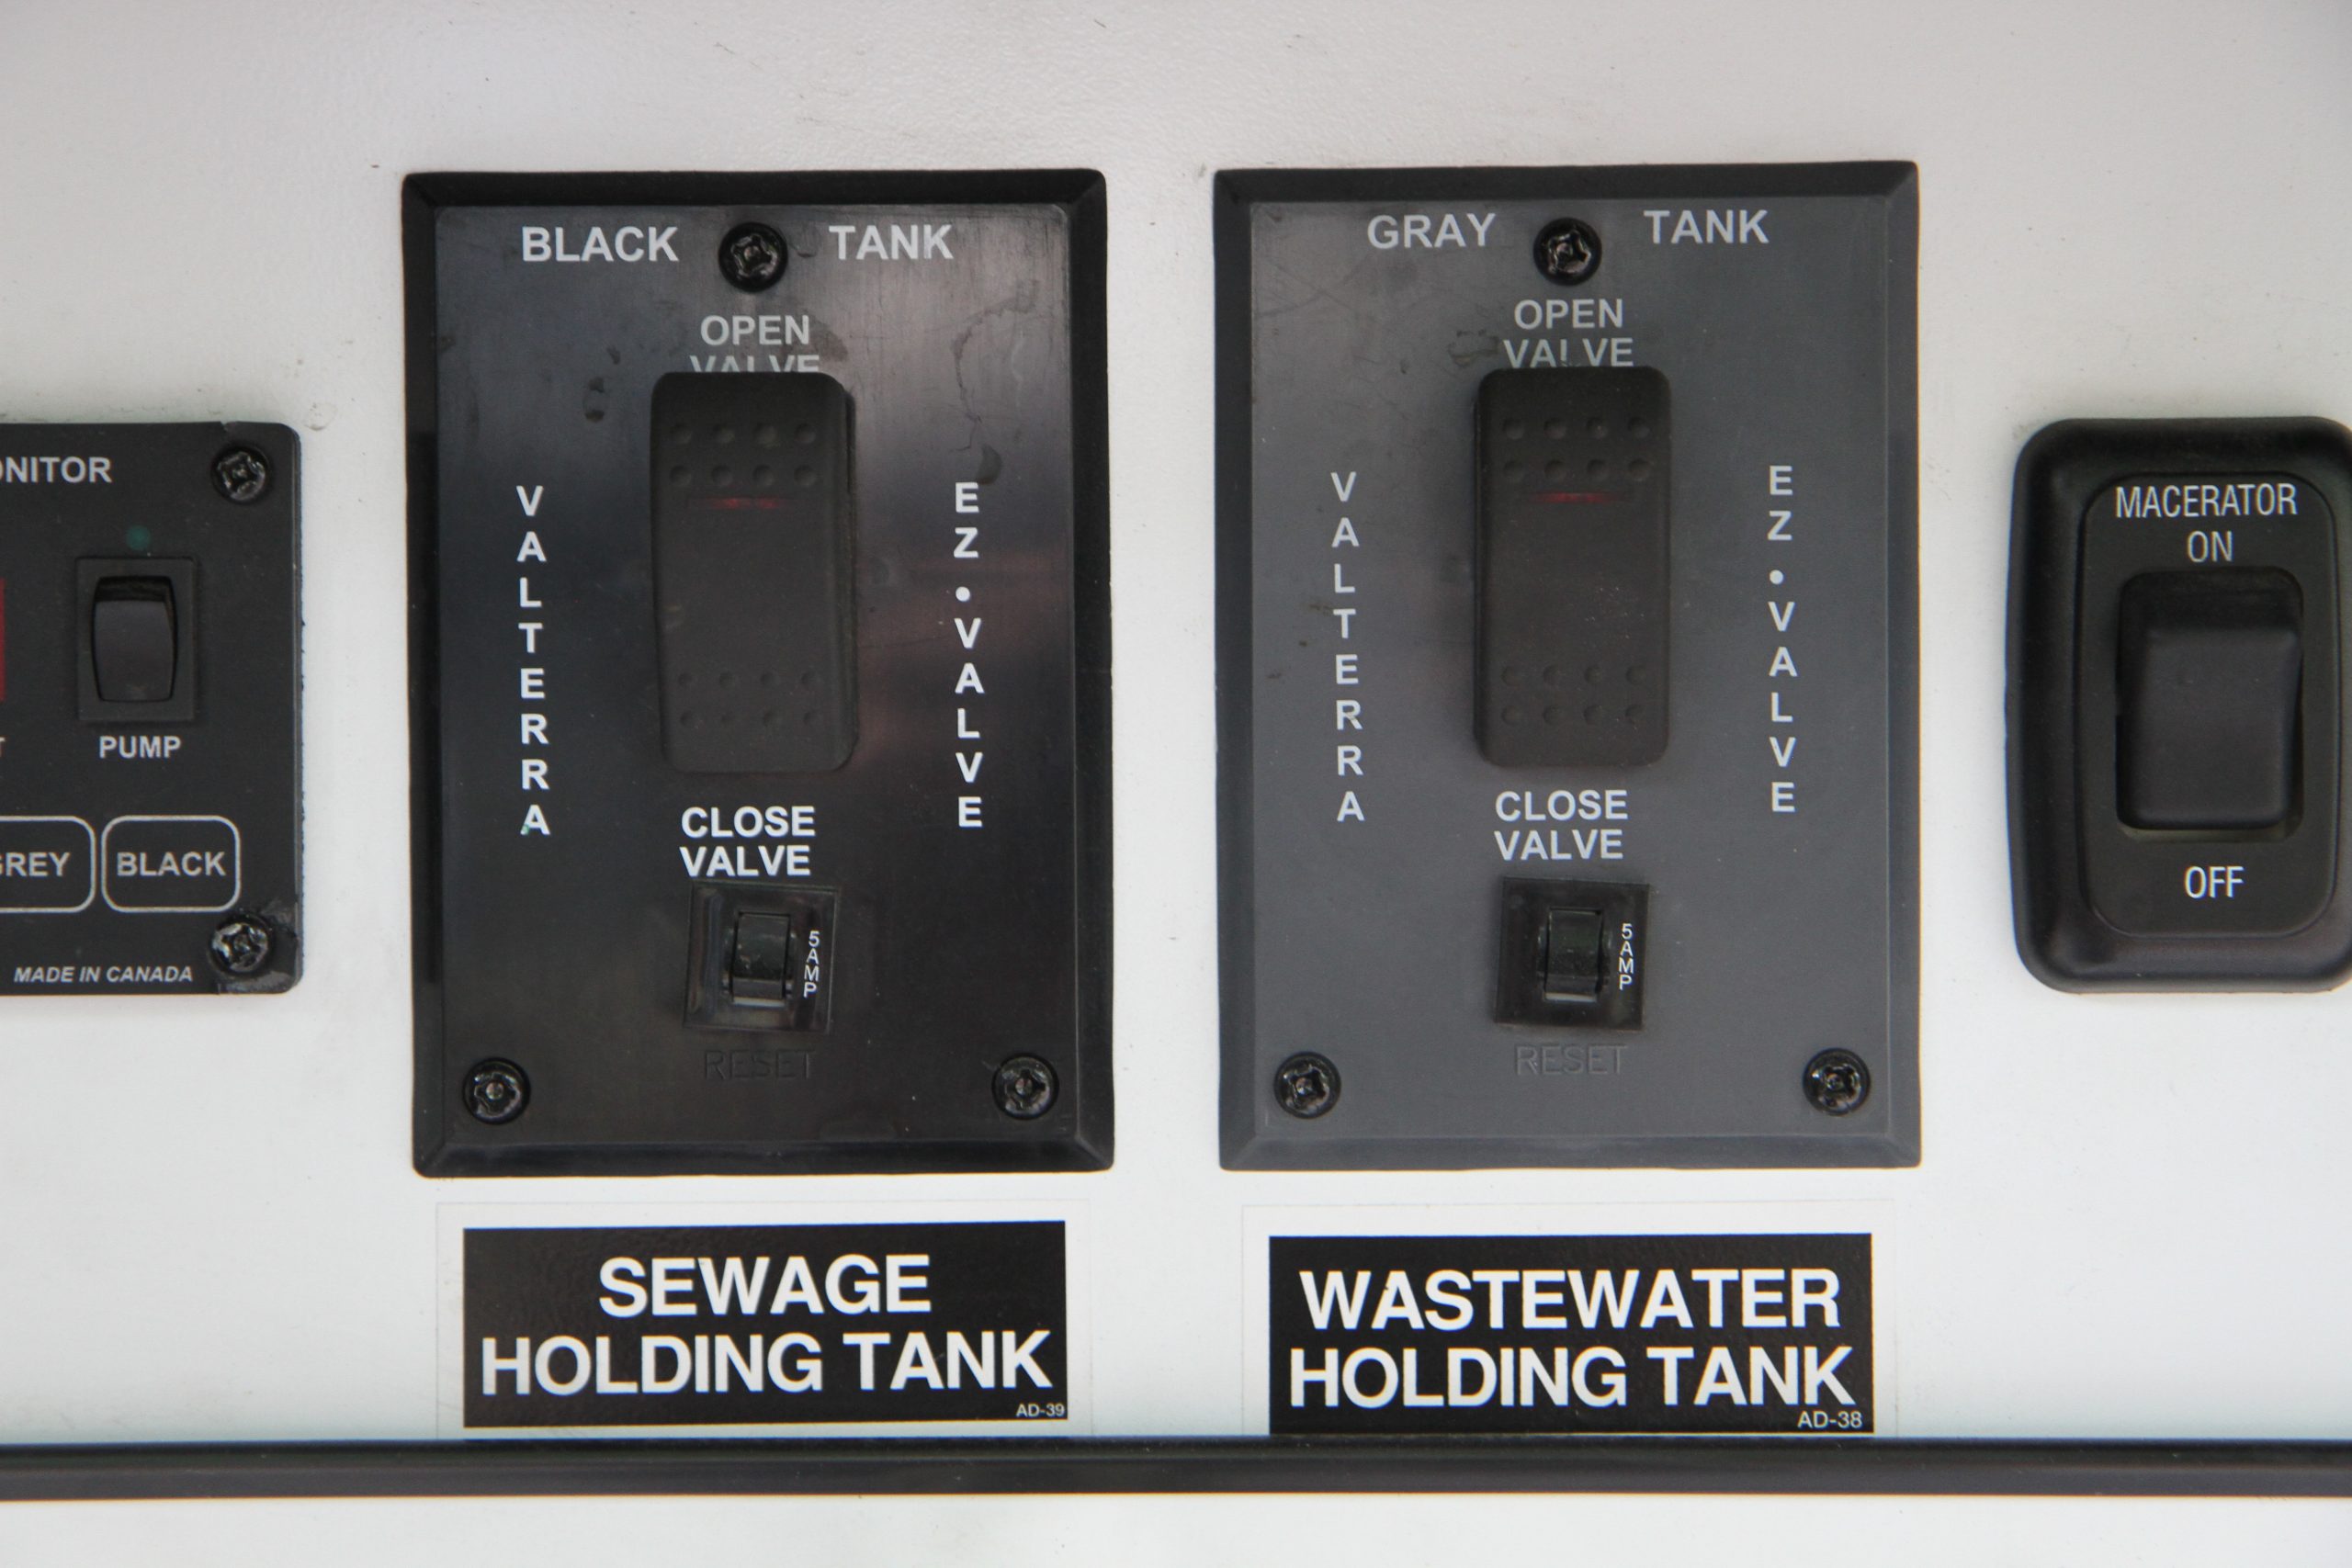
    The vast majority of motorhomes have a single sewer connection used to connect the sewer hose to the holding tanks. A pair of dump valves, one for each holding tank, connects via a wye connector to this common outlet. These valves are blade type valves to prevent clogging and can be either manually operated or electrically operated with a remote switch.

    National-Indoor-RV-Centers-blog-RV-sanitation-systems-motorhome-sewer-tanks

    A set of remote electric dump valve switches in our Entegra Coach.

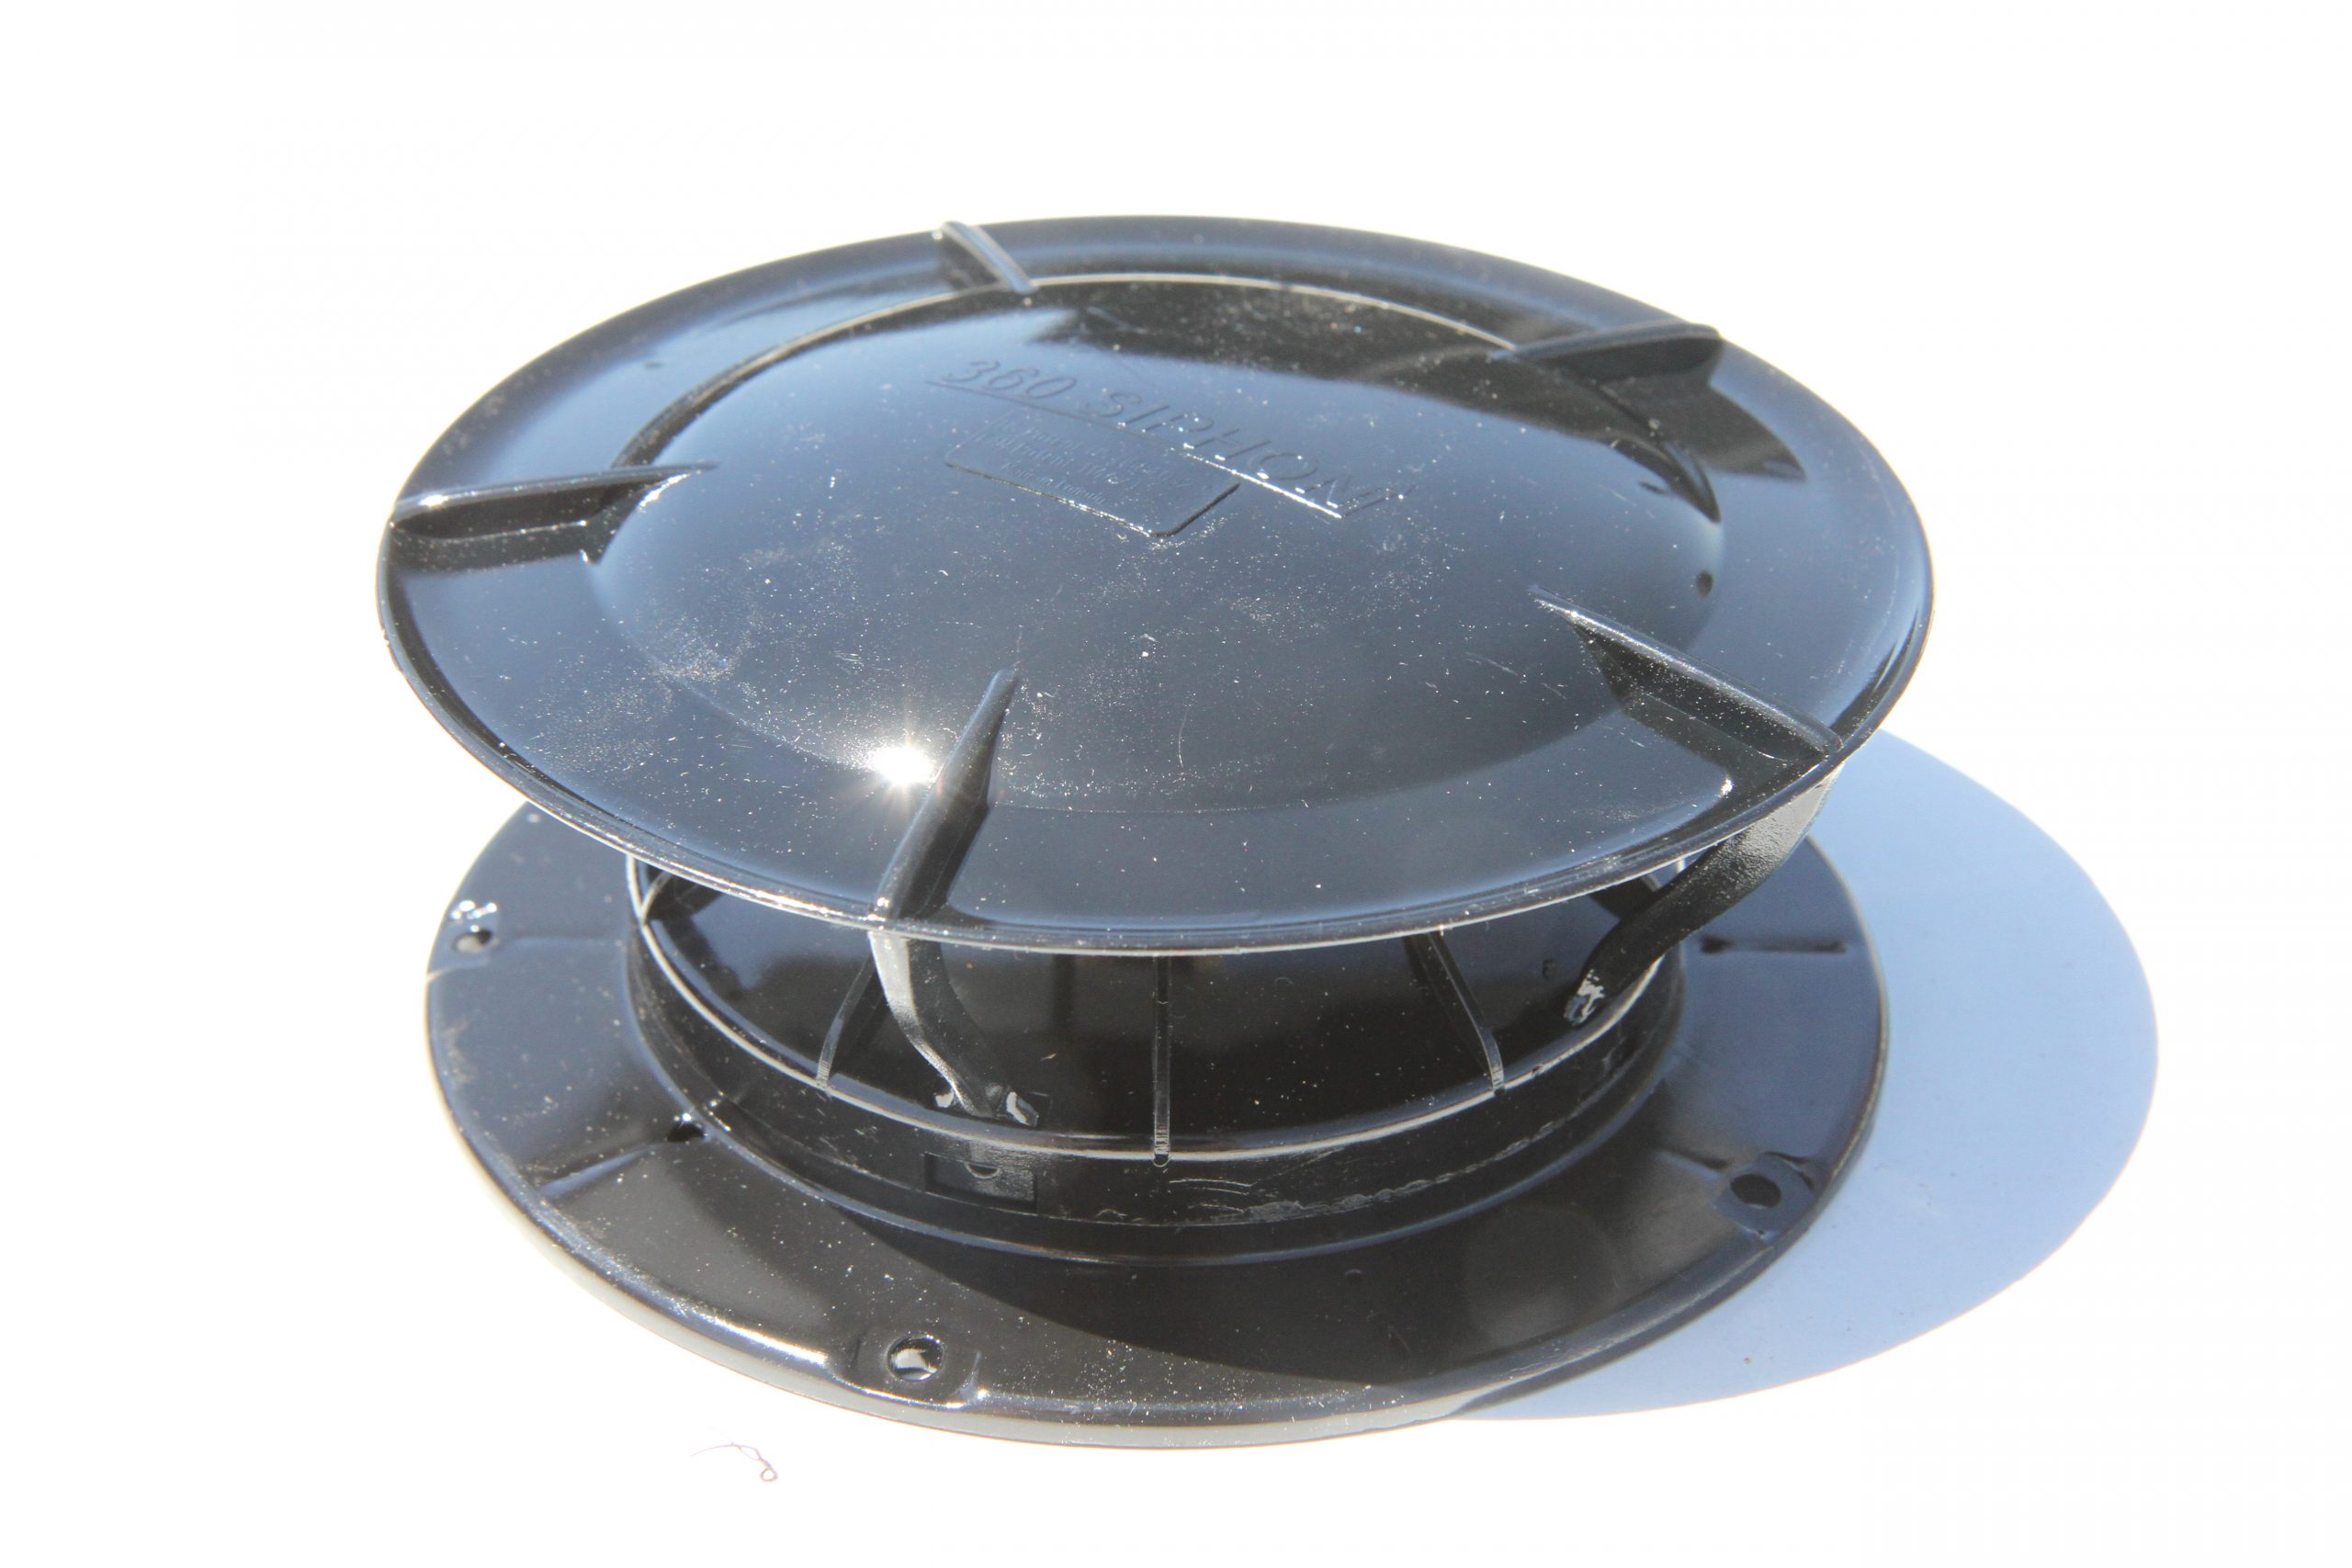
    Each tank is connected to a vent stack that extends out of the roof to eliminate a vacuum from forming in the tank when draining and expansion as the tank is being used. It also allows for odors to vent from the tank. You may have a pair of vent stacks for the two holding tanks, or they may be tee’d together into one common vent stack. A hood is applied to the vent stack to prevent rainwater or debris from entering the tanks via the vent stack. These hoods can be simple rain caps or venturi style fittings that allow the wind to help ventilate the tanks.

    National-Indoor-RV-Centers-blog-RV-sanitation-systems-motorhome-sewer-tanks-rooftop-vent

    Rooftop vents, such as this 360 Siphon, are required to ventilate the holding tanks and provide makeup air when draining the tanks.

    Sensors

    Of course, you’d never know when you have to dump your holding tanks without some kind of indicator. Early tank designs used three sensor probes that were inserted into the tank. One was located at the one-third level, another at the two-thirds level and one at the very top of the tank. These sensors were inserted through the sidewall of the tank and would conduct electricity when wet. A wiring harness connected them to a monitor panel inside the coach to display the tank levels. If the tank was full, all four LEDs would illuminate. If the fluid level in the tank reached the two-thirds level, only three LEDs would light up. At one-third, only two would light up and if below one-third, only the bottom “empty” LED would be lit.

    This system worked for years but had a few drawbacks. For one, the sensors easily fouled and gave false readings, so it was imperative to keep the tanks as clean as possible. Another concern was their accuracy. If the tank level was just below the two-thirds sensor, it would register one-third full on the display. You might think you have plenty of room left in the tank but all you had to do was add a little bit of water to the tank and it instantly jumped to two-thirds full, so you never really knew exactly how full the tank was.

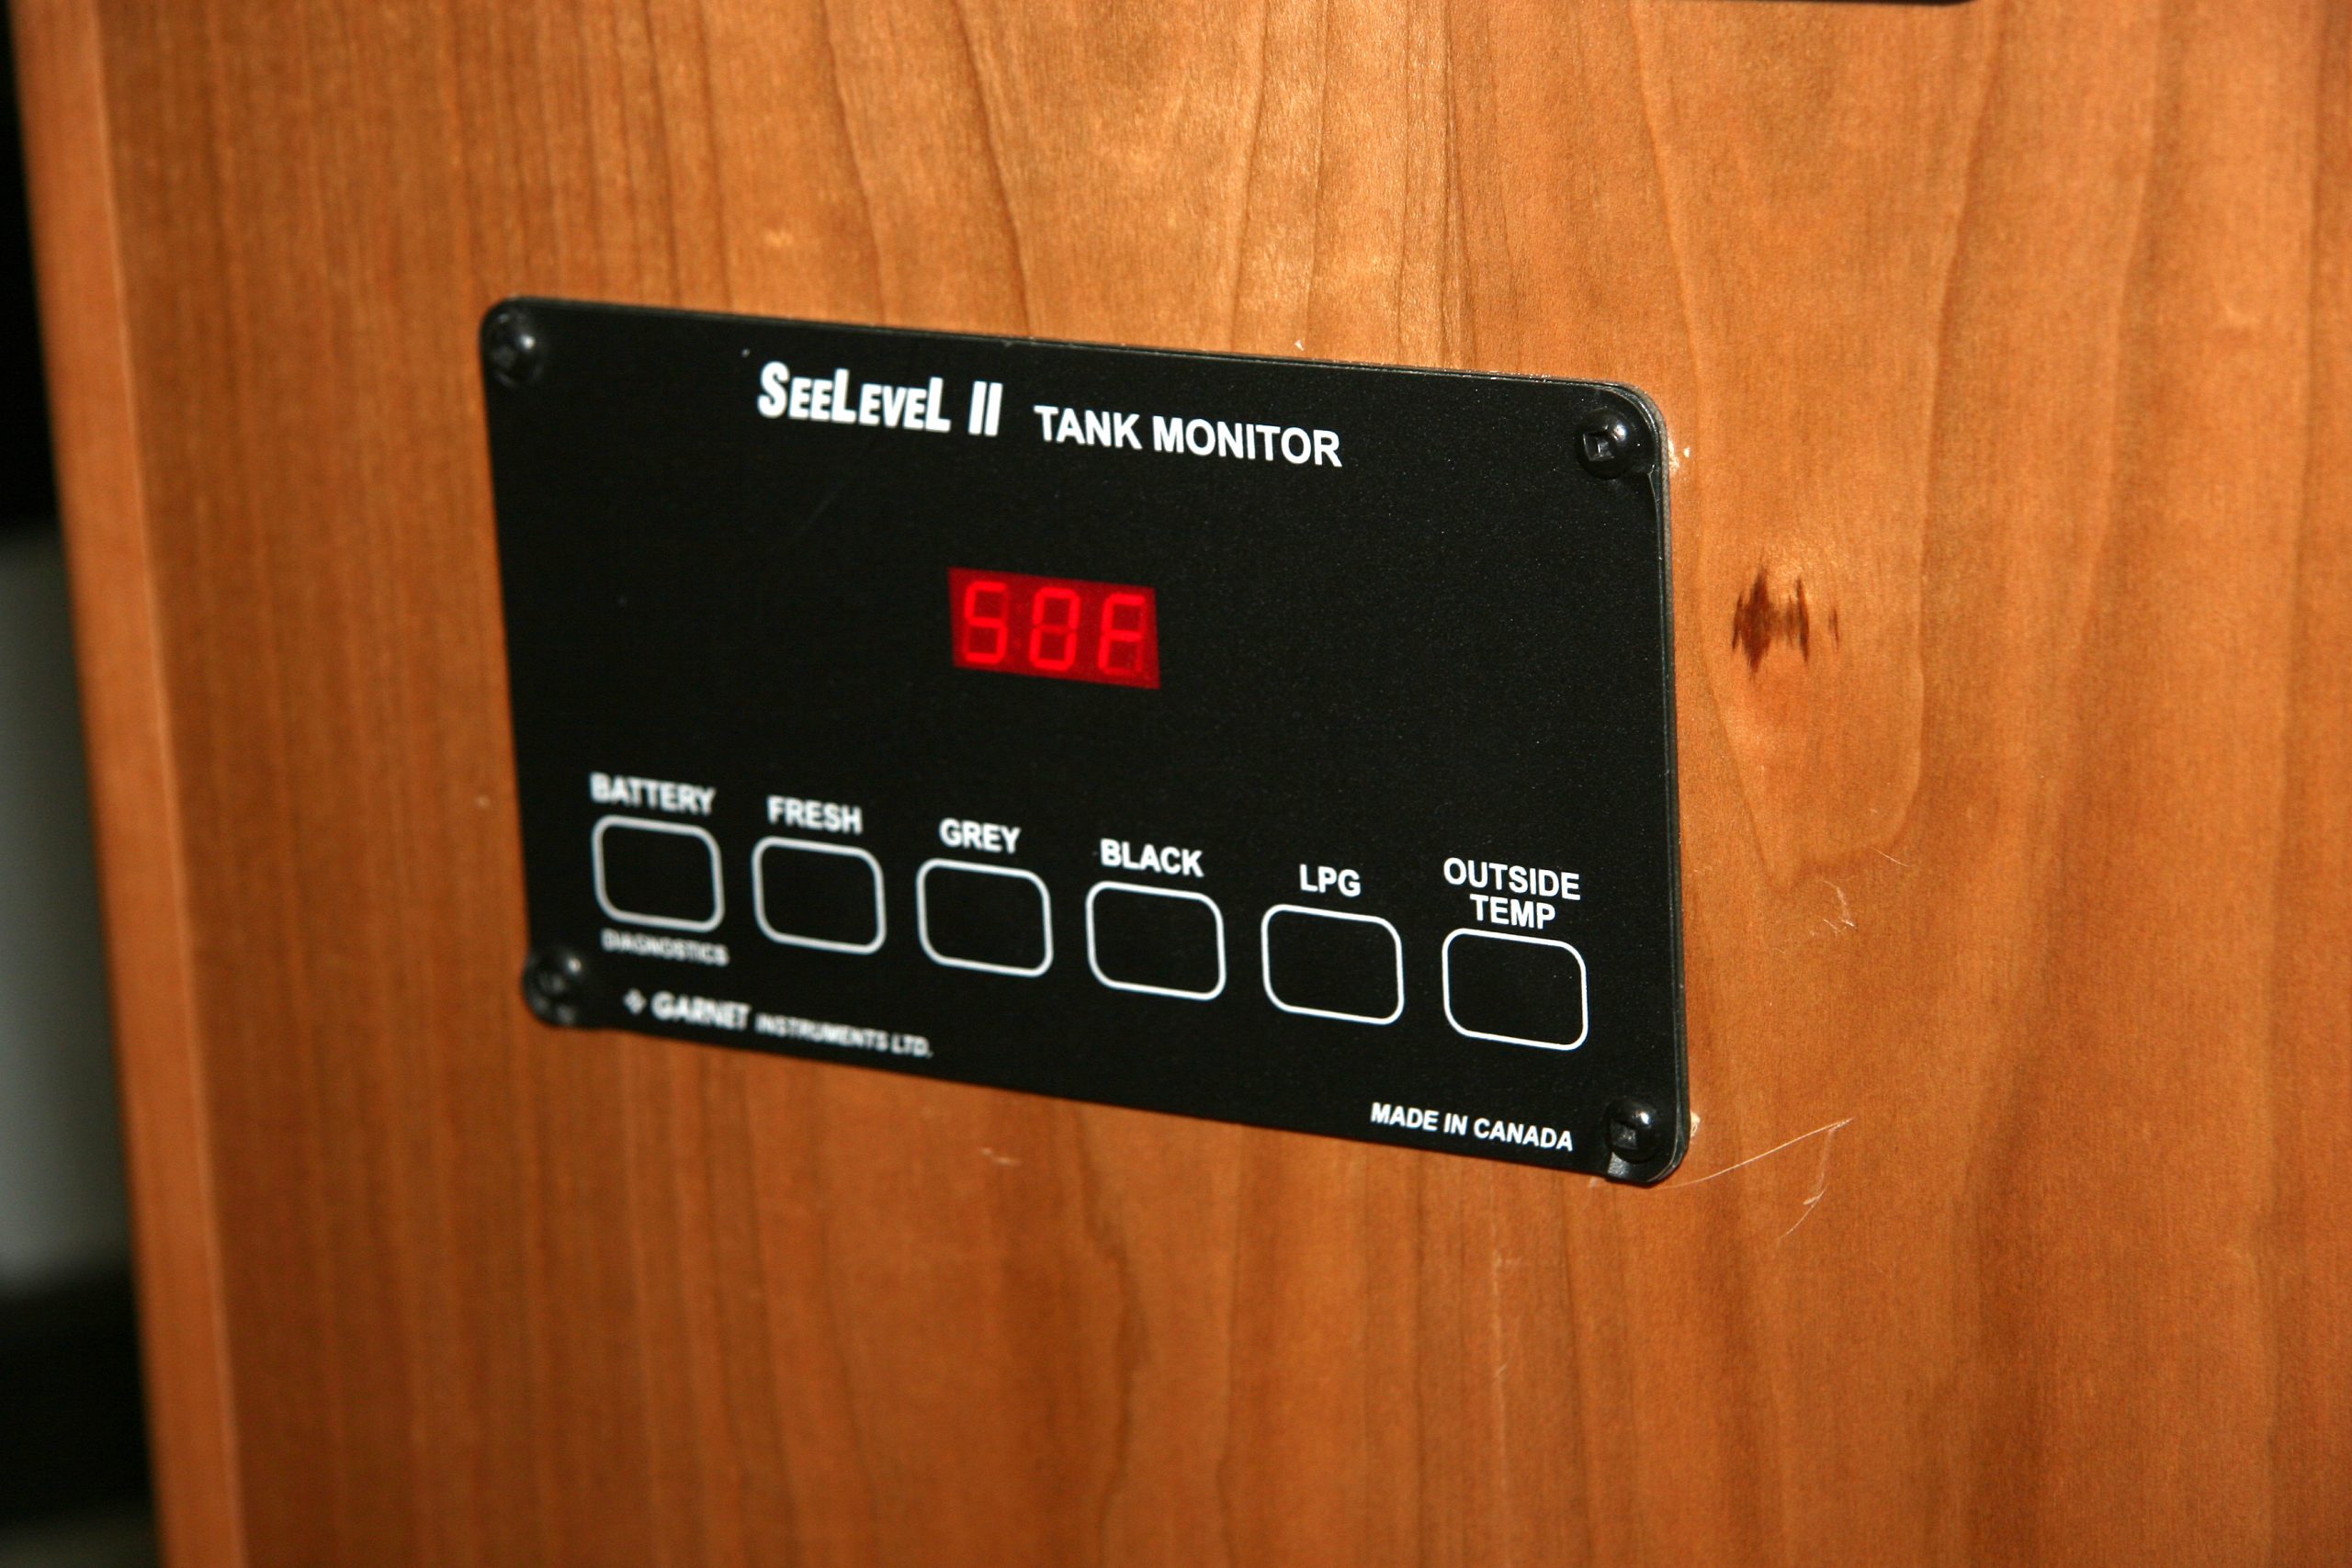
    The next big improvement was the SeeLevel tank measurement system. This system used external sensors that used adhesive to attach to the outside of the tank. These sensors were full length and used radio waves to determine the precise level of the tank’s contents.

    National-Indoor-RV-Centers-blog-RV-sanitation-systems-motorhome-sewer-tanks-seelevel
    National-Indoor-RV-Centers-blog-RV-sanitation-systems-motorhome-sewer-tanks

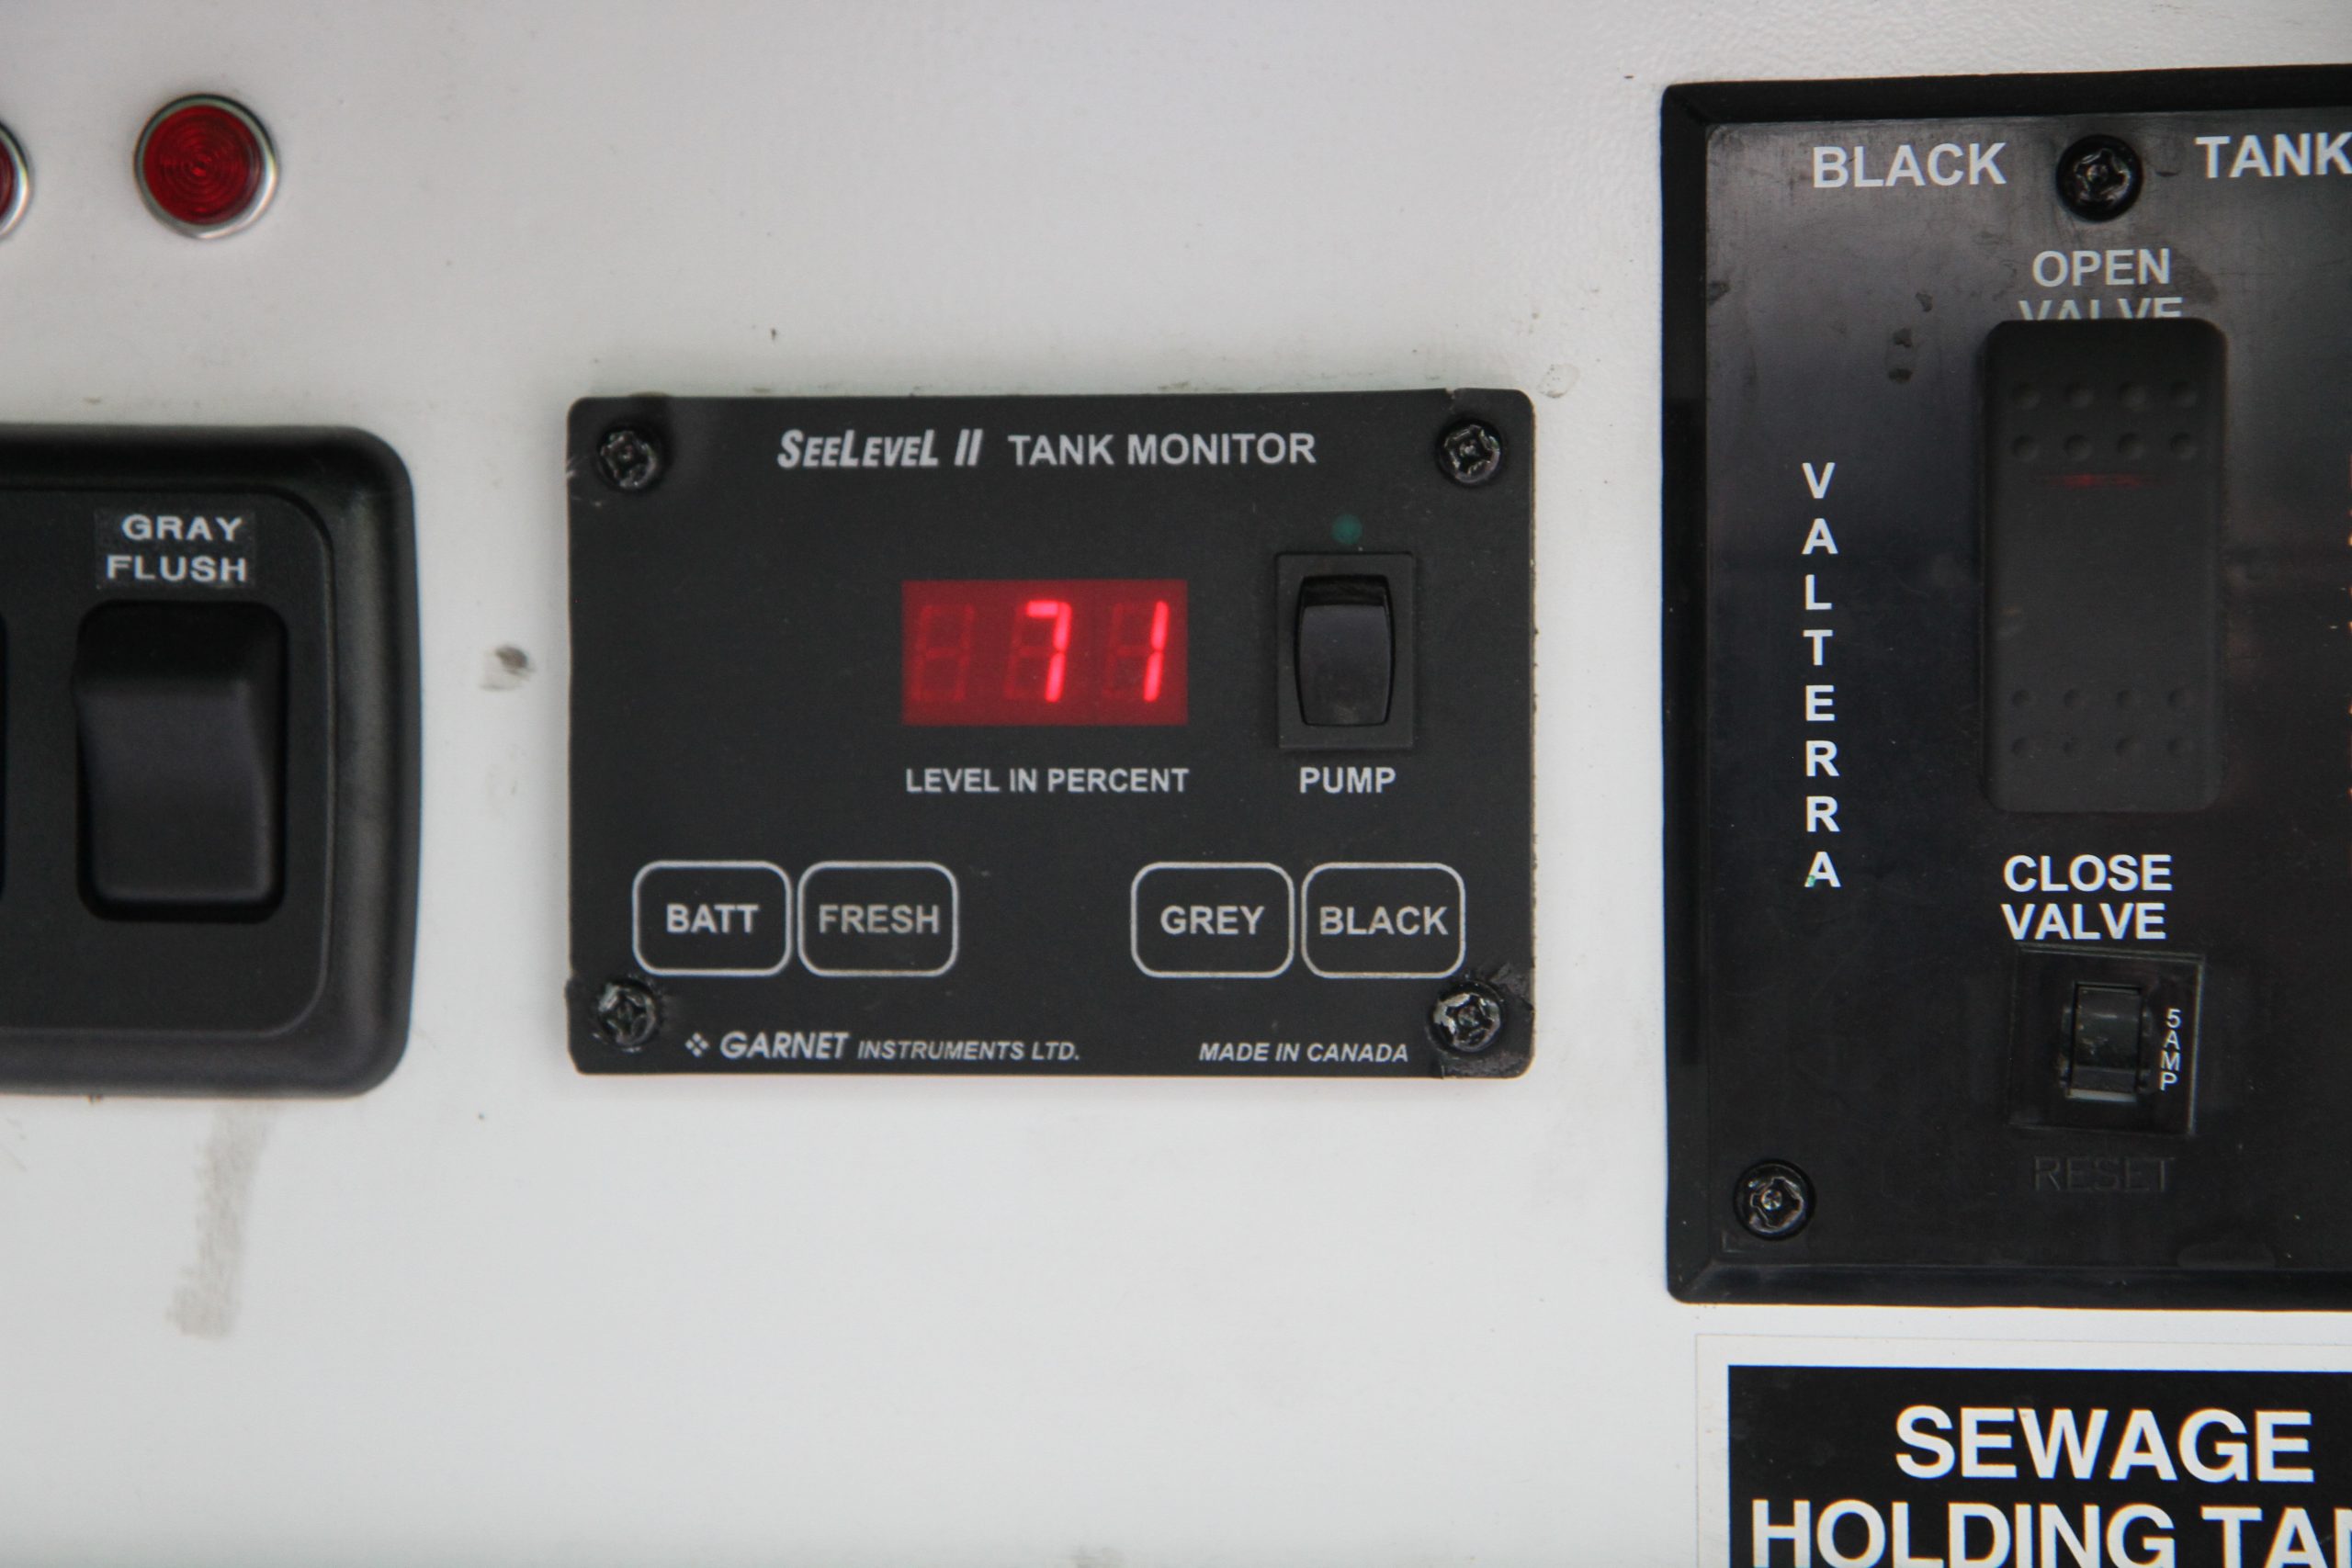
    The SeeLevel system uses digital sensors that are externally mounted to the tank and displays the levels in 2% increments on a digital display within the coach.

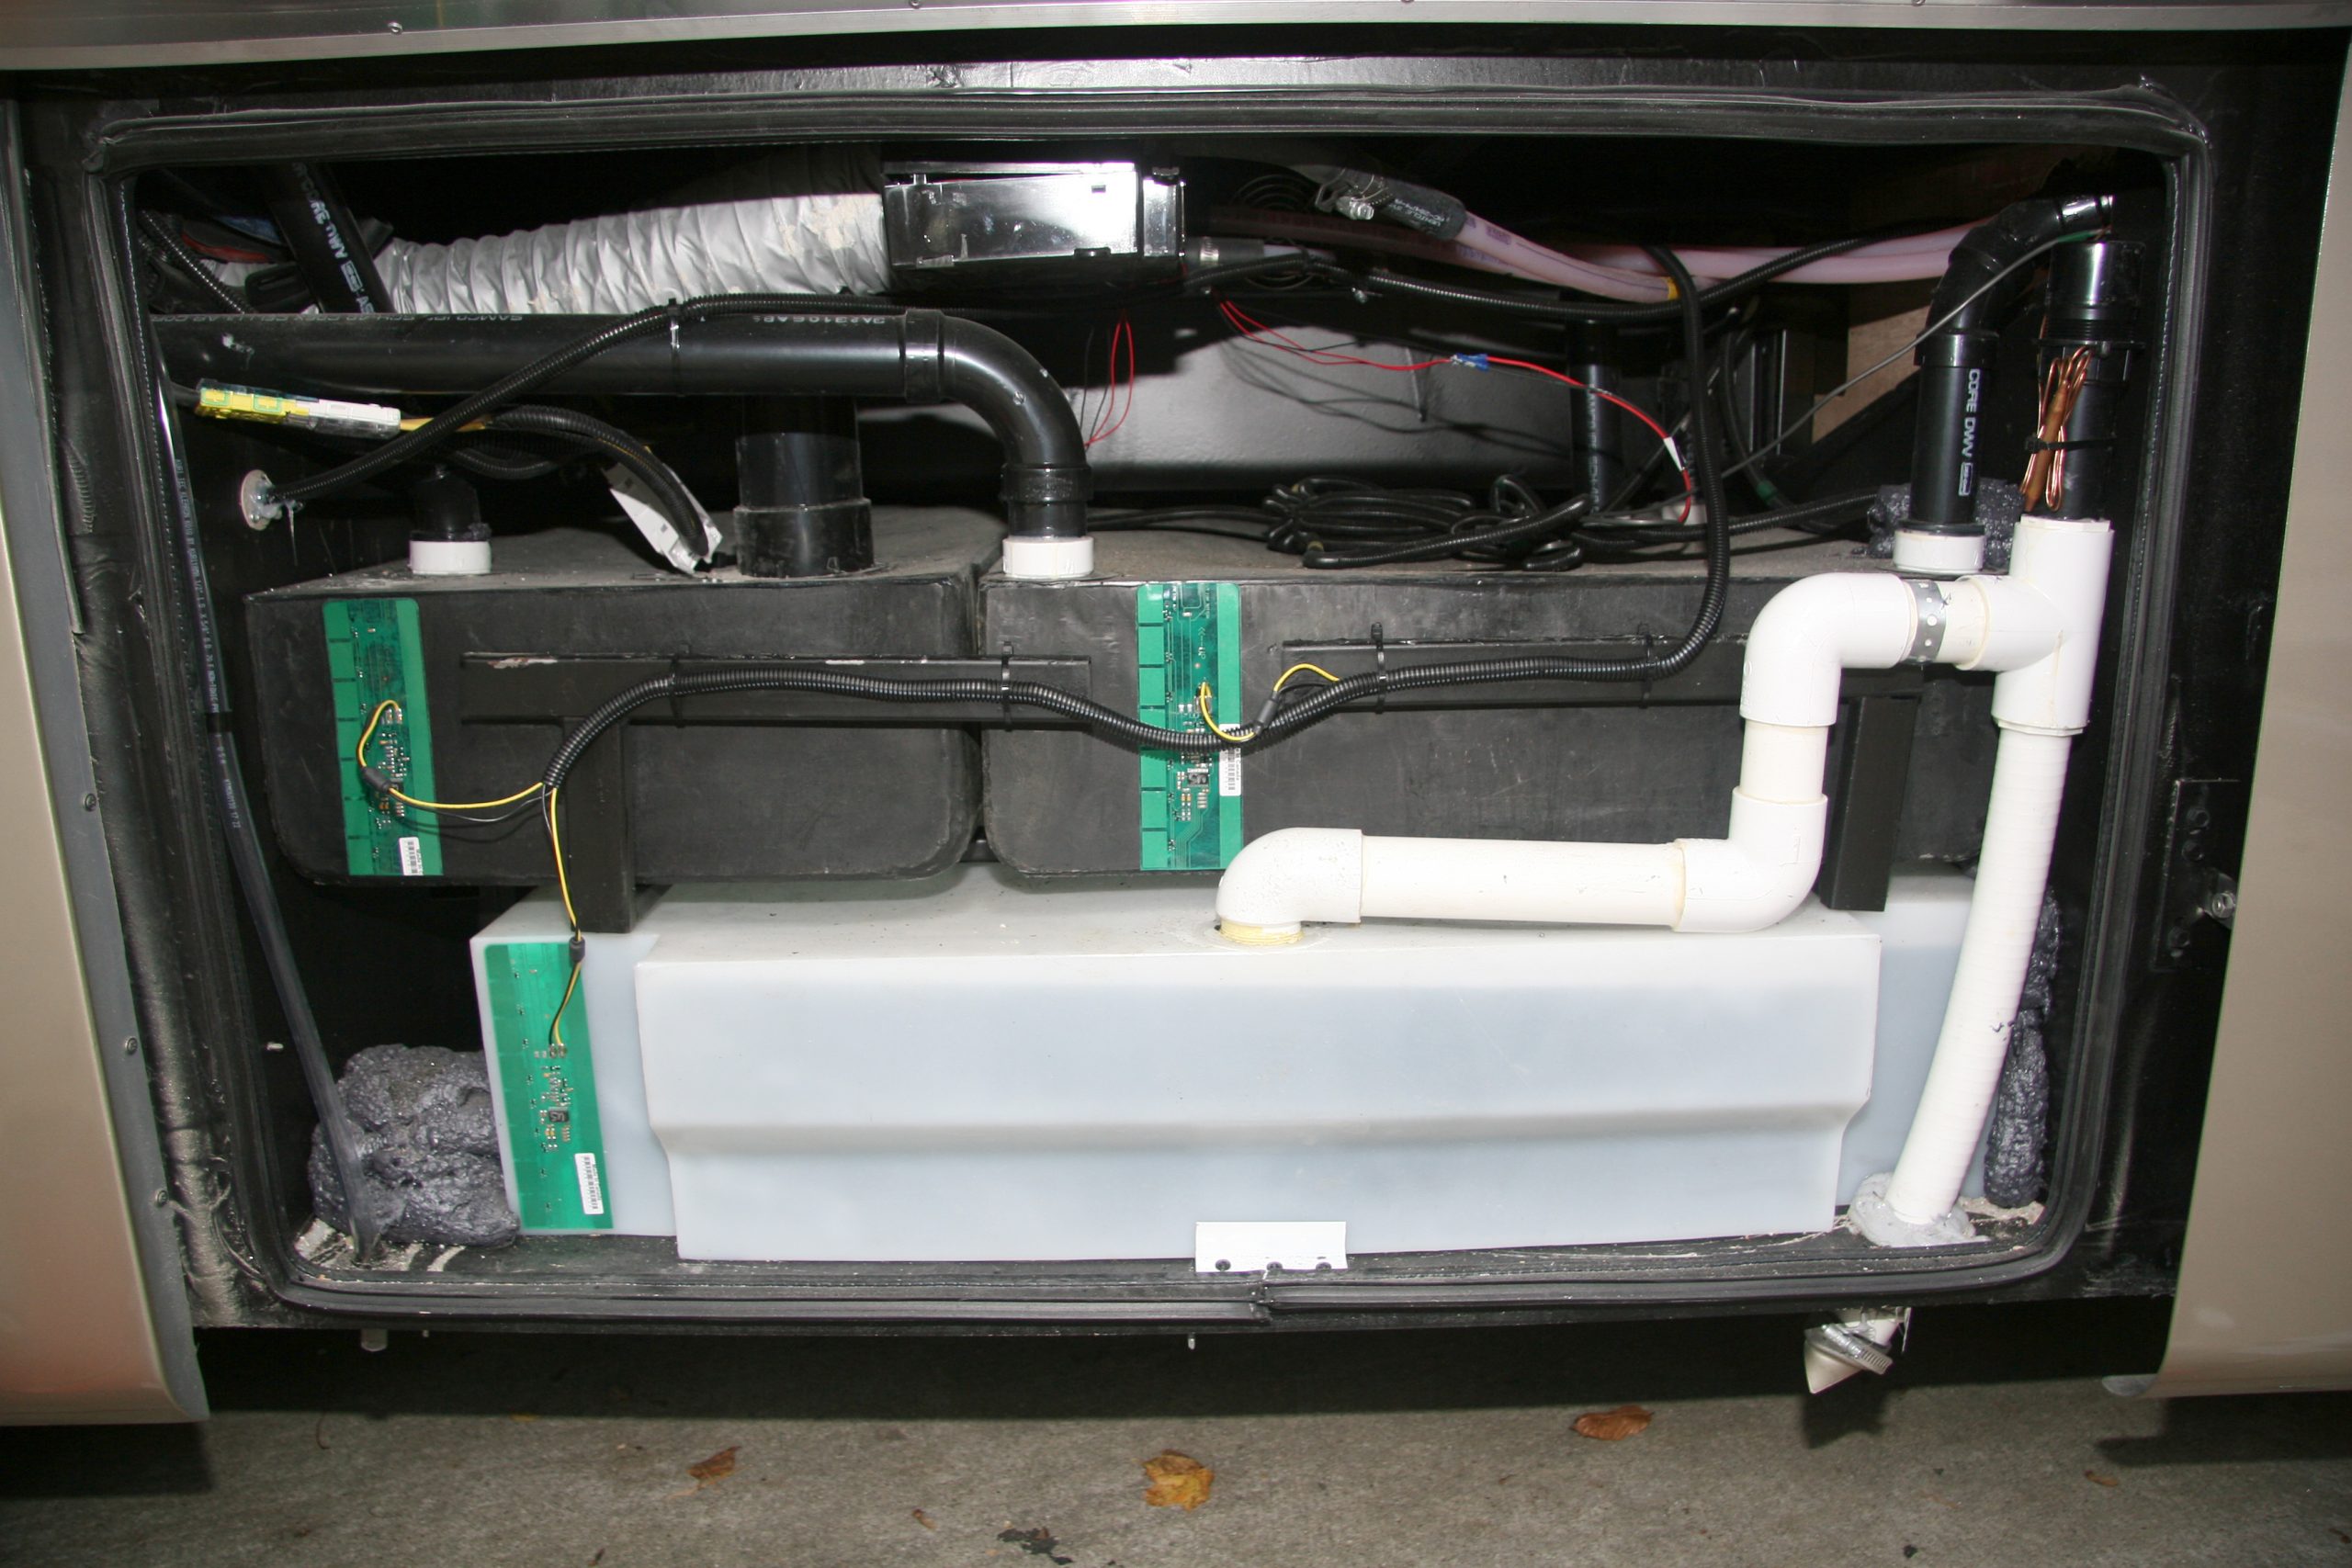
    A second SeeLevel display panel can be mounted in the wet bay to monitor tank levels when draining or filling the tanks.

    In addition, the external mount prevented the sensor from fouling. The only time an errant reading was displayed was if the inside tank wall was seriously caked up and needed a major cleaning. The display panel inside the coach was a digital display that reported in actual percentages, usually with 2-4% accuracy. The displays were available in multiple configurations that could cover the LP tank level if needed as well as switches for water pumps. Multiple displays meant you could have one display inside the coach with a second display in the wet bay. Eventually this sensor technology also found its way into the multiplex wiring systems, such as Firefly’s VegaTouch system, so that it could be displayed on their central touch screen panel.

    National-Indoor-RV-Centers-blog-RV-sanitation-systems-motorhome-sewer-tanks

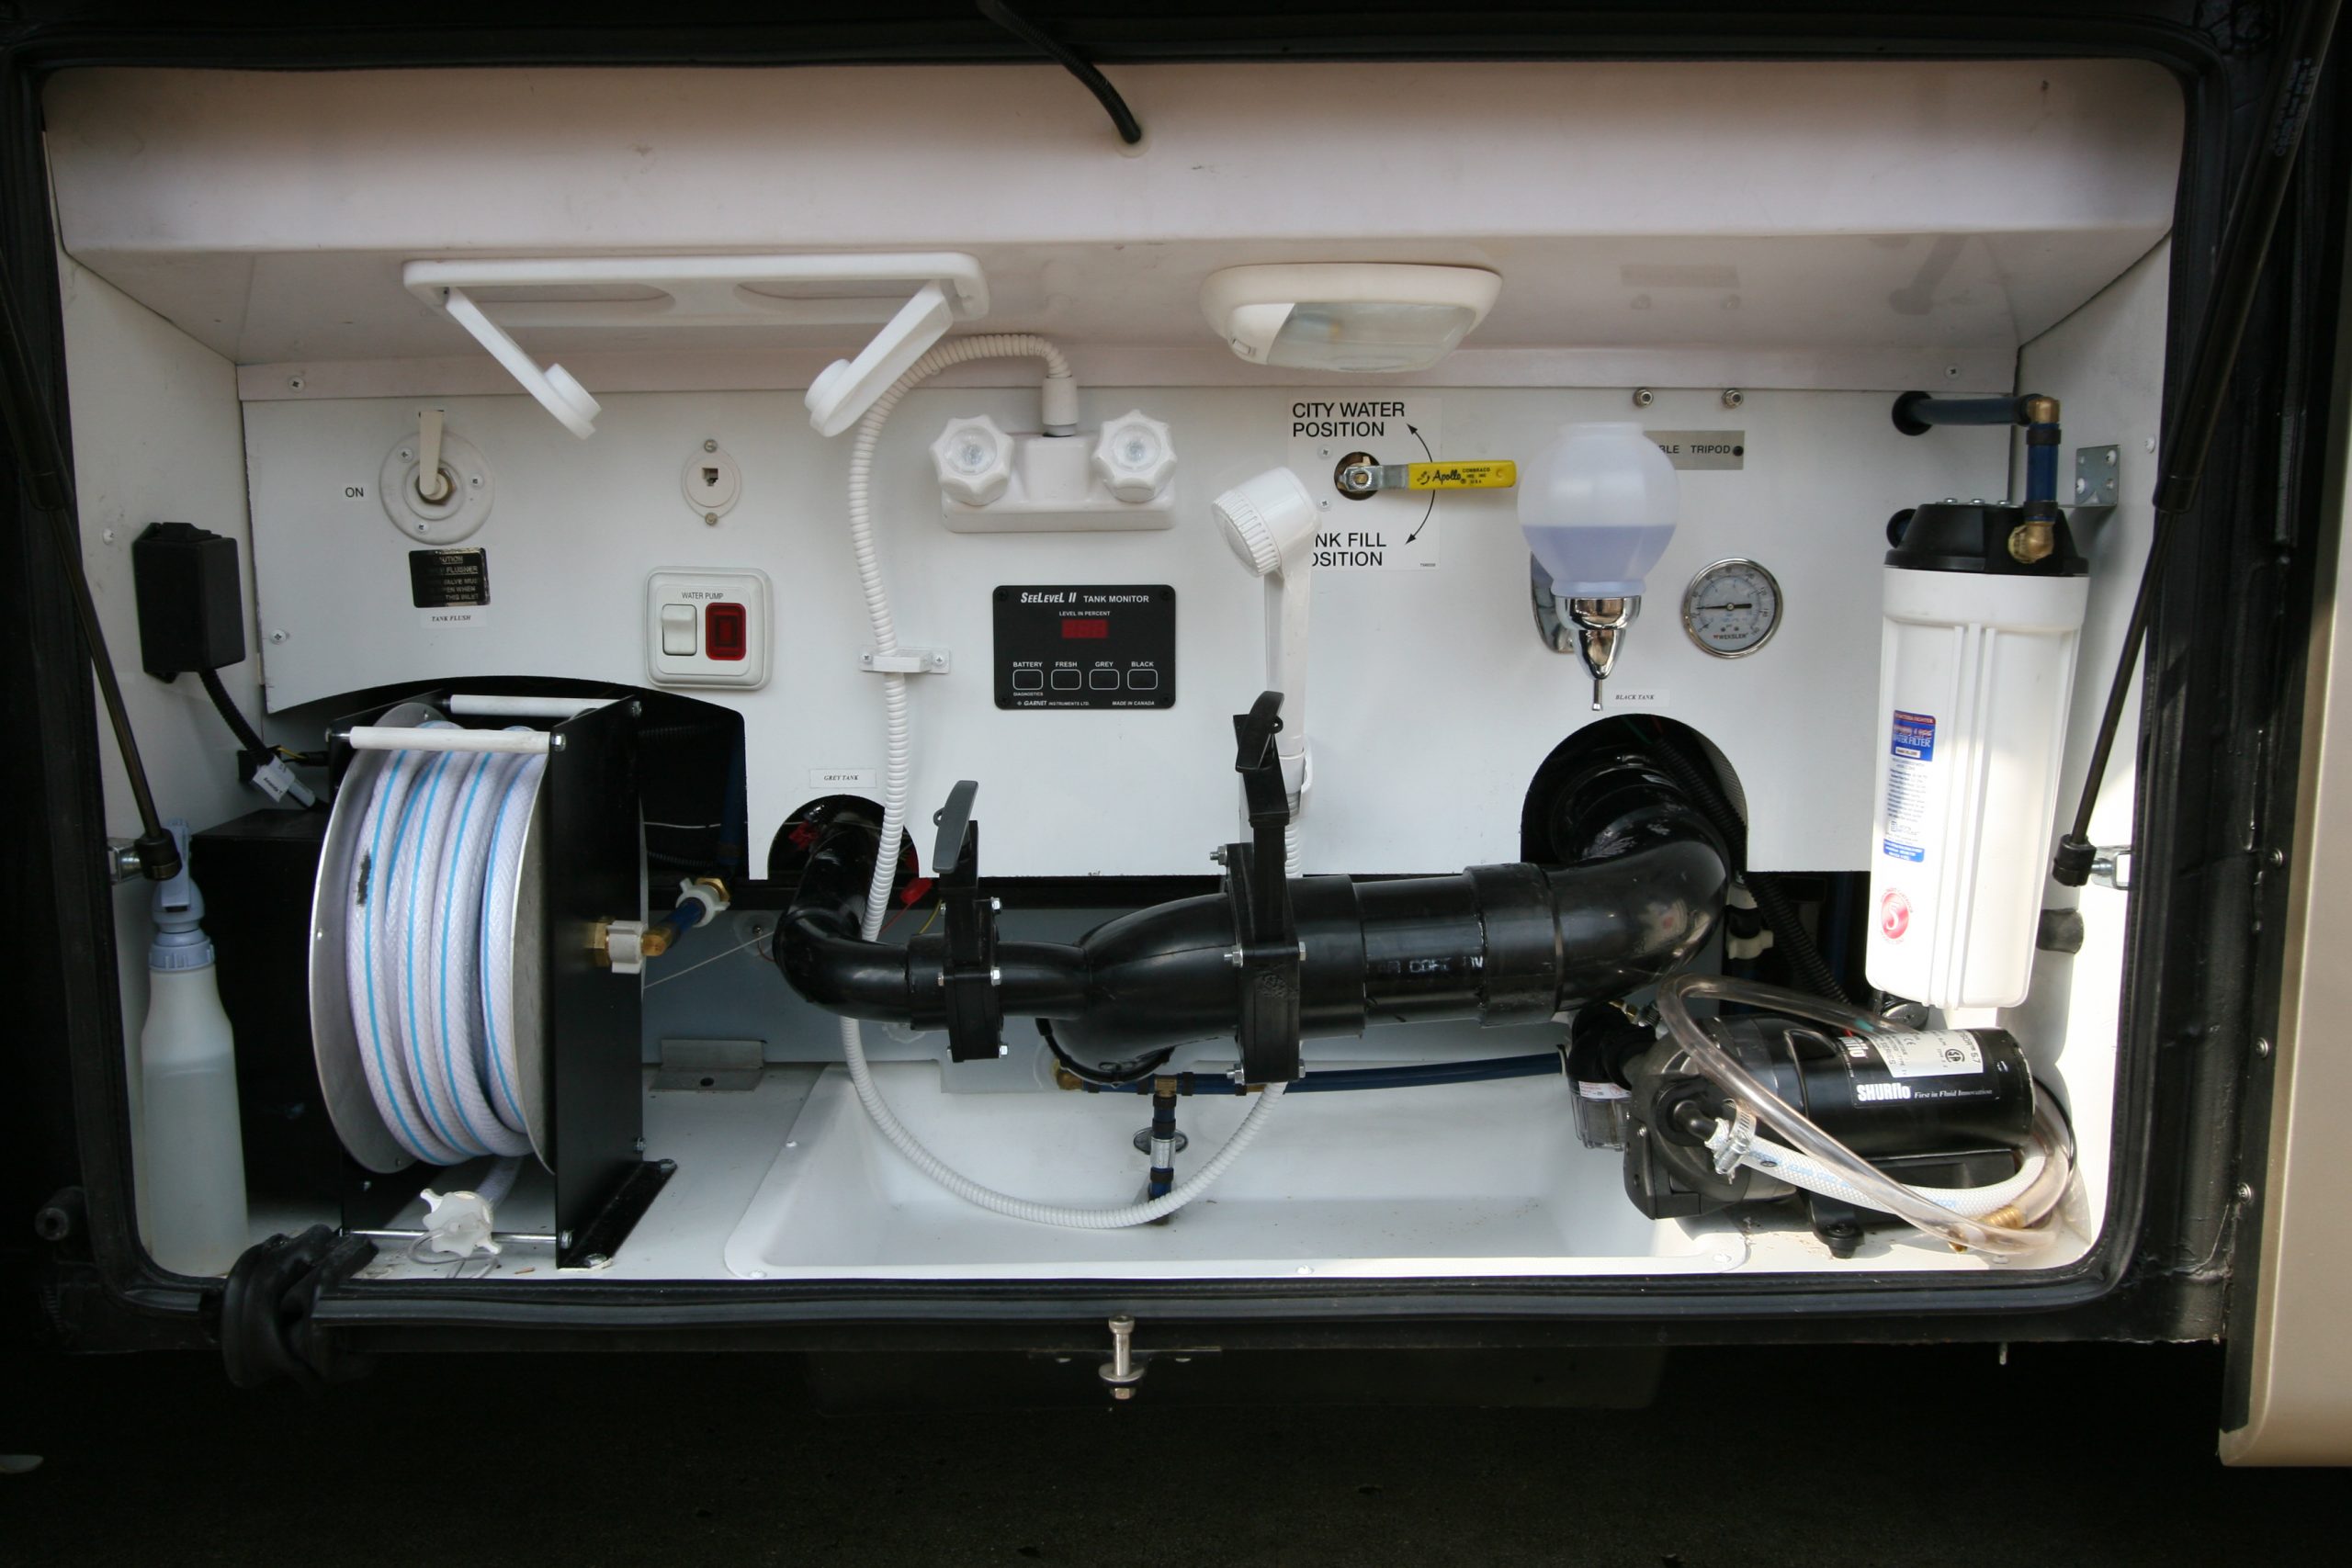
    Typical basement wet bay from my Allegro Bus, showing water filter, hose reel, dump valves, water pump and all valves and controls.

    RV Toilets

    While sinks, showers, dishwashers and laundry centers aren’t that much different than what you would find in a sticks and bricks home, the toilets used in an RV are markedly different. A residential toilet has a large water closet that acts as a storage tank for clean flush water. It also has a trap that fills with water to prevent any sewer gas from backing up into the home. When you press the flush lever the tank water runs into the bowel with a vengeance, rinsing the bowl and using gravity to flush the water down into the sewer. The tank then refills with water to be ready for the next flush. An RV needs to conserve water because both the freshwater and holding tanks are limited in size, so a different design is used. In most cases an RV toilet consists of a blade valve that is kept closed except when flushing. These gravity dump toilets are placed directly over the black water holding tank. The blade valve is either operated manually via a foot pedal or electrically via a wall mounted switch. When you activate the flush mechanism, the blade valve opens to allow the waste to fall into the tank below and a measured amount of flush water is expelled to rinses the bowl and provide some water to the holding tank to prevent the waste from drying out.

    National-Indoor-RV-Centers-blog-RV-sanitation-systems-motorhome-sewer-tanks

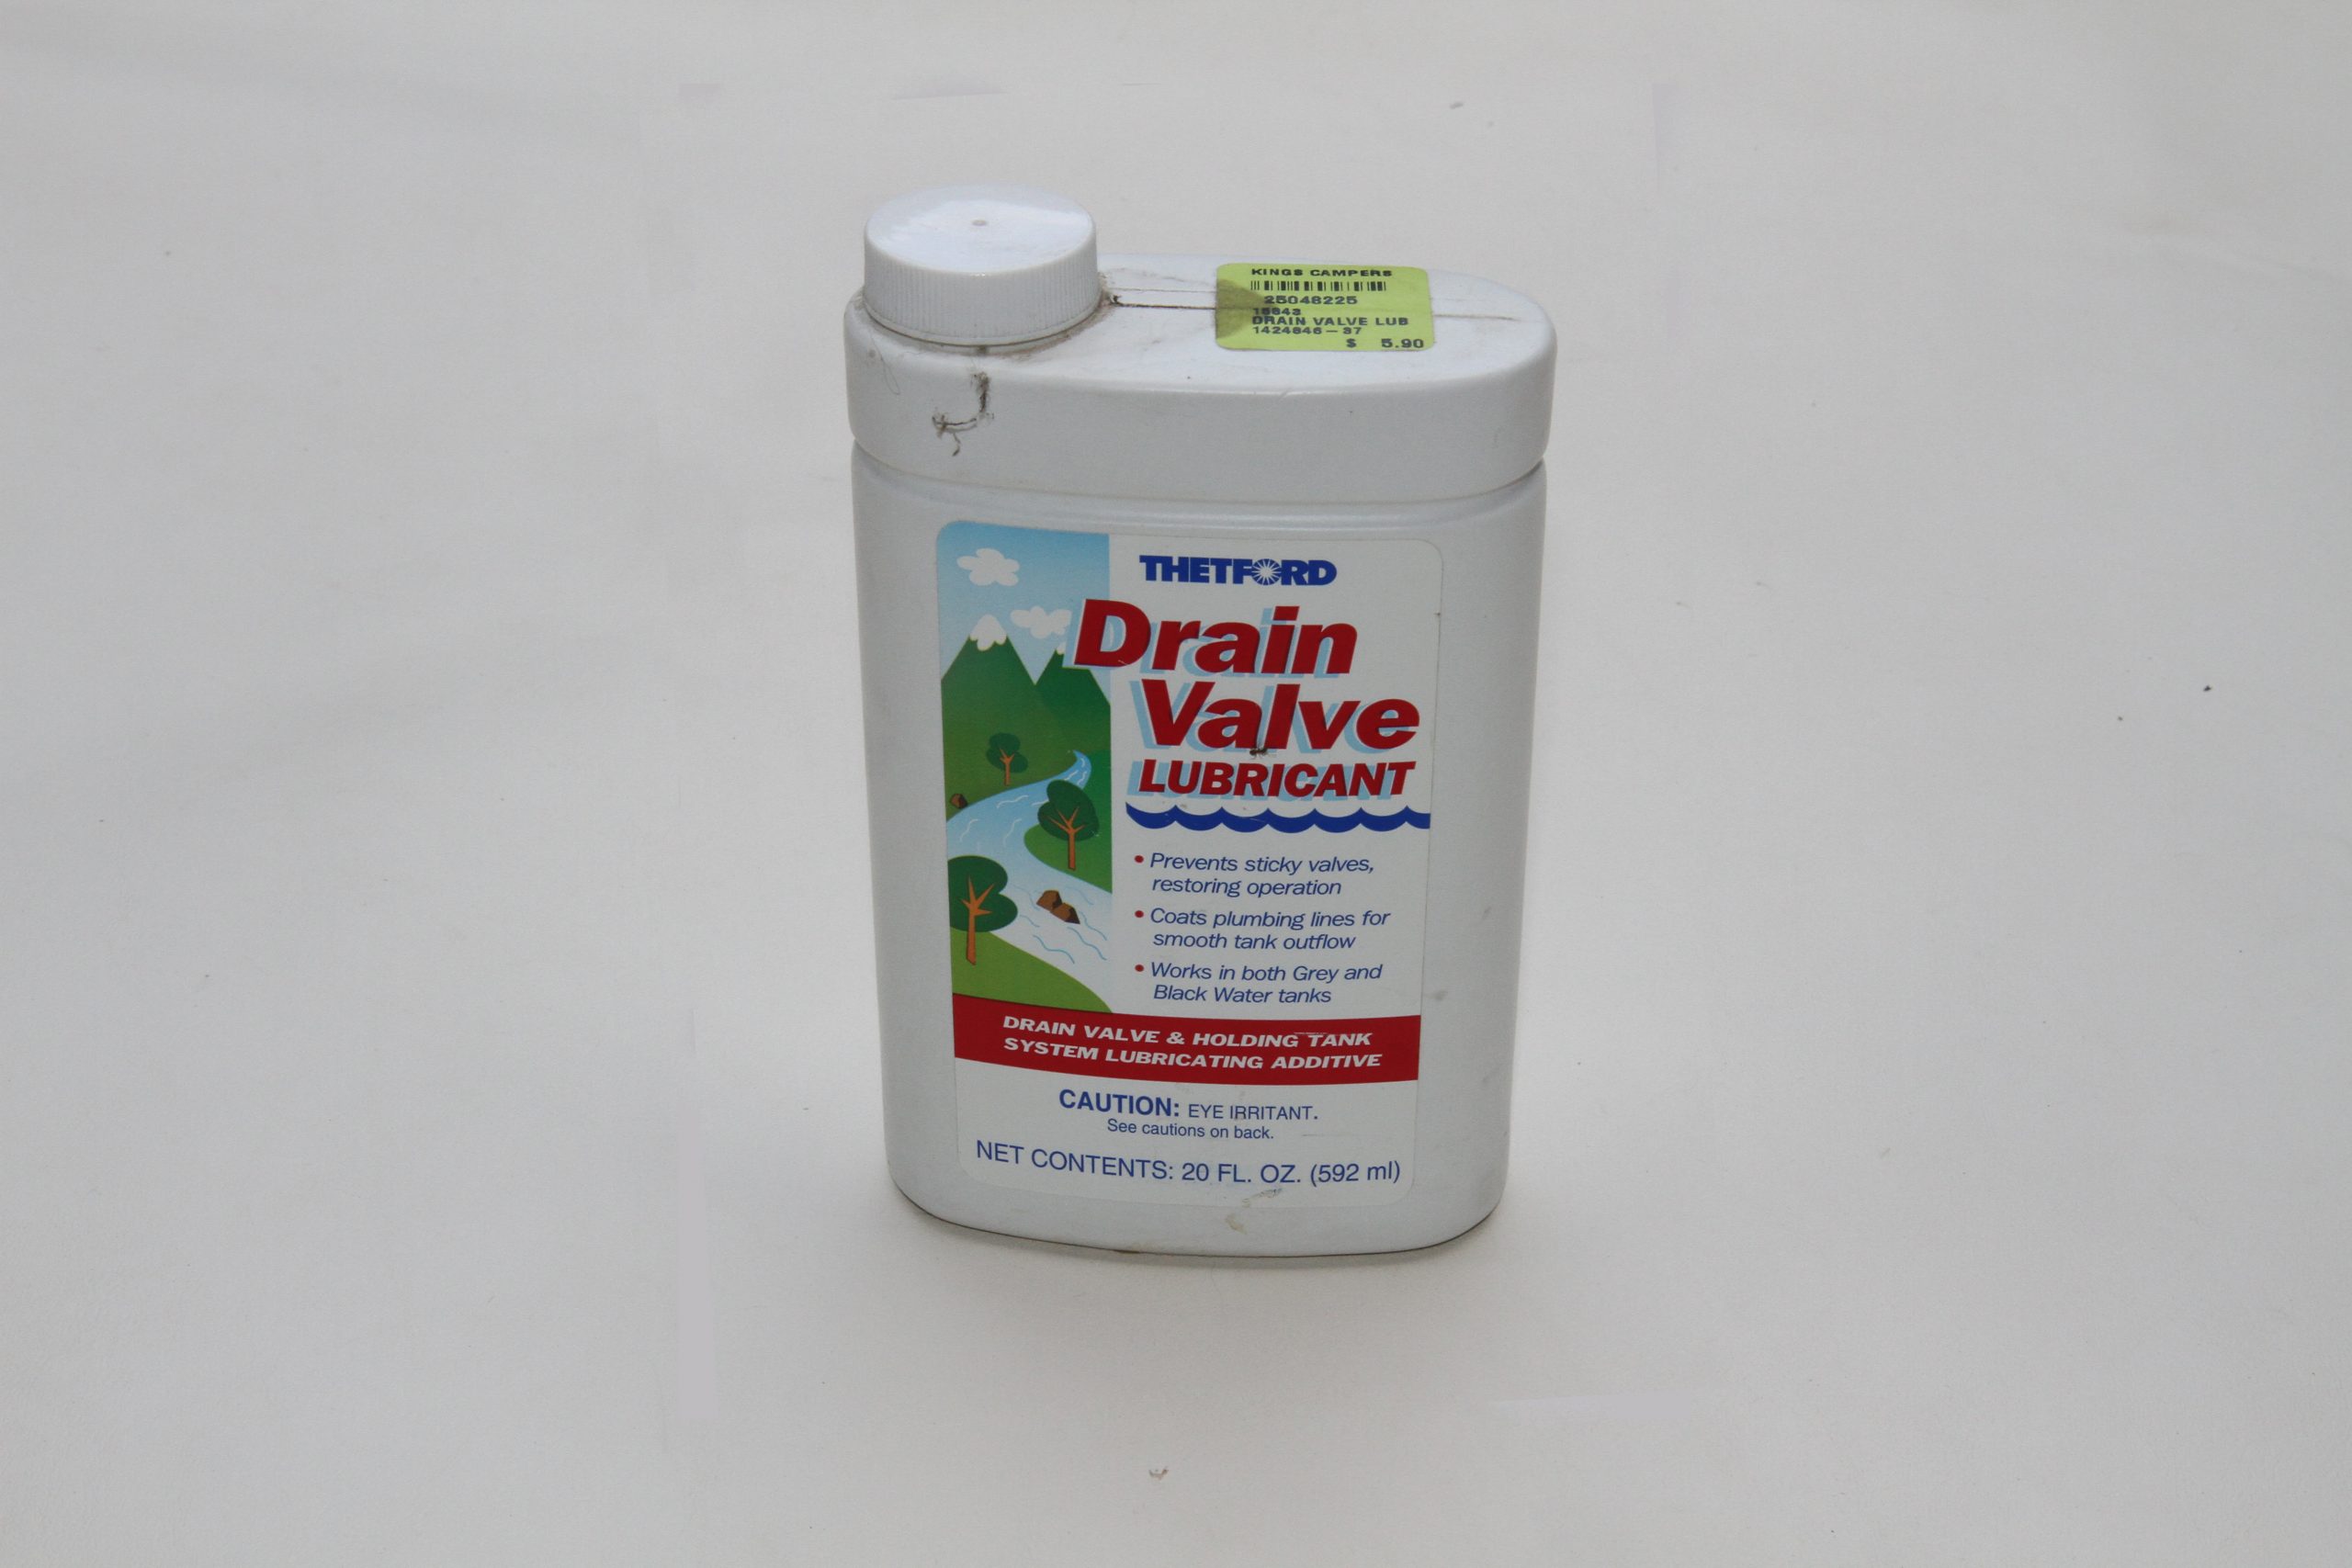
    If the dump valve blades get sticky a drain valve lubricant can be added to the tank to help free it up.

    In some cases, it’s not possible to locate the toilet directly over the black tank. This is especially true when your coach has a 1.5 bath floorplan with one toilet midship and another in the rear bath. In that case, a macerator toilet is used. A macerator toilet uses a motorized grinder to grind the waste up and pump it to the black tank regardless of where the tank is located. Instead of a blade valve, this style does use a small trap filled with water. When you push the flush button, the bowl fills with more water and then the macerator kicks in and pumps the waste through a smaller 1-1/4” line to the black holding tank. Then it adds some more water to the bowl. Macerators are necessary when the black tank isn’t located beneath the toilet. The only real disadvantage to them, other than cost, is that they do use more water when flushing than a direct gravity dump toilet, which can be a concern when boondocking with a limited water supply. However, the extra water used helps to keep the solids in the black tank suspended and will keep the tank walls cleaner.

    National-Indoor-RV-Centers-blog-RV-sanitation-systems-motorhome-sewer-tanks

    Macerators use a smaller diameter 1-1/4 to 1-1/2” hose and can pump the waste uphill and for longer distances than a gravity dump 3” sewer connection.

    RV Sewer Hoses and Fittings

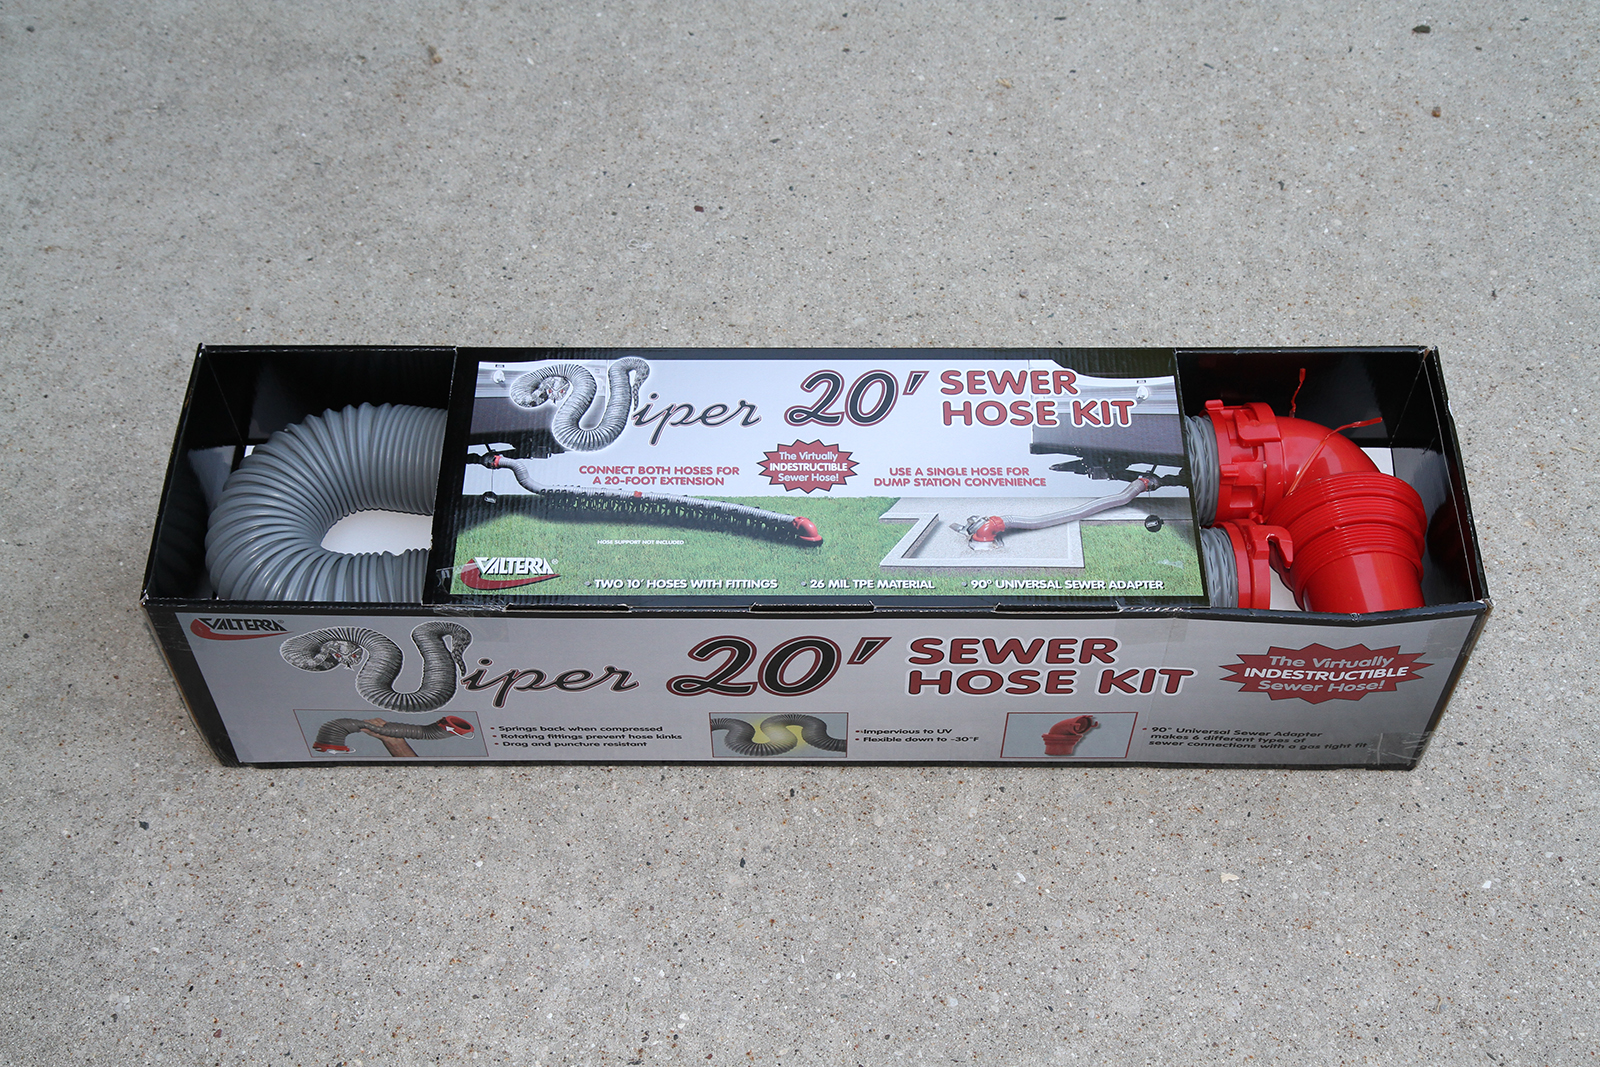
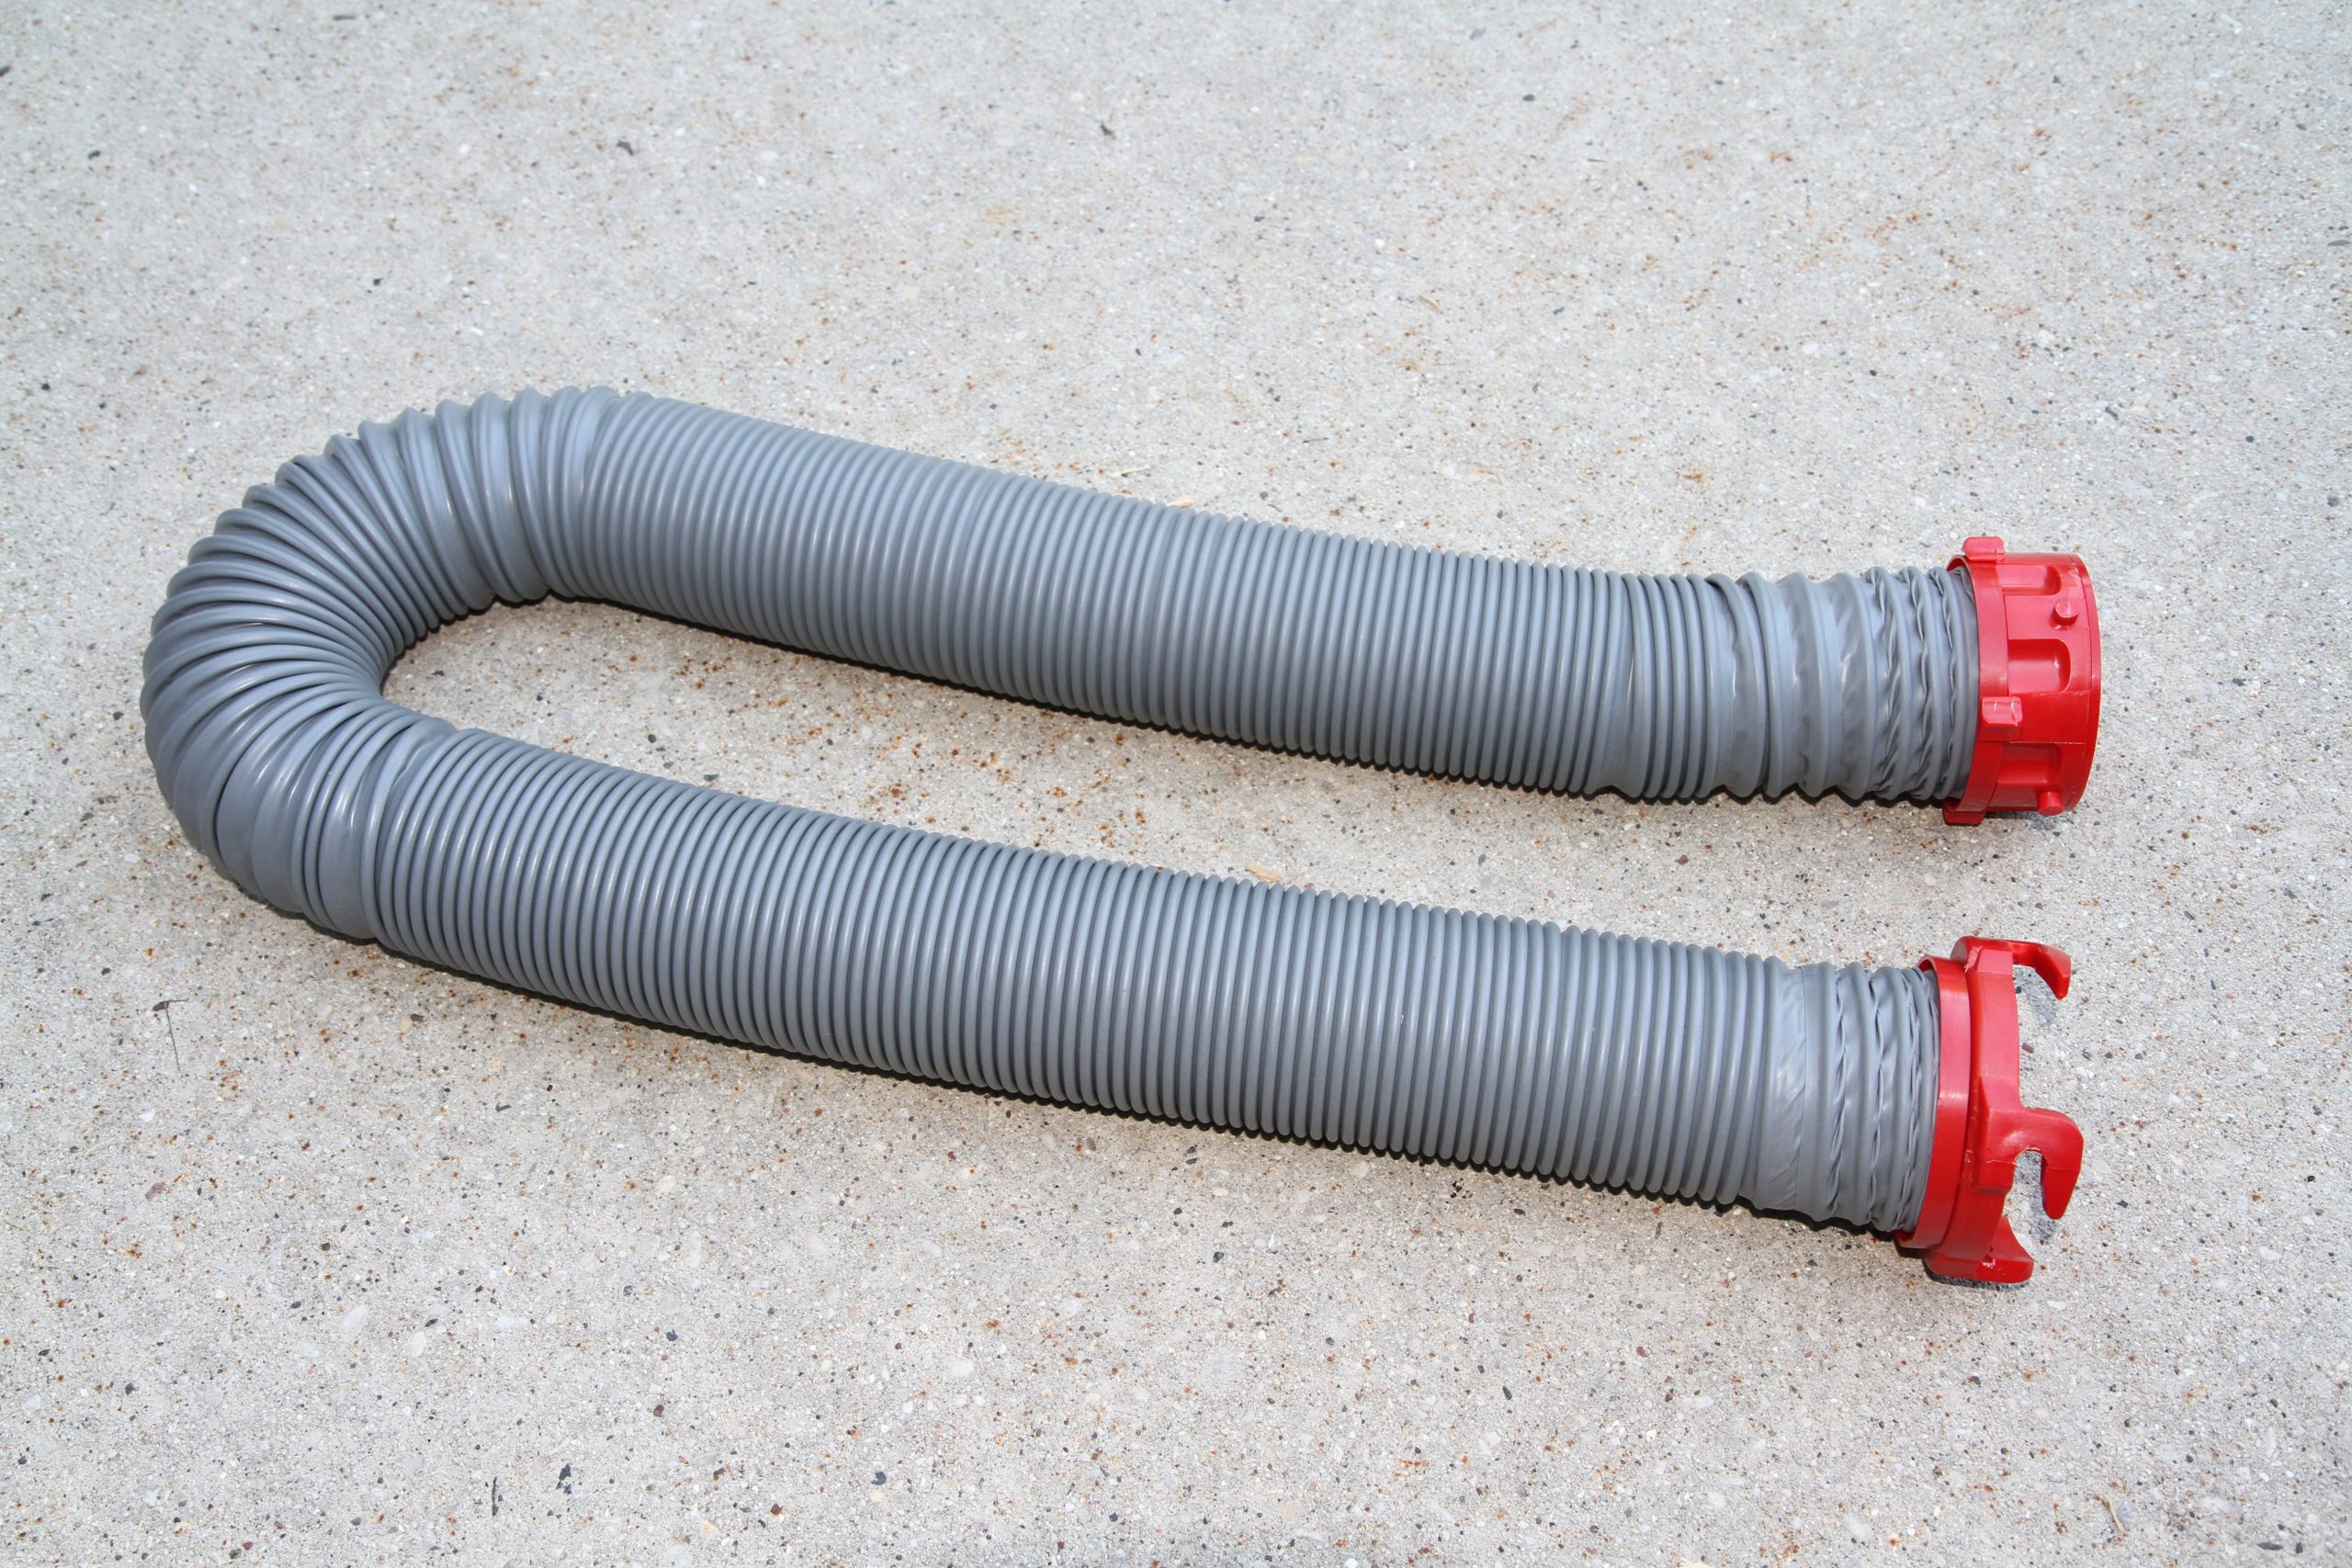
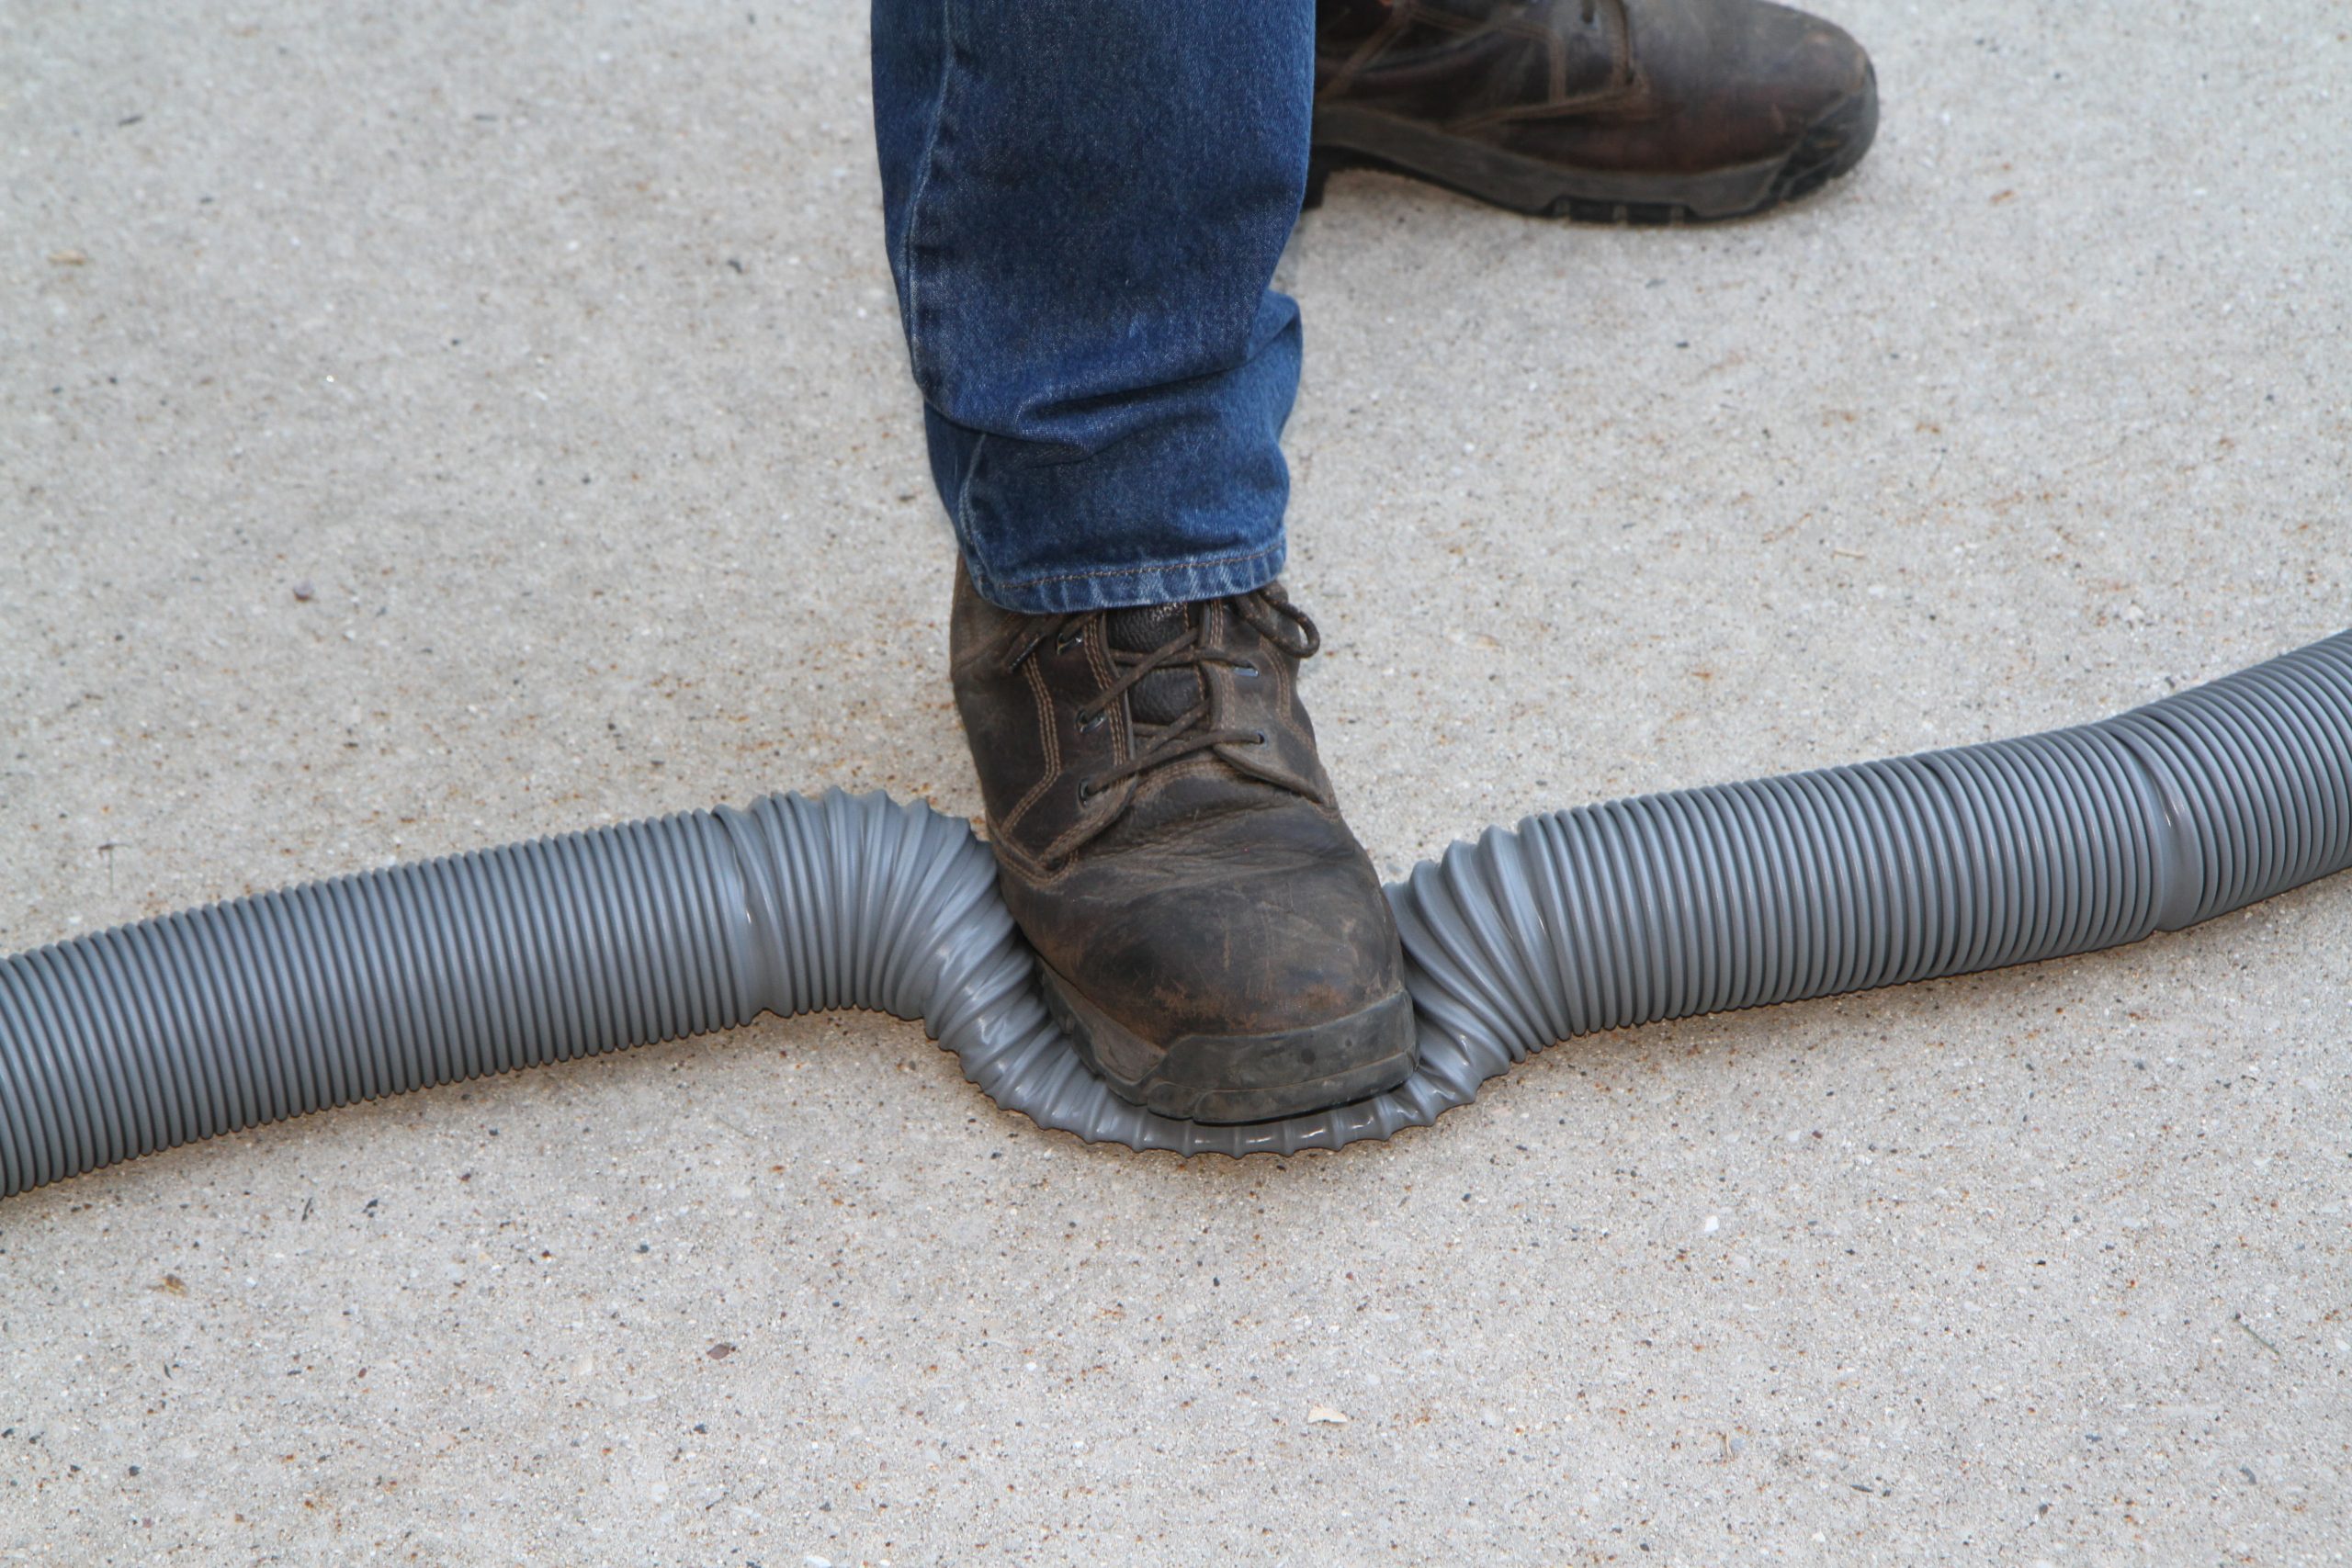
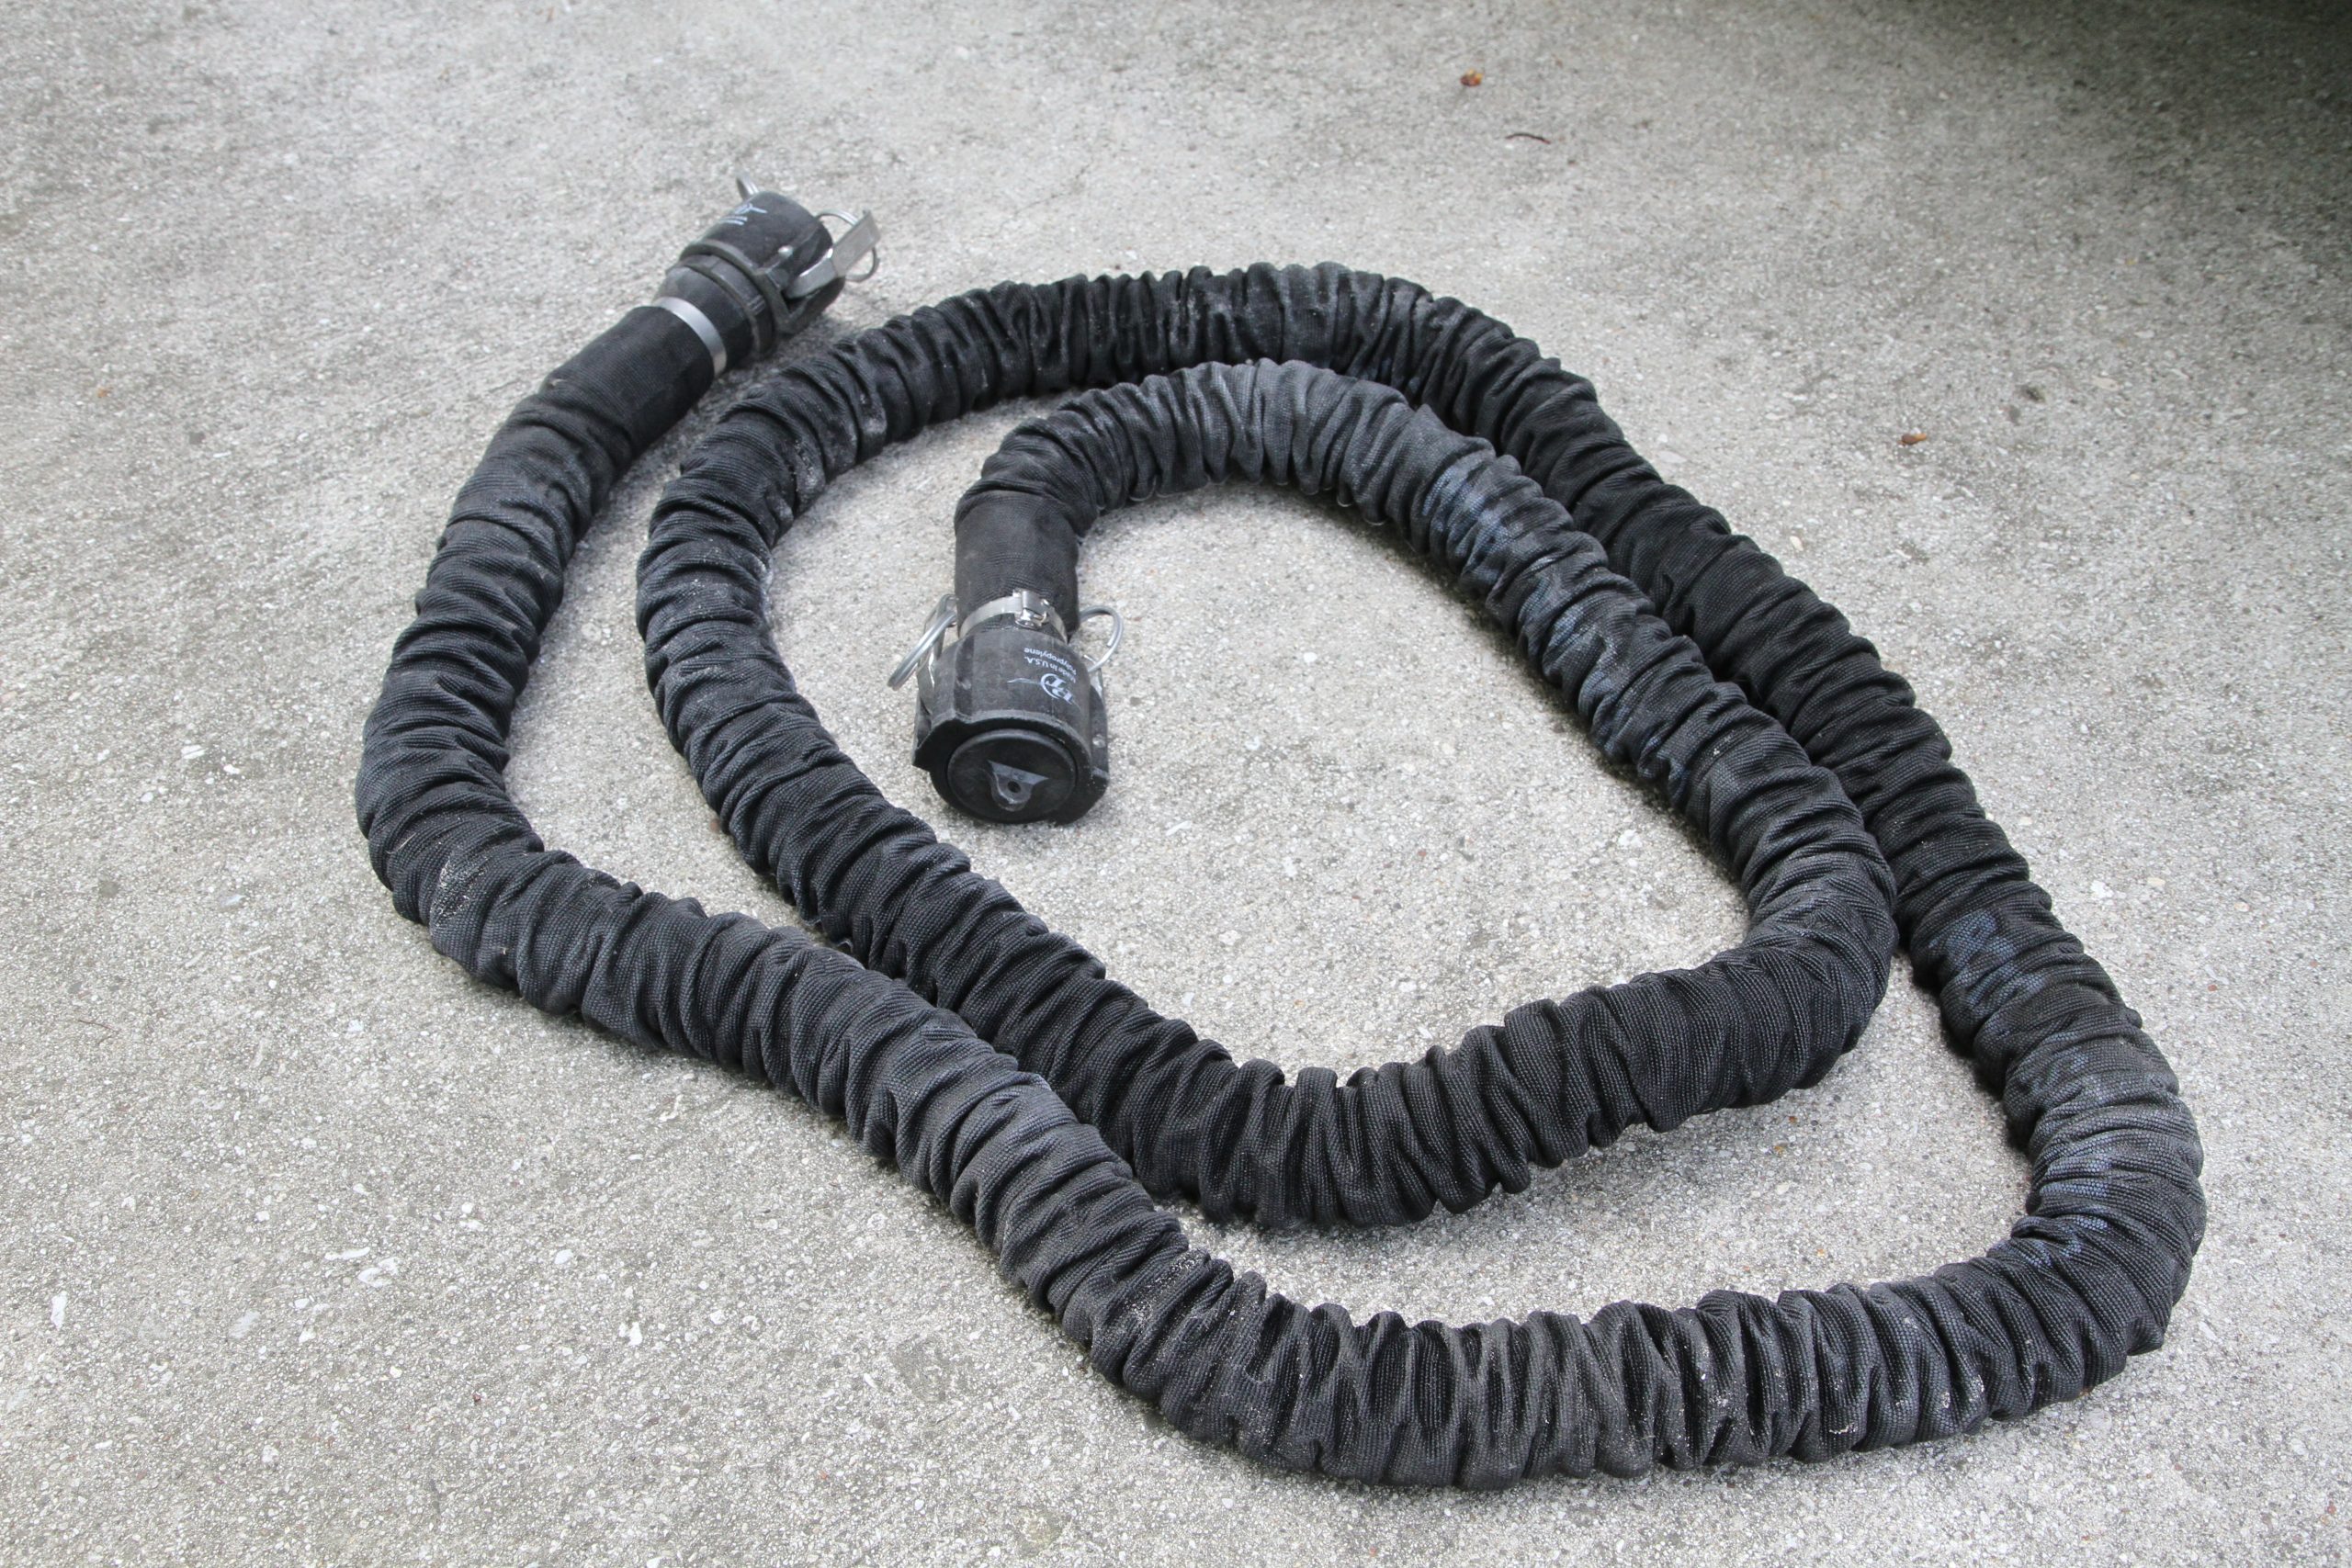
    You need to have a way to transfer the waste from the tanks to a sewer connection or dump station so that requires a sewer hose. Sewer hoses use a common 3” inside diameter hose with an industry standard bayonet connection. These “slinky” hoses are typically vinyl with a spiral wire reinforcement to prevent the hose from collapsing and come in various grades. The cheapest hoses are very thin and won’t last very long. You will develop pinhole leaks, cracks and tears quickly. Upgrading to a heavier vinyl helps but even with the extra heavy-duty hoses, you’ll still have issues. Many motorhome owners have gone with Camco’s Rhino Flex hoses, which are a step up over traditional vinyl hoses. These hoses can hold their shape more easily and are quite a bit stronger. My personal choice is Valterra’s Viper sewer hose. The Viper hose is unique in that it doesn’t uses any helical wire in the hose. The spiral wire used in typical sewer hoses keeps the hose from collapsing but it also leaves a corrugated interior to the hose, which provides restriction when dumping and lots of crannies for waste sediment to pack up inside the hose. This requires additional water to rinse the hose clean. The Viper hose has no wire and the interior is smooth so it rinses clean. You can also step on it to crush it flat and it will bounce right back, unlike a corrugated wire hose which will remain flat and kinked. It also remains flexible at down to -20 degrees Fahrenheit, so it really blows all of the other hoses away.

    National-Indoor-RV-Centers-blog-RV-sanitation-systems-motorhome-sewer-tanks-valterra-viper-sewer-hose-kit
    National-Indoor-RV-Centers-blog-RV-sanitation-systems-motorhome-sewer-tanks-valterra-viper-extension-hose
    National-Indoor-RV-Centers-blog-RV-sanitation-systems-motorhome-sewer-tanks-valterra-viper-RV-sewer-hose

    Sewer hoses, such as this Valterra Viper are available in kits or as individual components.

    A Viper 10’ extension hose.

    The Viper hose has the ability to be crushed, yet return to its original shape.

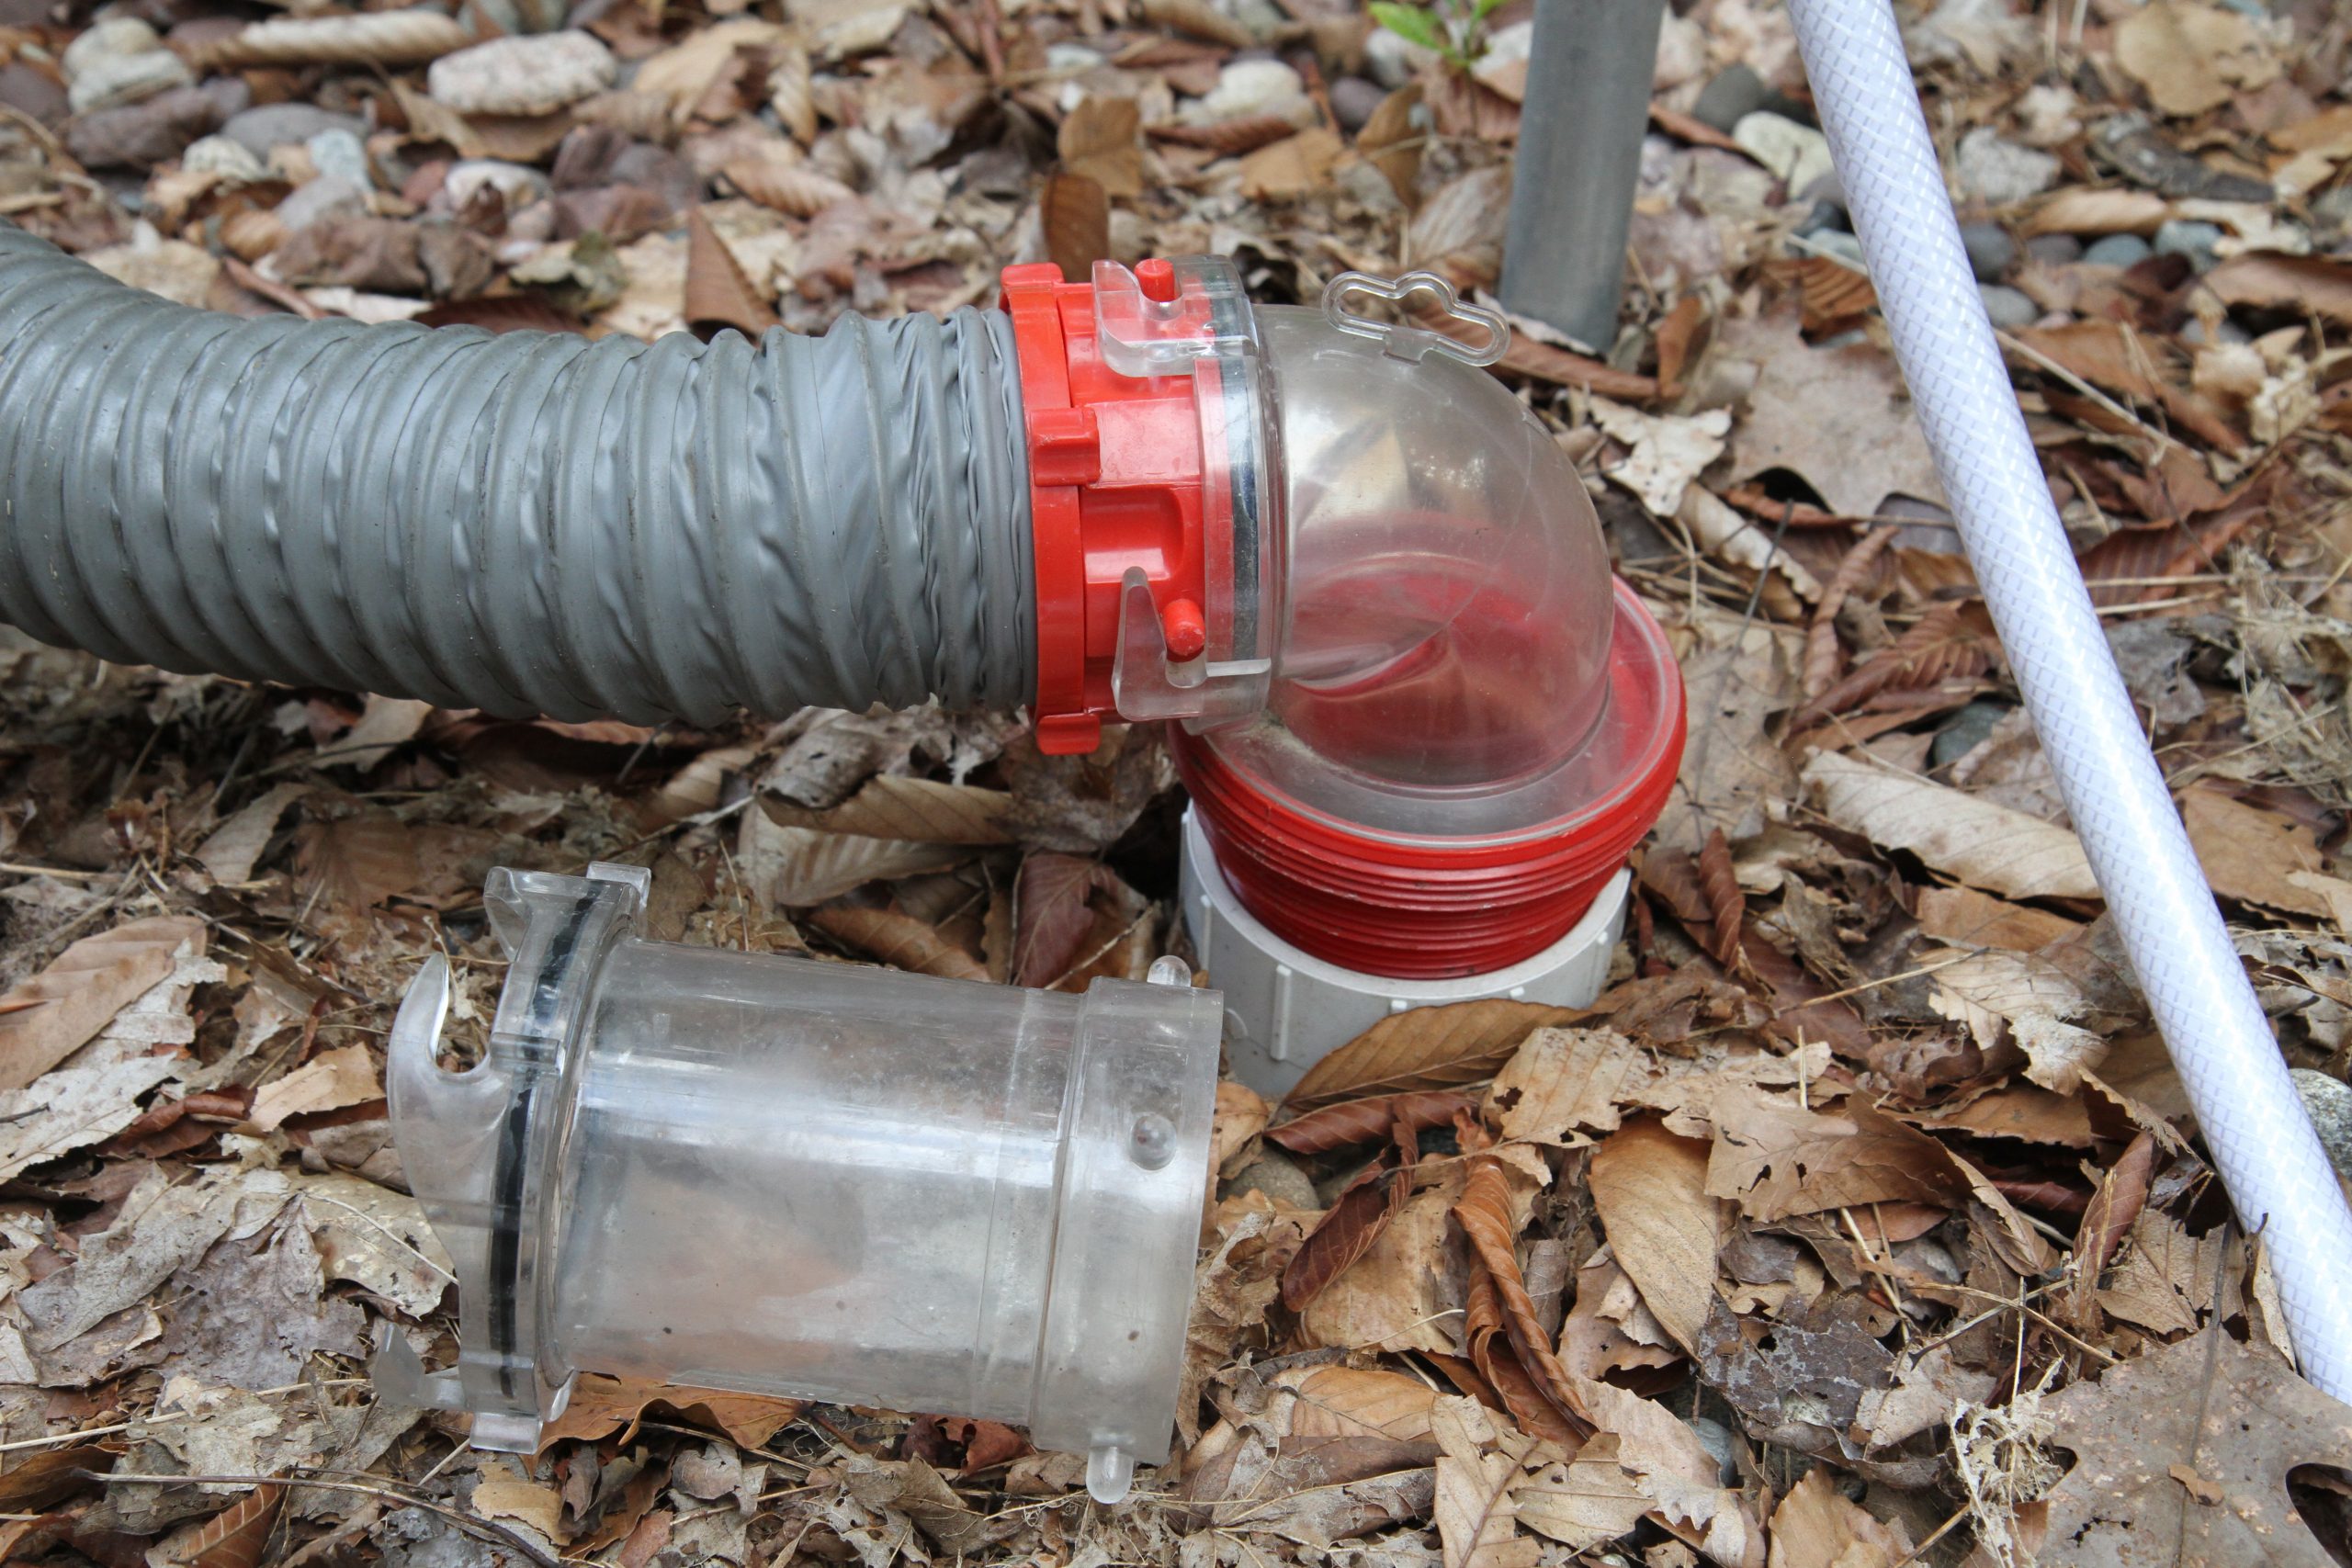
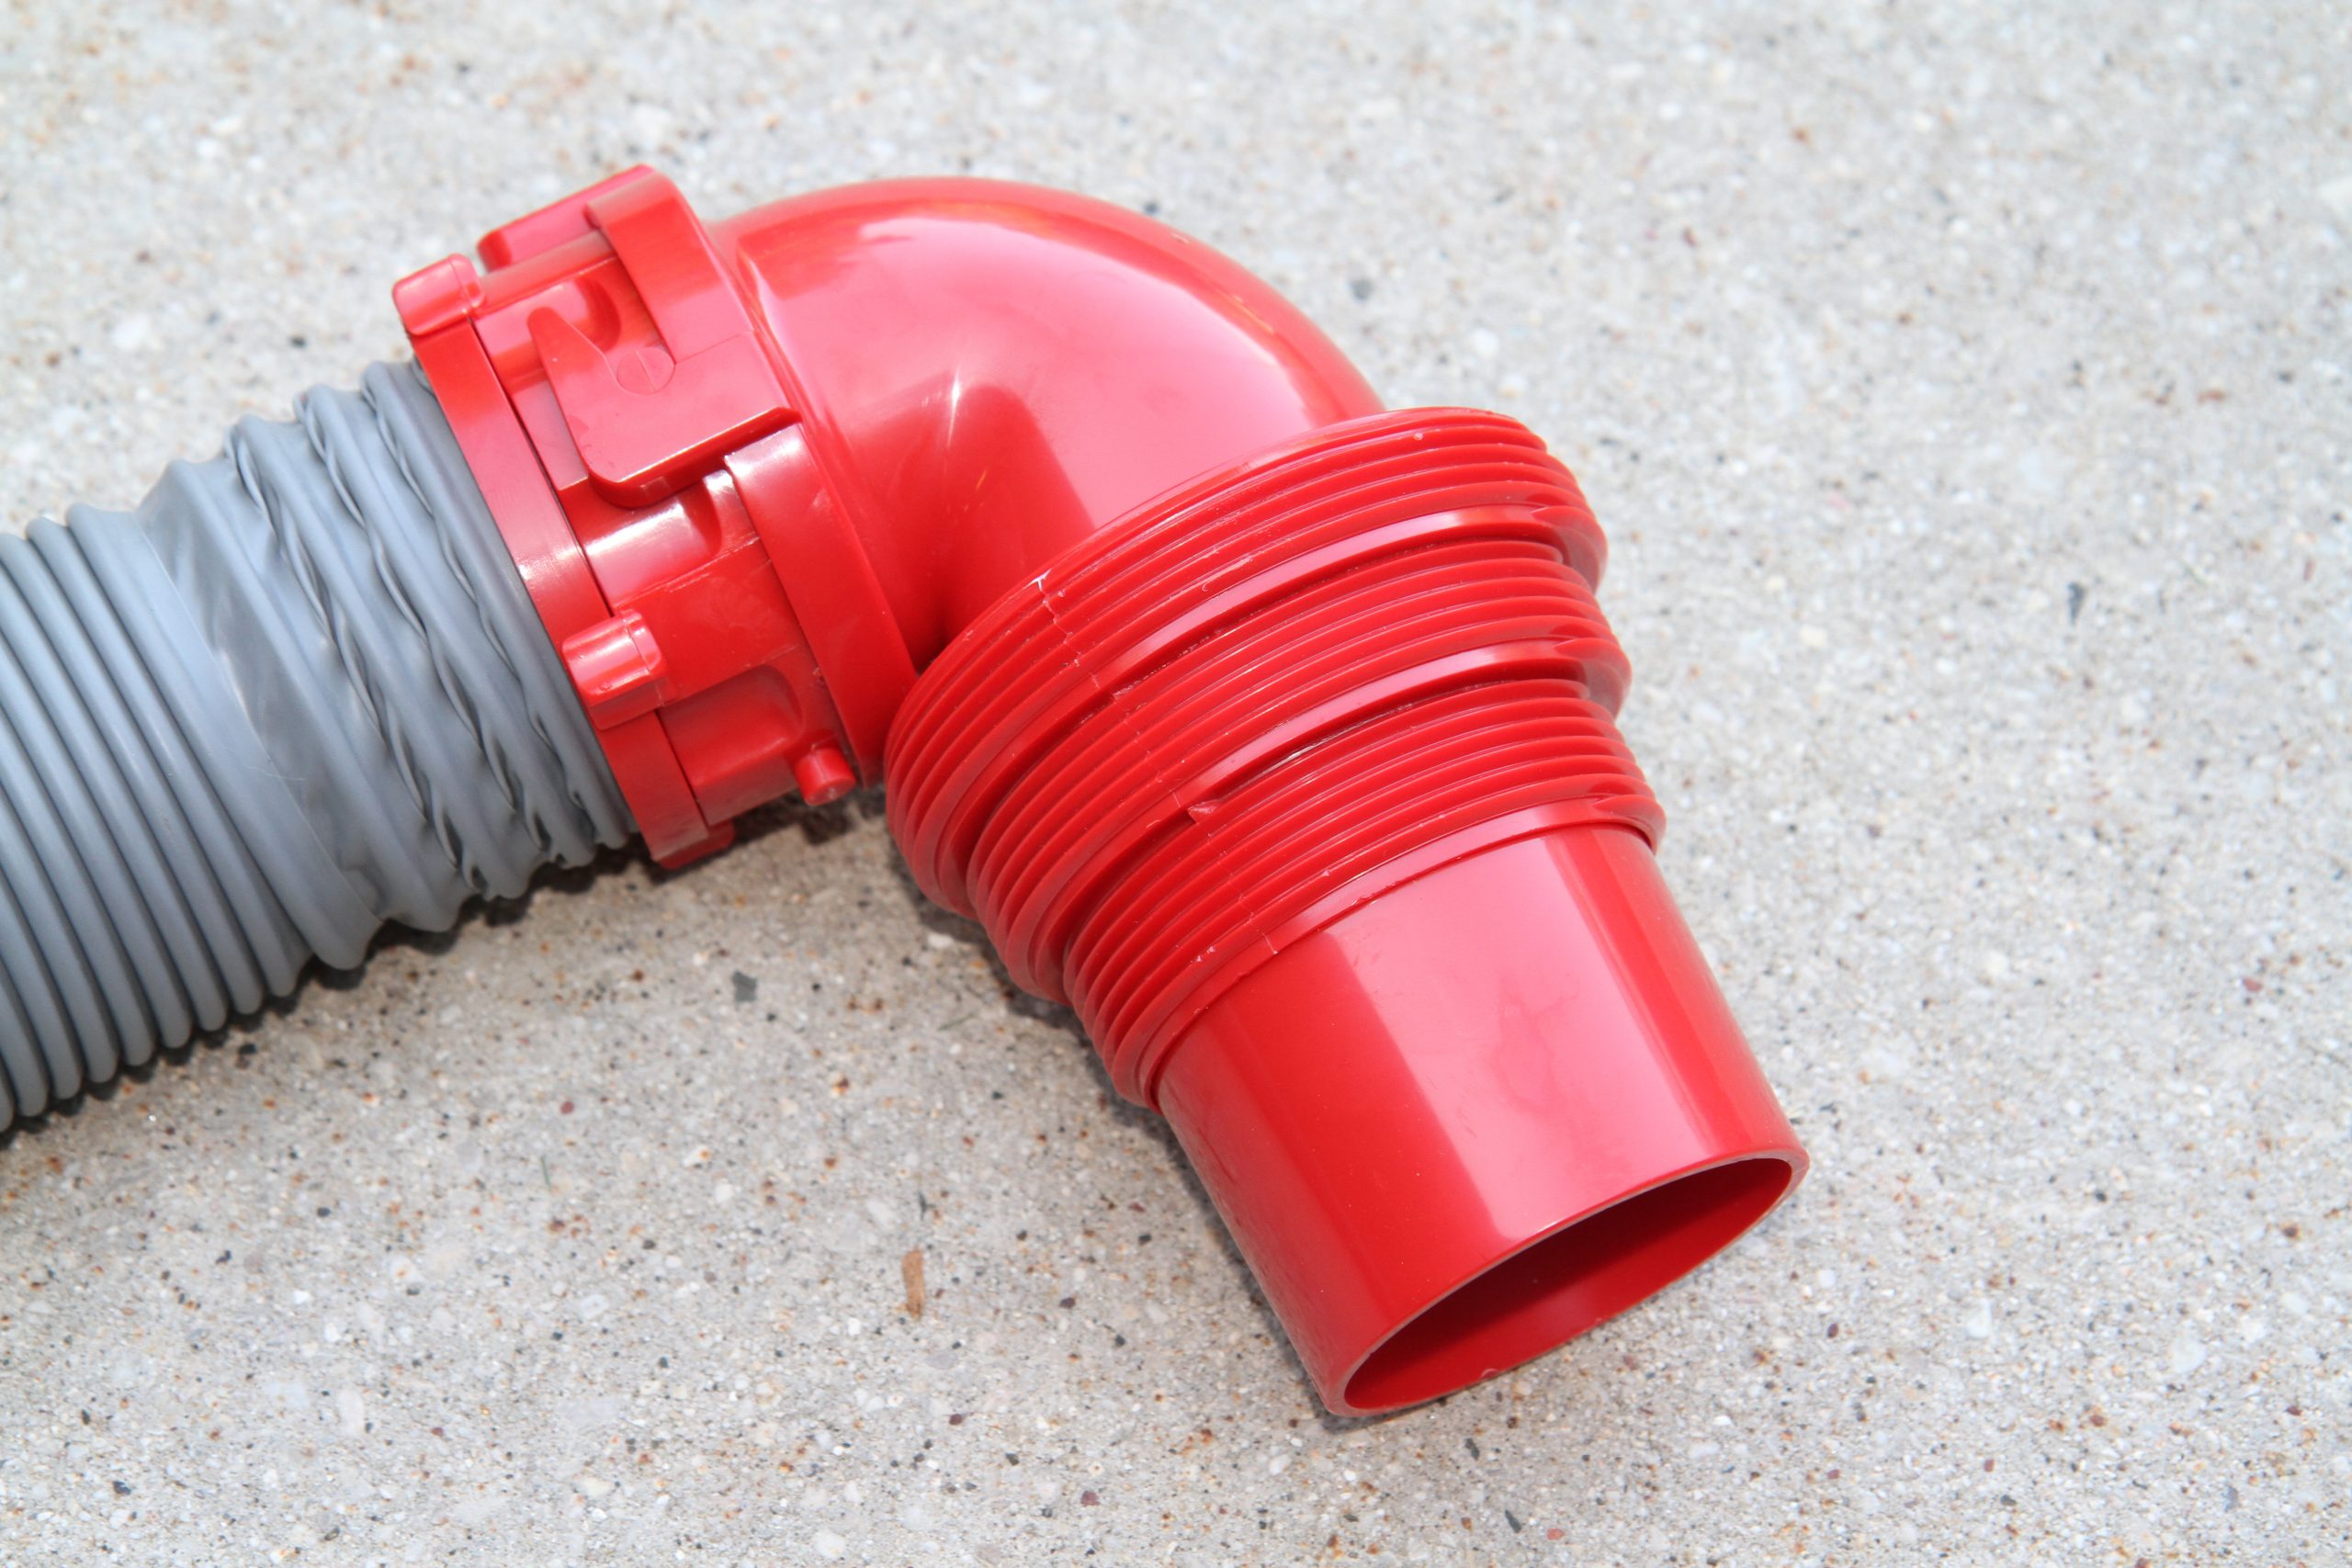
    Sewer hoses have a male and female bayonet connector so you can connect multiple hoses together if you need additional length. They typically are available in either 10’ or 20’ lengths. I prefer to use 10’ lengths because I can always use two to get to 20’ if I need the extra reach. Plus, I keep a third hose on hand in case I ever have a failure. Various fittings are available to connect to a sewer connection. A campground sewer connection may be as simple as a bare pipe sticking out of the ground or it can be a PVC pipe with either 3” or 4” pipe threads. The most common connector for any RV is a 90-degree elbow with a female bayonet connector to connect to your sewer hose and a long snout to insert into the sewer. Most have a slide-on threaded adaptor that is molded onto the snout. This adaptor has both 3” and 4” male pipe thread so that it can fit either size sewer pipe. If you find you are at a site with a bare unthreaded pipe, you can slide a rubber or silicone donut over the pipe. This will allow you to press the elbow into the unthreaded pipe when necessary. It’s also typically used at a dump station, where the sewer pipe is generally just a hole in the concrete pad. These elbows can also be found in clear plastic so that you can monitor the color of your waste. This is helpful when you are rinsing your black tank and want to know when it is clean. Clear pipes that can be inserted in line with the hose are also available.

    National-Indoor-RV-Centers-blog-RV-sanitation-systems-motorhome-sewer-tanks
    National-Indoor-RV-Centers-blog-RV-sanitation-systems-motorhome-sewer-tanks-90-degree-RV-sewer-elbow-attachment

    A threaded sewer elbow in clear plastic allows you to see when the tank flushing process has been thoroughly cleaned.

    90 degree sewer elbows are threaded for various size pipe threads and also a long snout to accept a donut for unthreaded sewer connections.

    Sewer hoses do have limited use because they use gravity to dump. If your motorhome’s sewer connection is fairly low and the campground sewer sticks out of the ground quite a bit, gravity isn’t going to work very well for you on this uphill battle. If it’s not too serious, you can just walk the hose from the coach to the sewer after dumping to drain the fluid resting in the hose manually.

    National-Indoor-RV-Centers-blog-RV-sanitation-systems-motorhome-sewer-tanks-macerator
    National-Indoor-RV-Centers-blog-RV-sanitation-systems-motorhome-sewer-tanks-macerator-hose

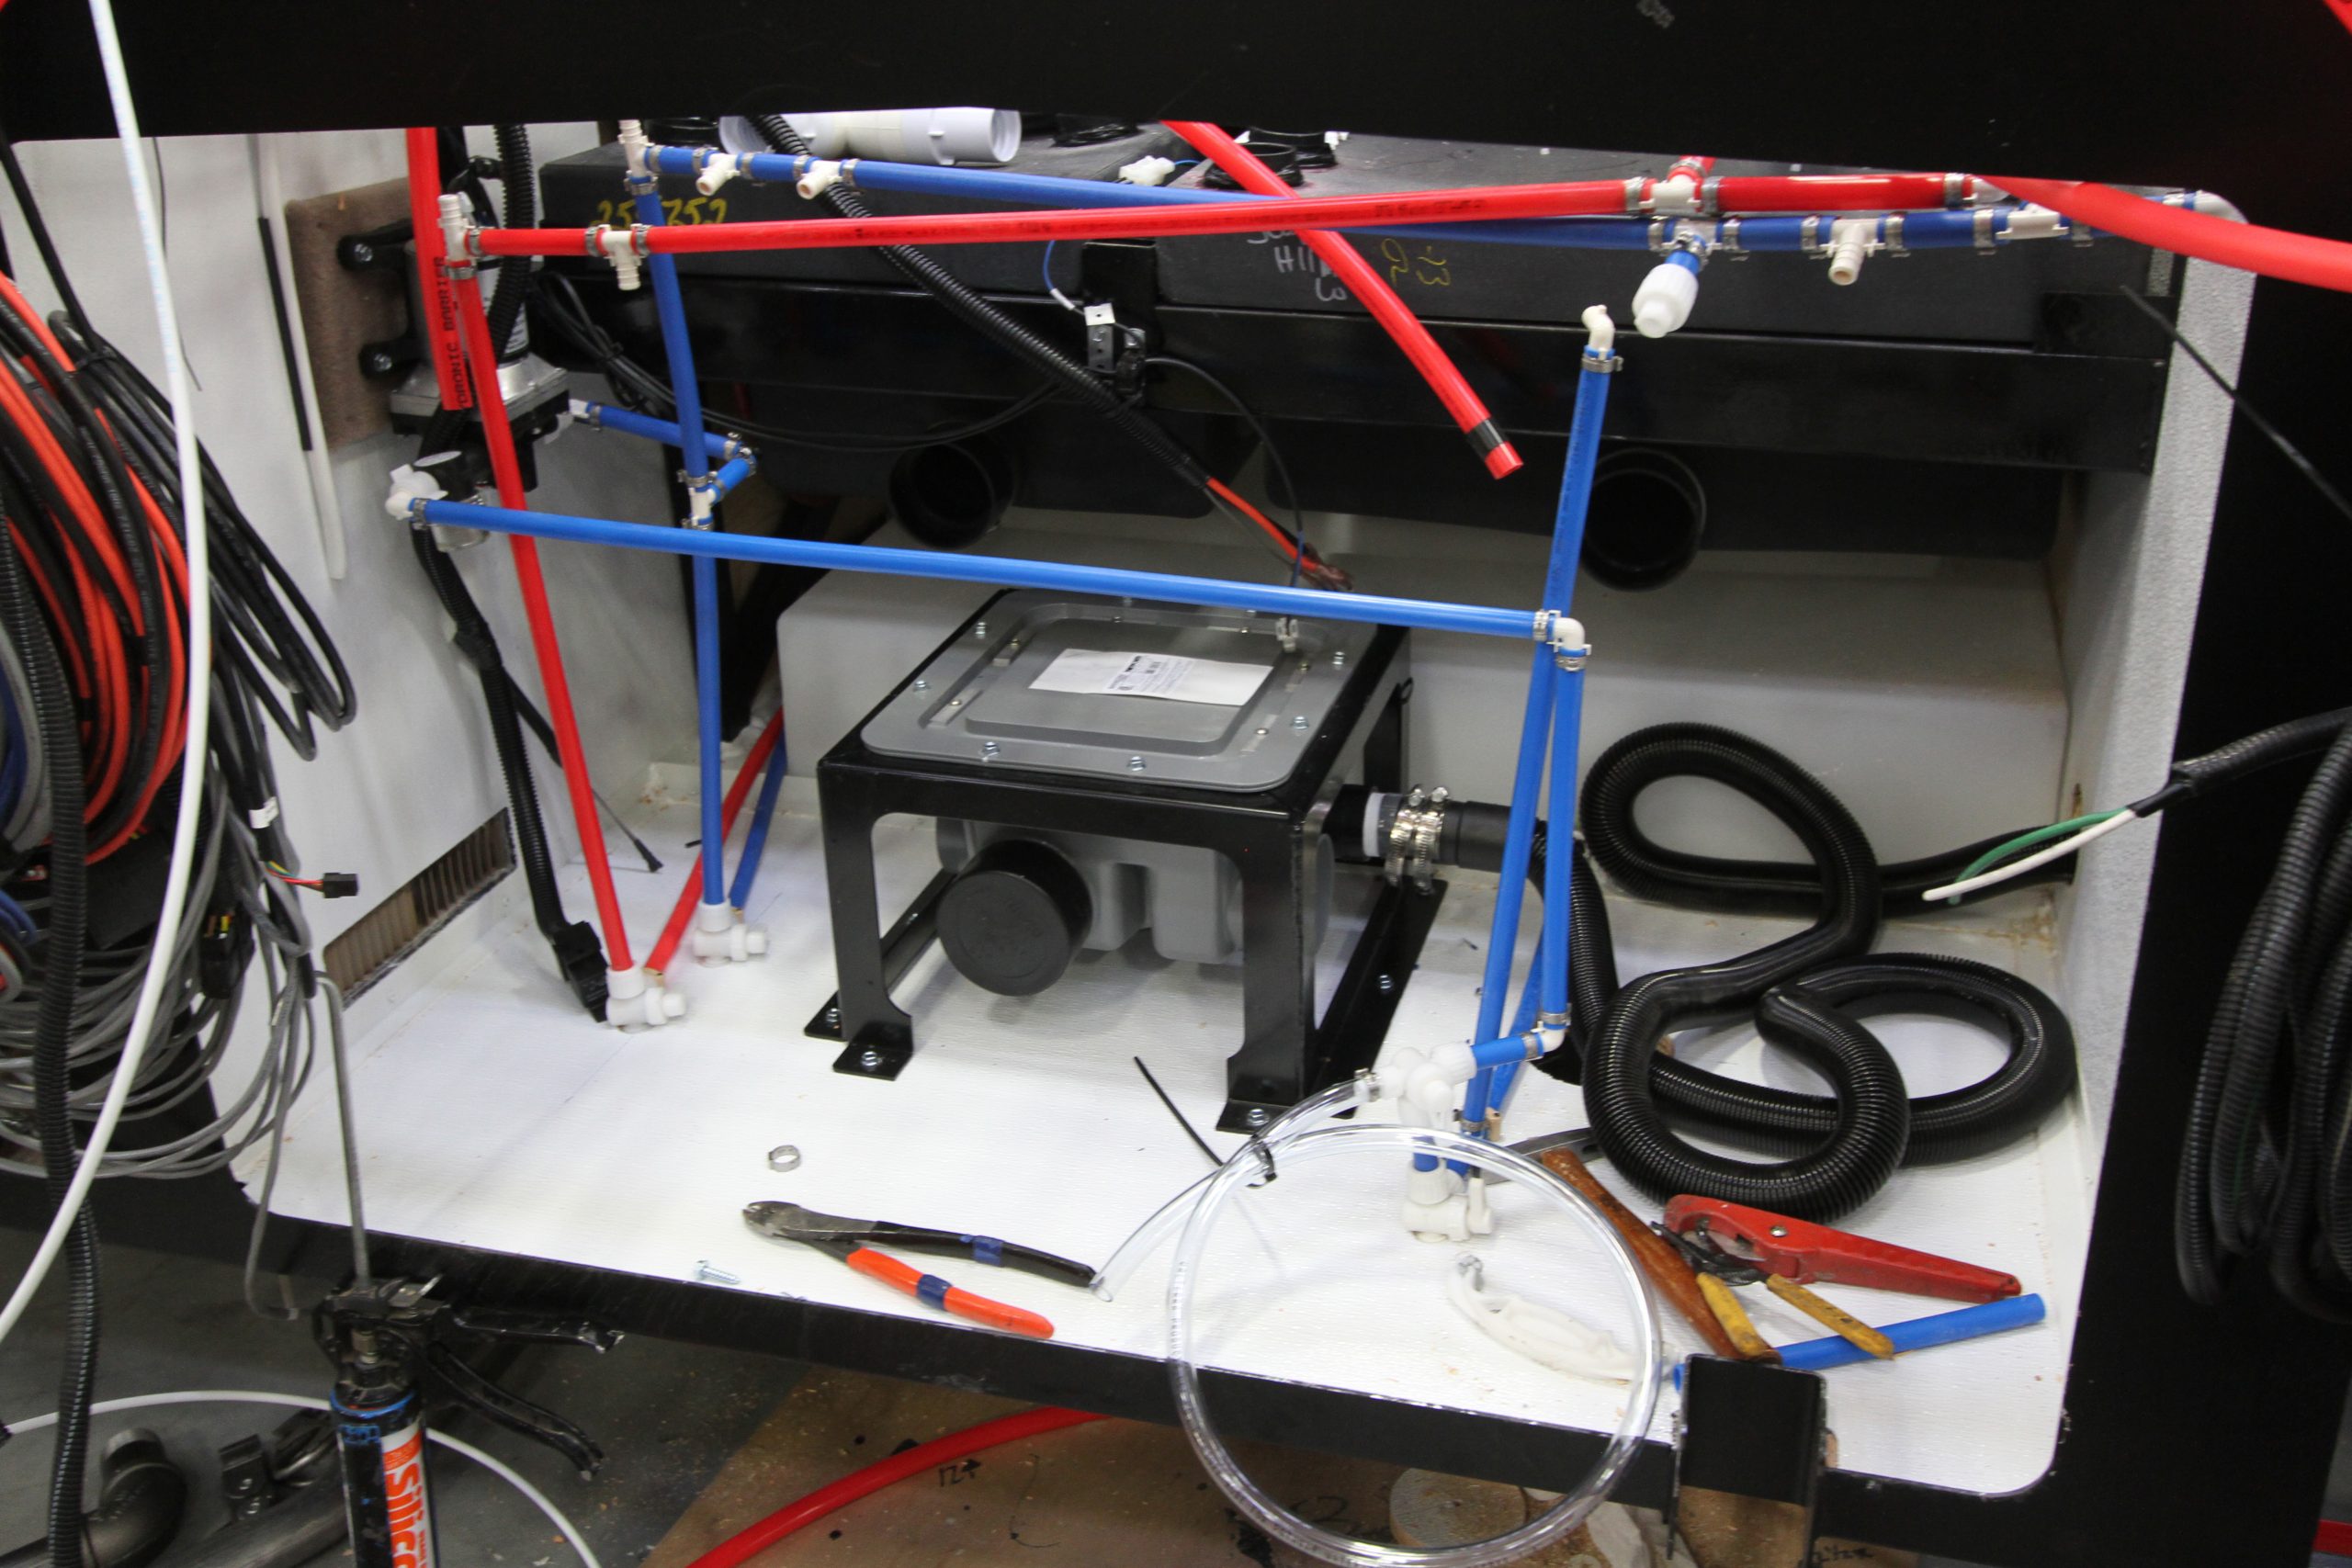
    Macerators grind up waste and can be portable or mounted in the coach, as in this Entegra.

    Macerators use a smaller diameter 1-1/4 to 1-1/2” hose and can pump the waste uphill and for longer distances than a gravity dump 3” sewer connection.

    Another option is a macerator. A macerator uses a motor to grind the waste and pump it uphill, similar to a macerator toilet. While a 3” slinky hose has a limited length and cannot go uphill, a macerator uses 1-1/4” or 1-1/2” hose that can pump uphill up to 9’ vertically and 100’ horizontally. Some of these models, such as the SaniCon Turbo, are installed permanently in the RV and feature a 3” bypass port for a slinky. Other models are portable and will connect to the coach’s bayonet fitting on the dump valve wye. They are a bit slower to dump that a 3” slinky but offer the ability to overcome gravity when dumping your tanks.

    National-Indoor-RV-Centers-blog-RV-sanitation-systems-motorhome-sewer-tanks

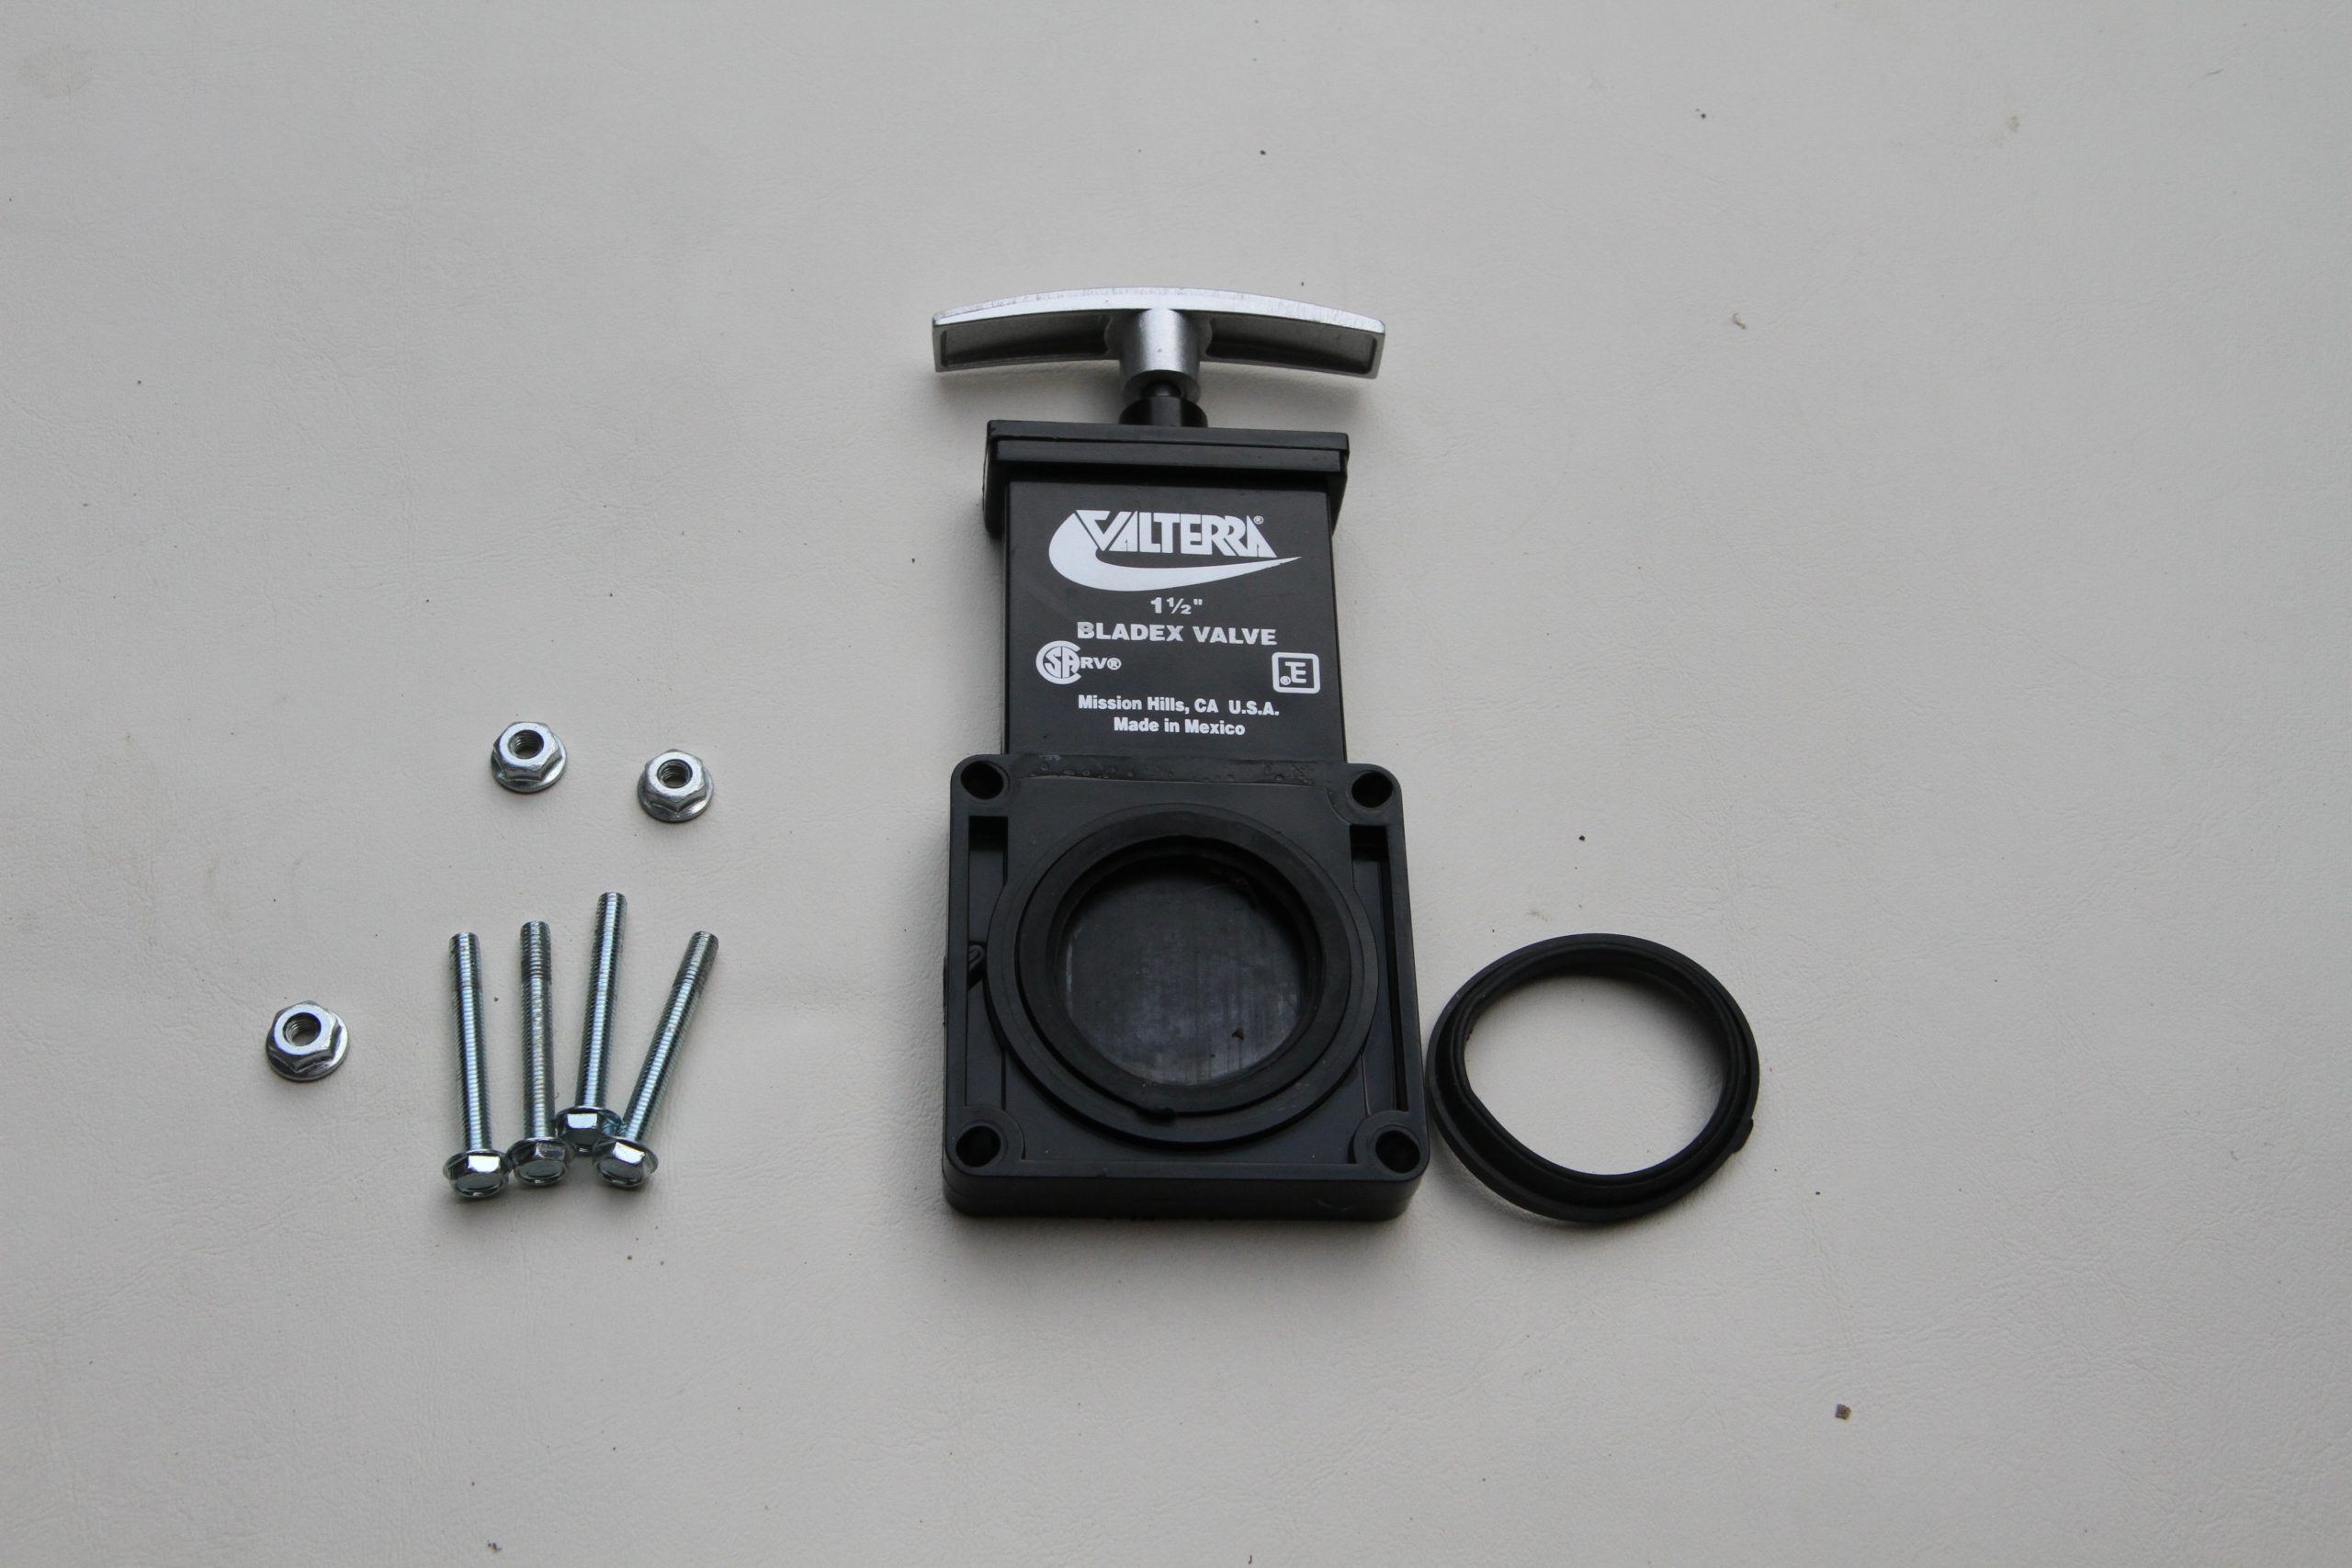
    Dump valves come in 3” and 1-1/2” sizes and are easy to replace. Replacement seal kits are also available.

    Operation and Cleaning

    Your gray water tank isn’t very fussy. As long as you scrape the heavy stuff off your dishes before washing them and keep from pouring oils and fats down the drain, your gray tank will remain pretty clean. The soapy shower water and dishwater help keep the inside of the gray water tank clean so that your sensors won’t give you any trouble. But your black water tank is a bit pickier, so you’ll need to pay attention to it to prevent any issues from appearing. The biggest problem with black tanks is that the waste can dry and cake up on the inside of the tank walls. This leads to unreliable sensor readings. The most important thing is to keep the waste fluid and don’t let it dry out. Saving water can be a disadvantage in that respect.

    It’s possible to use a gravity dump toilet with very little water usage. When the toilet’s blade valve opens, the solid waste and toilet paper can just fall through the gate and lay in a lump beneath if the tank is low on water. With continued use, this “pyramid of death” builds and you’ll need a construction crew to break it up. Avoid this by using plenty of water when you flush the toilet. When you dump the black tank, be sure to add plenty of water to the tank so that you aren’t starting out with a dry tank. This water will help to keep future waste additions soluble. Some users like to keep their gray tank dump valve open, but this can lead to a tank with dry sediment caked in it over time. It also allows for certain insects to leave the sewer and enter the coach – you may wind up sharing a shower with them.

    Many black tanks will have a flush mechanism installed. This is basically a spray head that sprays water around inside the tank. In some cases, this sprayer can rinse down any accumulated waste that is caked on the tank walls. In other cases, it’s limited to merely pushing any loose sediment on the floor of the tank to the dump valve. Frequent use of the sprayer whenever dumping the black tank is recommended. If you wait too long, the waste will cake up on the walls and be much harder to remove. If you find that this is the case, it’s best to mix up a solution of Pine Sol and fill the tank to about ¾ full, then drive to your next destination. The sloshing action while driving will help rinse the tank walls and put everything into suspension. Then dump immediately after arriving at your destination and finish off with the tank flushing attachment.

    National-Indoor-RV-Centers-blog-RV-sanitation-systems-motorhome-sewer-tanks-electic-dump-valve

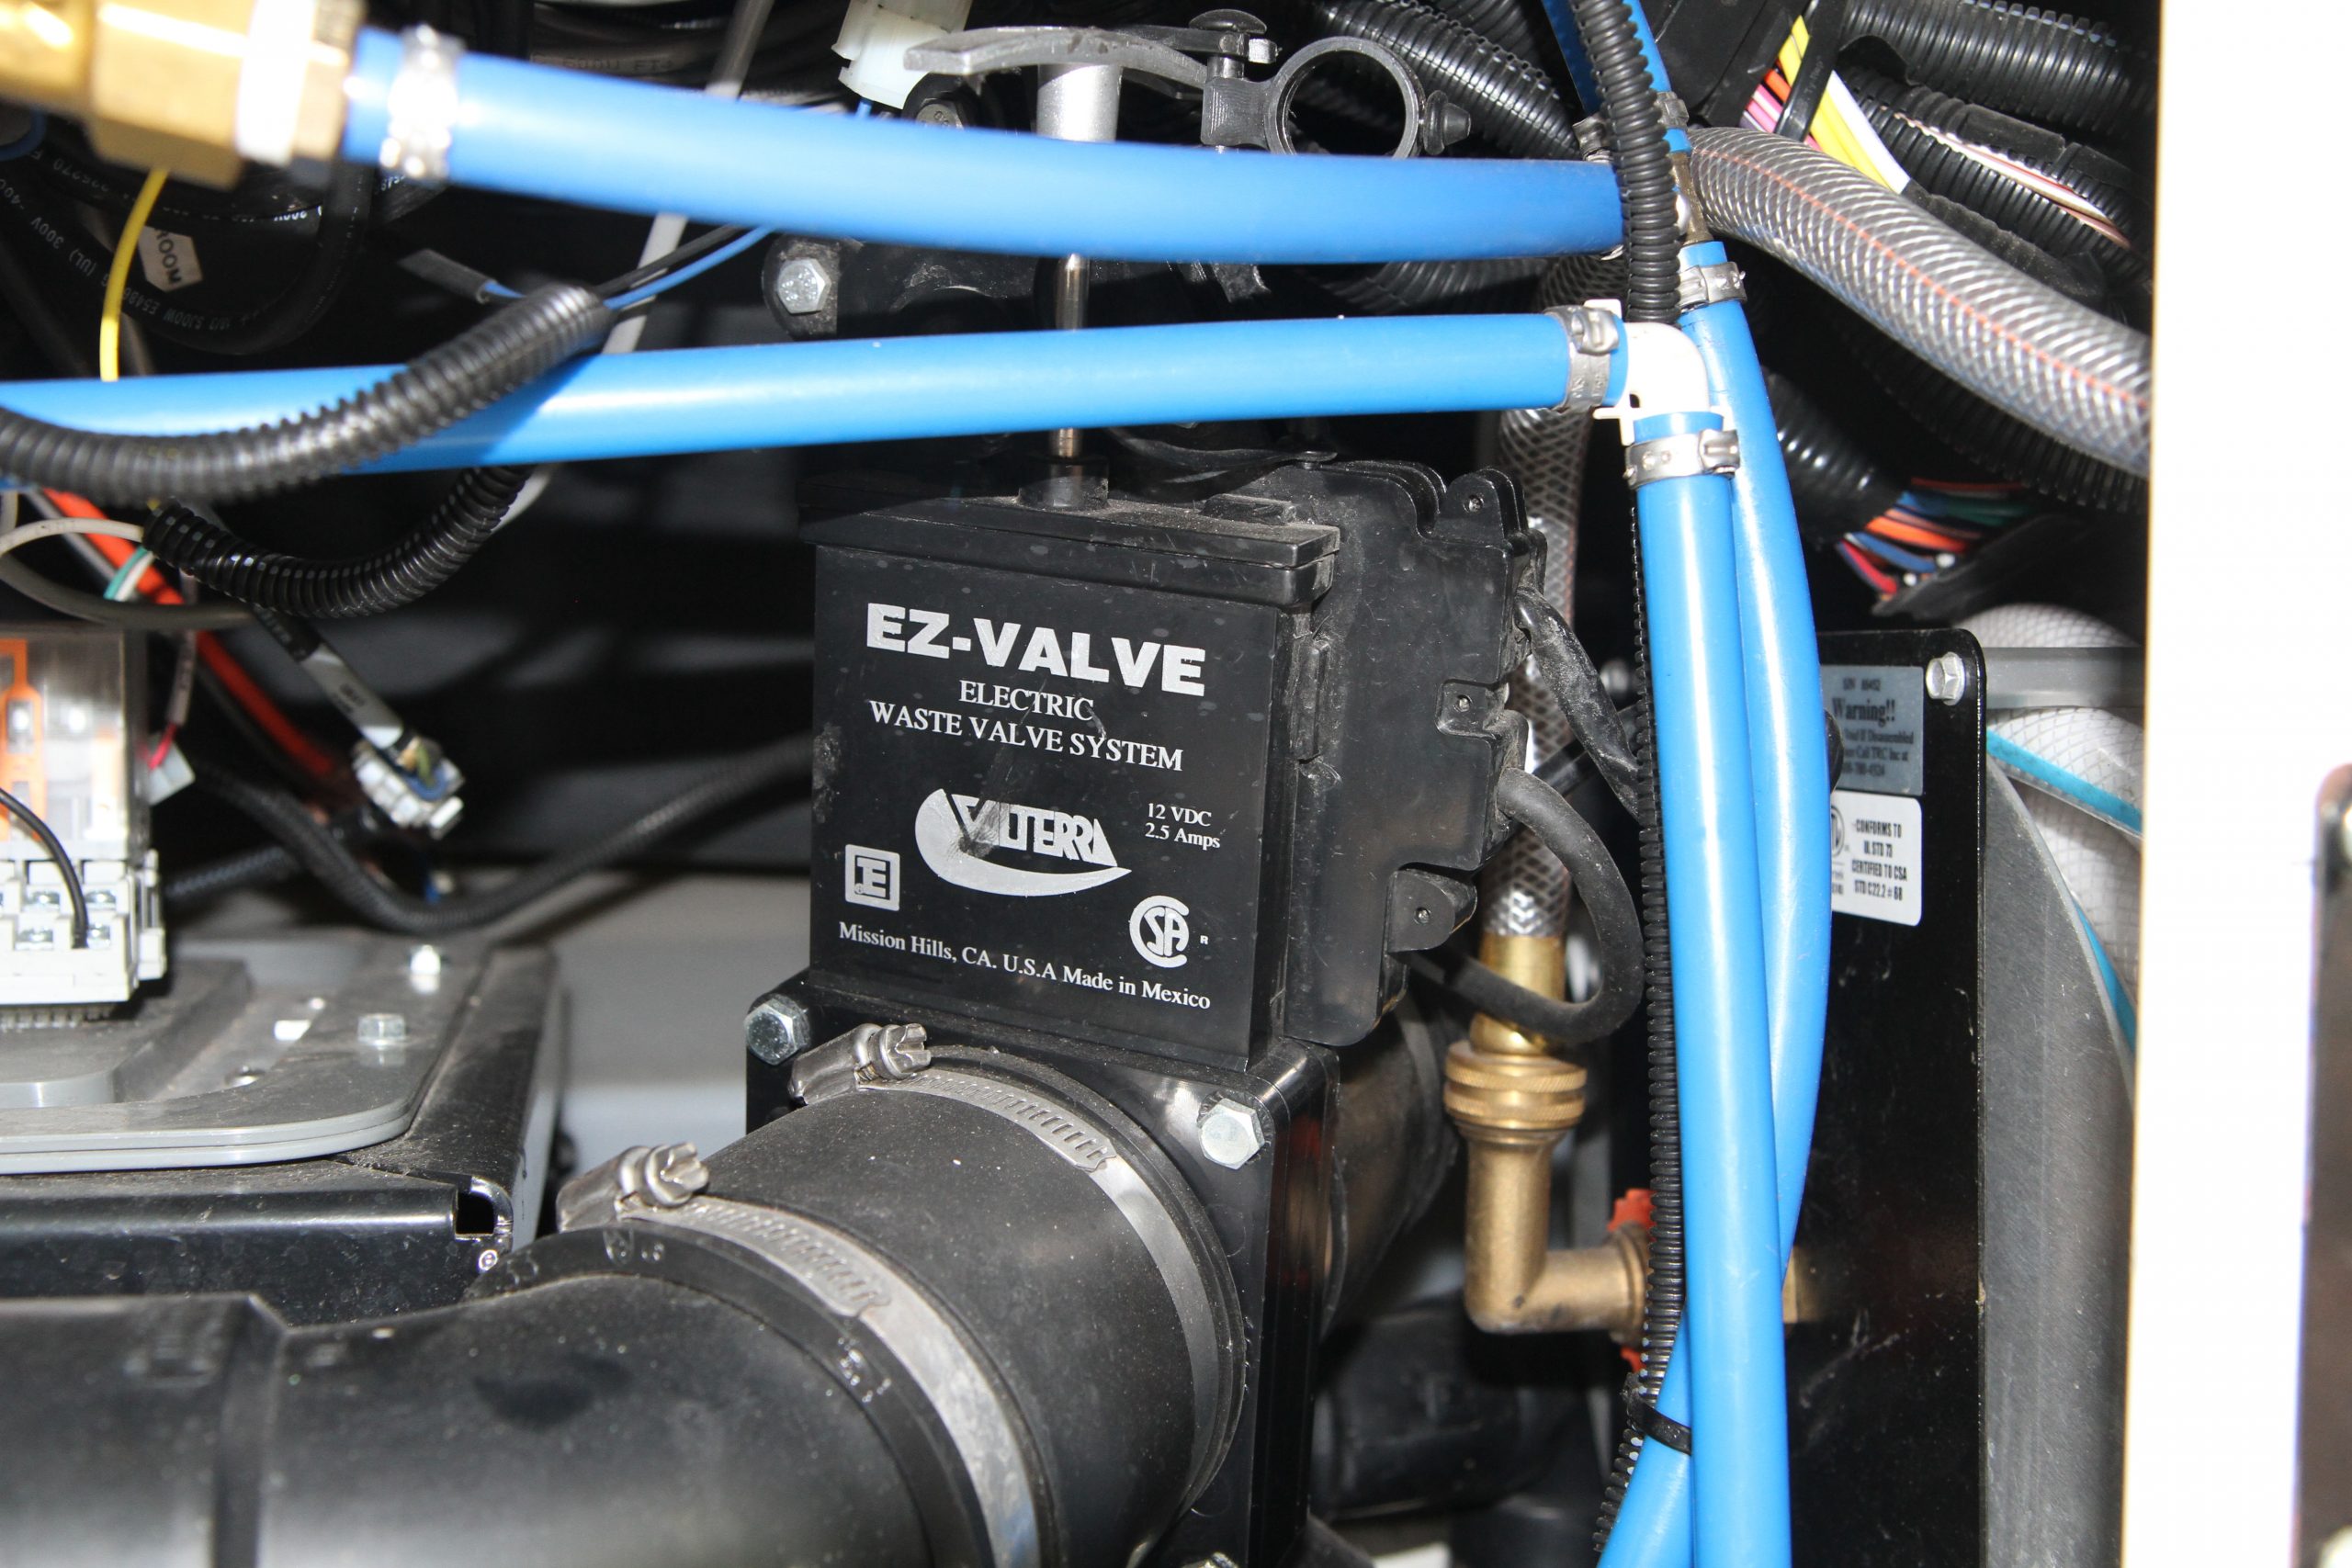
    Electric dump valves can be located in hard to access areas, like this Entegra Coach, and can be remotely operated.

    Never leave the black tank dump valve open when camping or you’ll experience severe caking and bad sensor readings. Always keep the valve closed unless dumping. It’s a best practice to always dump your gray tank after the black tank. The onrushing flow of soapy gray tank water will help flush any black tank residue from your sewer hose.

    If you dump the black tank too often, you’ll never get the water level high enough to prevent waste from caking on the upper portion of the tank walls. Be sure to get the fluid level up high enough before dumping. Ideally, you can do this after a day’s drive to derive the benefit of the sloshing that has taken place. Also be sure to only put human waste and approved toilet paper into the black tank. Never put facial tissue or feminine products down the toilet. You don’t have to buy expensive “official” RV toilet paper from an RV dealer or camping supply store. You just need to use a septic safe paper that will dissolve and break up in water.

    You can test your choice of paper by doing the Mason jar test. Place a wad of toilet paper into a Mason jar and fill it about ¾ full of water. Screw on the lid and shake it for about 15 seconds. The wad of paper should now be dissolved into a bunch of fluff suspended in the water. If it is – you pass the test and it’s RV safe. If it’s still a wad of paper and hasn’t broken down – don’t use it in the RV because it will plug up the system.

    Chemicals and UViaLite

    This brings us to chemicals. A common misconception is that you need to add RV-specific chemicals to treat your waste tank. This is not quite true. Both human waste and toilet paper will dissolve in plain water. You don’t need tank treatment chemicals to do that. If you neglect your black tank, you may need some heavy-duty tank chemicals or Pine Sol to clean it but under normal use, you won’t. One thing chemicals do is deal with odors – although that’s not all it’s cracked up to be either.

    Some chemicals are nothing more than perfume. They don’t remove the odors, but they mask it by adding a more favorable scent to the tank. Other chemicals include enzymes that do react with the odors, but enzymes are organic organisms that take 5-7 days to become active. Most RV owners don’t wait that long to dump their tank, so they are basically flushing away good money every time they dump.

    National-Indoor-RV-Centers-blog-RV-sanitation-systems-motorhome-sewer-tanks-pure-power-blue

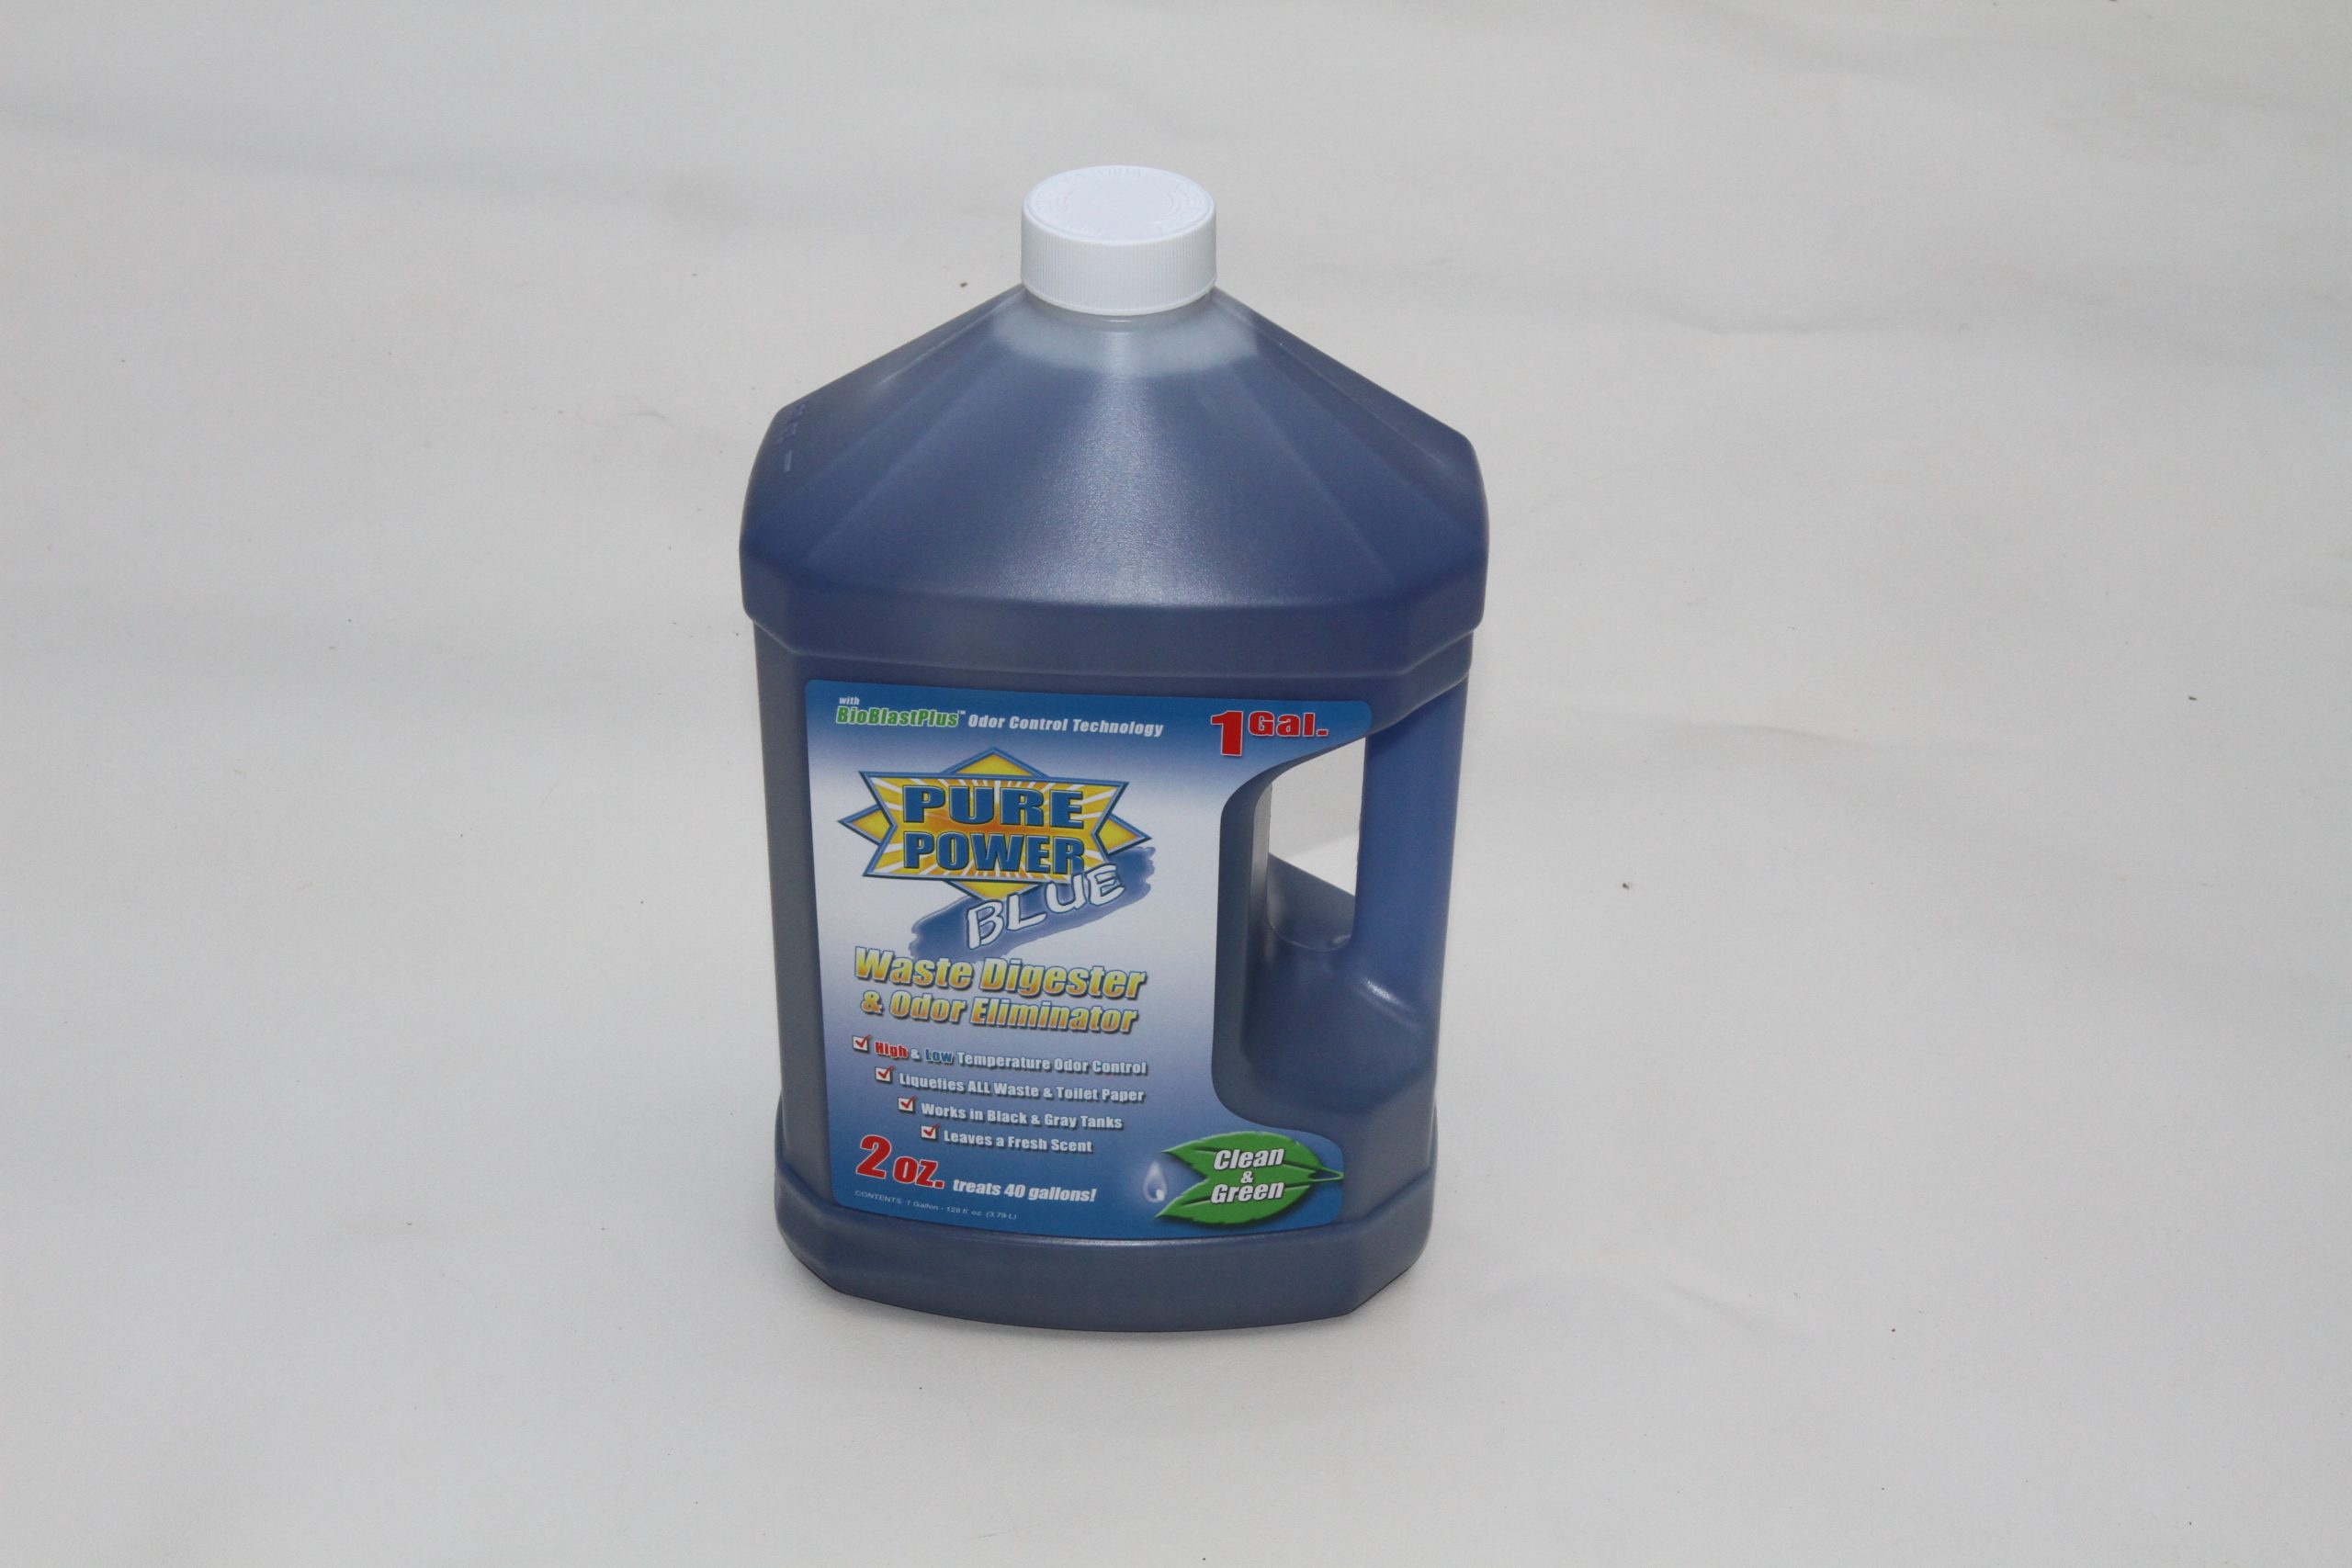
    Liquid waste digester, such as this Pure Power Blue, will help treat solid waste to prevent clogs and prevent odors.

    A great system that I am familiar with is the UViaLite system. I first noticed this system when reviewing an American Coach for a magazine article I wrote for another publication. I also noticed this system on a Thor diesel coach on another article and have since learned that other manufacturers are looking at implementing this system.

    National-Indoor-RV-Centers-blog-RV-sanitation-systems-motorhome-sewer-tanks-uvialite-waste-tank-ventilation-system

    This particular bay on an American Coach shows the UViaLite waste tank ventilation system installed.

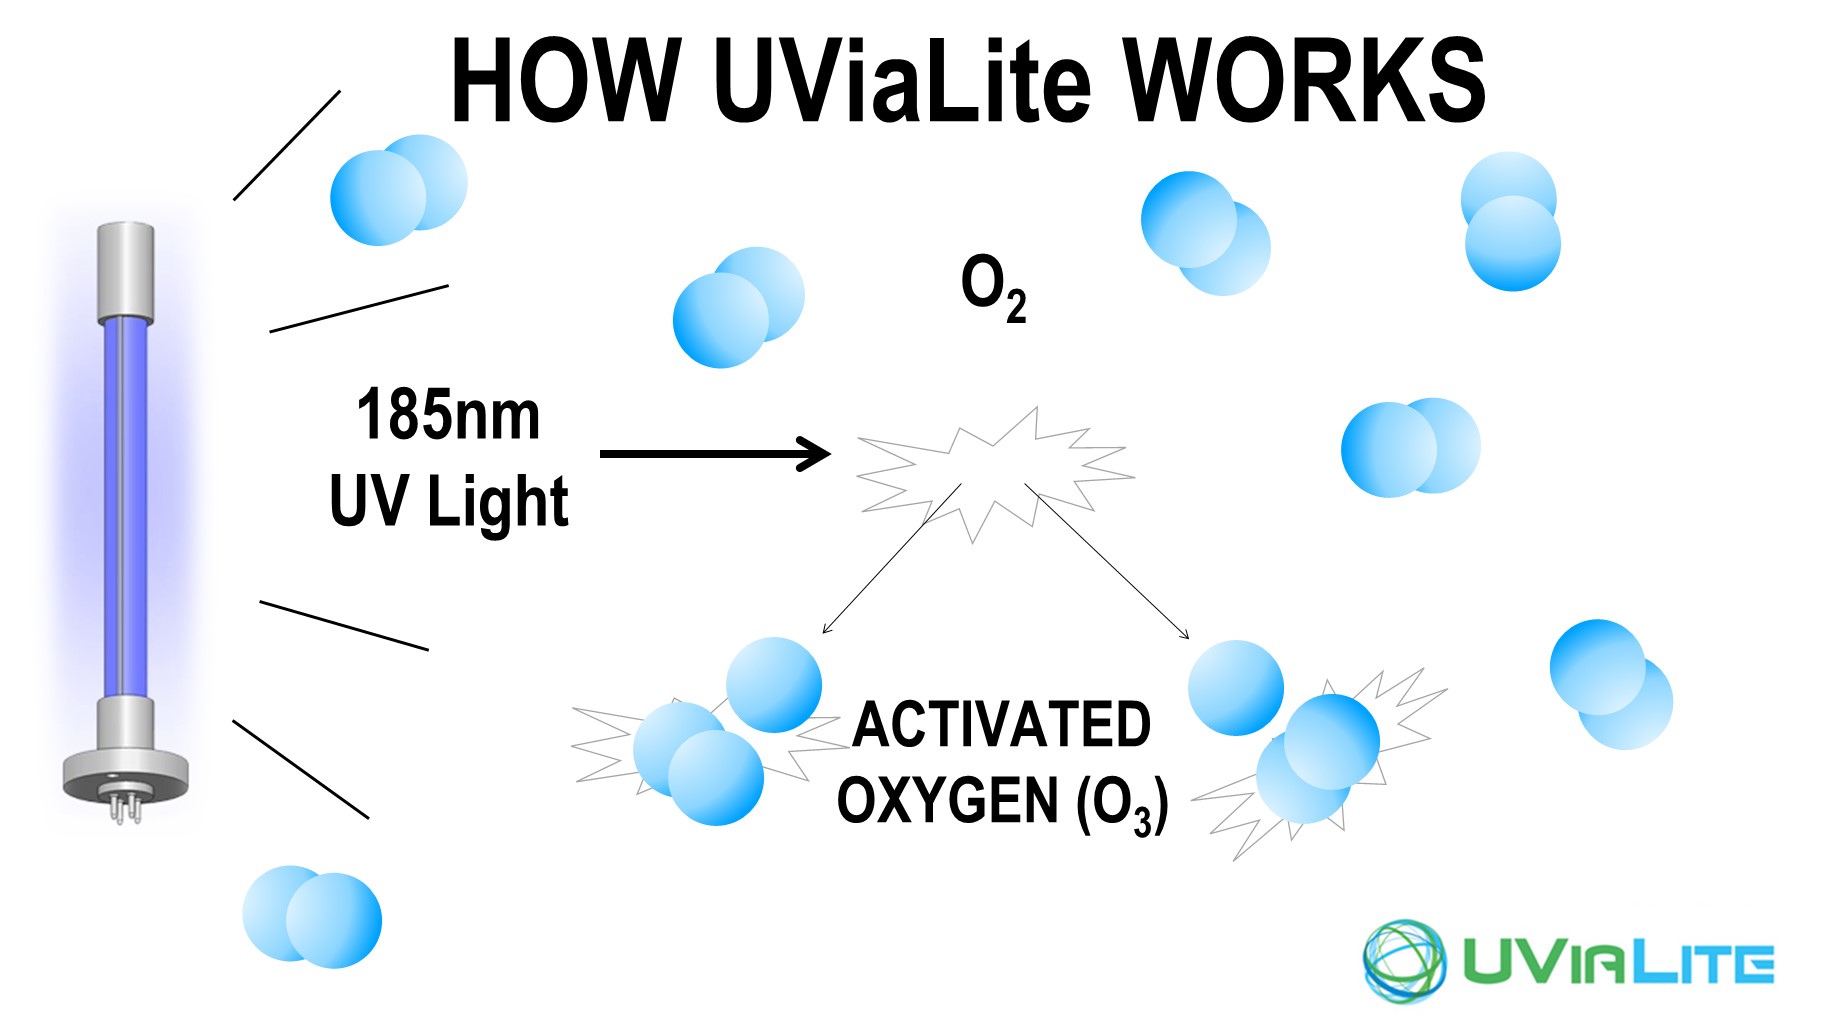
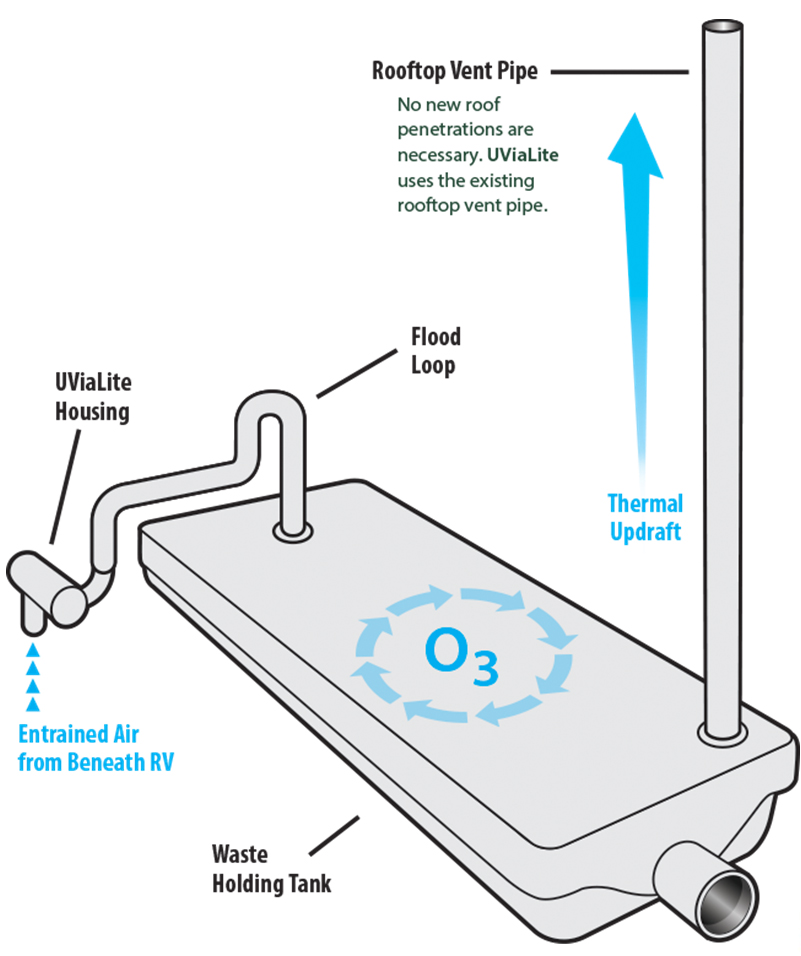
    UViaLite uses proven technology that uses an ultraviolet light set to a specific frequency of 185 nanometers to react with oxygen (O2) to create ozone (O3). This unit picks up fresh air from beneath the coach and passes it through the UV module and into the top of the tank via a 1-1/4” PVC pipe. There are no moving parts because the system uses the chimney effect of natural airflow rising through the tank’s vent stack. 6 to 20 PPM of ozone are created in the unit and the thermal updraft of the vent stack draws the ozone into the holding tank at less than 1 CFM. Once powered up, the unit can remain on and only draws 0.8 amps of 12 VDC power, which is around 10 watts. The unit can remain on until the user stores the RV at the end of the travel season.

    National-Indoor-RV-Centers-blog-RV-sanitation-systems-motorhome-sewer-tanks
    National-Indoor-RV-Centers-blog-RV-sanitation-systems-motorhome-sewer-tanks
    National-Indoor-RV-Centers-blog-RV-sanitation-systems-motorhome-sewer-tanks

    This image shows how the UV light creates O3 from O2

    Shows how Ozone attacks viruses and bacteria to form oxygen, carbon dioxide and water vapor.

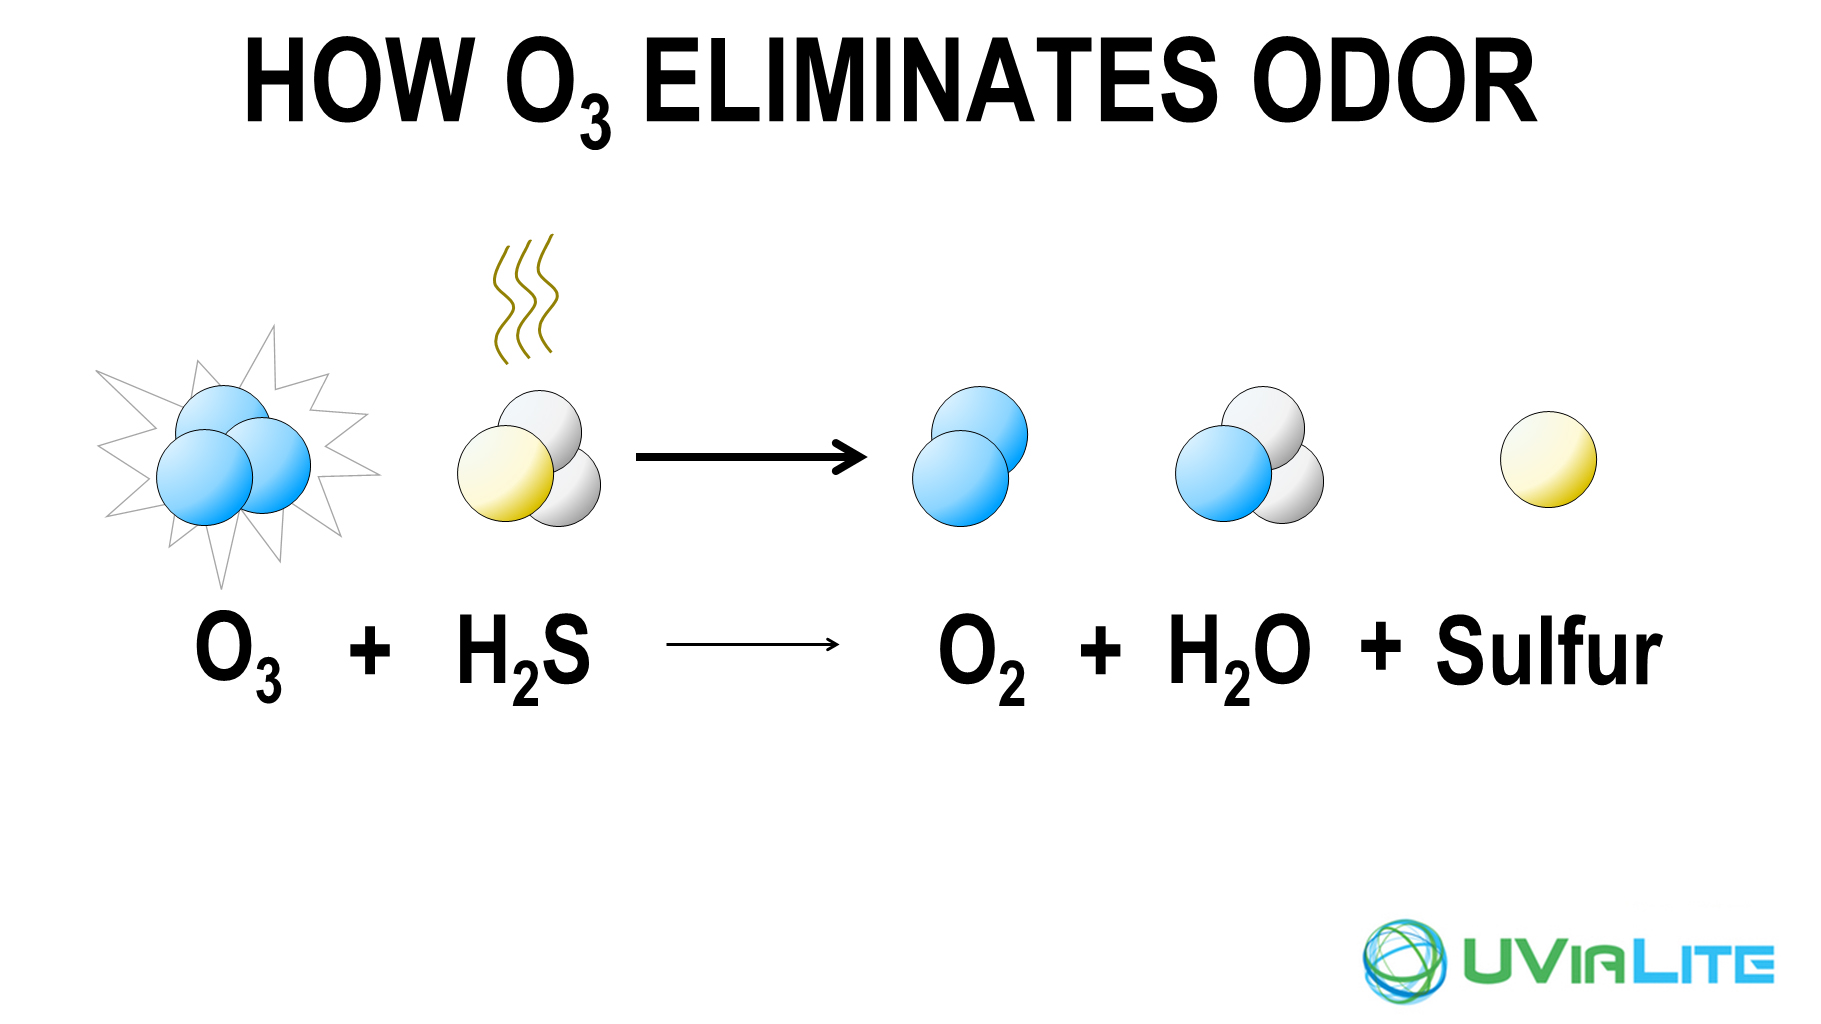
    Shows how odors are eliminated by converting the smelly hydrogen disulphide to water and sulfur that settle in the water and oxygen which vents out the stack.

    Ozone is a powerful oxidizer that will kill bacteria and chemically destroy viruses in seconds. The ozone generated by the eco-friendly UViaLite attacks the molecular bonds of viruses, bacteria & mold, breaking them up into harmless water vapor and carbon dioxide (CO2). UViaLite removes the stinky smell caused by hydrogen disulfide in the tank by converting it to freshwater vapor and sulfur that falls out of the air and into the tank.

    National-Indoor-RV-Centers-blog-RV-sanitation-systems-motorhome-sewer-tanks-uvialite-system

    This diagram shows how the air flows through a UViaLite system.

    Eliminating odors rather than masking them with a perfumed scent will make a big difference whenever someone flushes the toilet, especially when the bathroom exhaust fan is on. Because it also kills any pathogens, it will prevent viruses shed from a sick person from wafting up out of the tank and possibly infecting other people in and around the coach. UViaLite does not affect anything in the liquid portion of the tank so it won’t affect any chemicals you may have in there. It only affects the air above the liquid, which is where the odor is anyway.

    Keep in mind these few tips and you’ll qualify as an RV sanitation expert in no time!

    National Indoor RV Centers blogger Mark Quasius profile picture

    Mark Quasius is the founder of RVtechMag.com, the past Midwest editor of RV Magazine, writes for numerous RV-related publications and a regular Contributor to FMCA’s Family RVing Magazine. Mark and his wife Leann travel in their 2016 Entegra Cornerstone.

    RV Electrical System Failure

    RV Electrical System Failure

    Sometimes these systems can fail, not that this will come as a shock to anyone. When electrical systems fail it’s time to do some testing to see where the failure is. A voltmeter is a huge help in this area although a test light can also be used to test low voltage circuits. Personally, if you are a motorhome owner you should have a multi-meter of some sort. It’s invaluable for checking high voltage circuits, campground pedestals, low voltage circuits, and continuity.

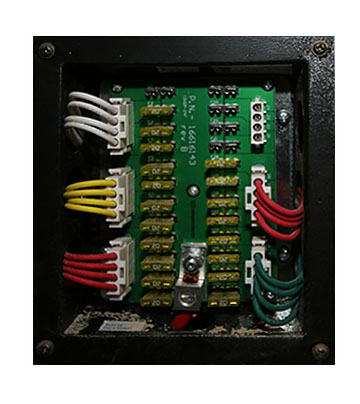
    Fuse Panel

    Fuse panels hold fuses for all 12-volt systems

    Check for Blown Fuses 

    The first thing to do is to check for blown fuses. Sometimes you can do this by removing the fuse and holding it up to the light to determine if the fusible link is blown. Sometimes it’s not so easy to see. The way many of these fuse panels are labeled, or more accurately, “not” labeled, you may have trouble figuring out which fuse does what. The common ATO fuses are blade type fuses with a plastic housing. There are bare spots on the end of the housing that can be used to test for voltage. If you have power going into the fuse, but not out of it, you’ll know you have a bad fuse. Another method is to use the ohms setting on a multimeter. Remove the fuse and check for continuity with the meter. If there is no continuity, the fuse is bad. If you have a critical circuit you can also replace those fuses with ATO style circuit breakers that plug right into place. There are also fuses with LED pilot lights that will illuminate if the fuse is blown. So, you have lots of options when it comes to fuses.


    Test for Voltage 

    If it’s not a fuse, then you need to look a little deeper. If the fuse does have power leaving it, test for voltage at the device that isn’t working. If you have power coming into the device, it’s either a bad device (light bulb, fan motor, water pump, etc.) or else you do not have a complete circuit. In that case, I’d check for a bad ground because an open ground won’t provide a complete circuit back to the battery. If you do not have power at the device, there is an open circuit between the fuse and the device. The first place to look would be at the switch. Test to see if there is power coming into the switch and power exiting the switch. If the power is getting to the switch but not leaving it, it’s time to replace the switch.

    Wire Gauge (AWG) Wire Diameter, in Inches Current Capacity, in Amps
    0000 .4600 600
    000 .4096 500
    00 .3648 400
    0 .3249 320
    1 .2893 250
    2 .2576 200
    4 .2043 125
    5 .1819 100
    6 .1620 65-80
    8 .1285 40-50
    10 .1019 30-33
    12 .0808 20-23
    14 .0641 15-17
    16 .0508 7.5-10
    18 .0403 5
    20 .0320 3.3
    24 .0201 1.3
    28 .0126 0.5

    This chart shows the current capacity for various wire gauge sizes

    3 Advantages to Financing Your RV

    Just like it matters where you buy your RV, how you finance it matters too! 

    Picking the perfect RV is no easy task. Across every brand and RV class, some seriously great options are available. From Newmar‘s massive Class A King Aire RVs to the comparatively humble Class B Winnebagos, there’s something for everyone.

    Once you’ve picked the perfect RV, you’ve still got one more big choice ahead of you: how to pay for it. While RV newcomers often assume the process is similar to buying a car, reality can be much more complex—especially if you’re choosing a high-end model. 

    Given how big of an investment an RV can be, many drivers are tempted to either pay cash out of their savings or secure a line of credit from their bank, which allows them to cover most (if not all) the cost of a new motorhome. However, this isn’t always the best route to take.

    Working with your RV dealership’s financing options can have some serious advantages, both in the amount of money you owe and the terms you get for repaying it. Let’s take a look!

    Financing an RV Offers More Flexibility in Repayment Terms

    As RVs can be individually expensive purchases, they come with many considerations when navigating repayment terms. It’s not unheard of for the loans on some luxury RVs (Class A vehicles especially) to extend over 20 years or 240+ months. That means these loans have more in common with a second mortgage instead of a car loan.

    It’s hard to imagine your local bank or credit union offering terms like these. Many likely aren’t familiar with the intricacies of owning an RV, and this can create a whole host of headaches.

    Discussing financing options with your RV dealership can also save you the steps of dealing with a pre-approval process, which can translate to serious time savings. Depending on where you would otherwise source your RV financing, it’s easy to miss an entire season dealing with clerical tasks. By contrast, an RV dealership understands how important it is to get you behind the wheel of your new RV as soon as possible.

    Financing Also Offers Lower Average Monthly Payments

    Working with your RV dealership to figure out financing options doesn’t just translate to more flexibility in your repayment timeline; it can also easily translate to lower monthly payments. As we mentioned above, some RV loans can last more than a decade, which translates to very different considerations versus a regular car loan.

    More often than not, these longer RV loans translate to significantly lower monthly payments, sometimes as low as $200! Renting an RV for that much money is considered a steal, so try to wrap your mind around owning one for that amount. 

    Even better, drivers can expect to pay a lower average down payment as well. As there are fewer hoops to jump through when you reach out directly to your RV dealer, you can expect a cleaner (and more affordable) close on your new motorhome!

    An RV Dealership Will Be Uniquely Qualified to Work With You

    If you’re noticing a theme here, it’s that RV dealerships are better equipped to work with the unique needs, costs, and considerations of owning an RV than virtually any other source of financing. 

    There’s a really obvious reason for this: RV dealerships know more (and care more) about RVs than other sources of financing!

    Beyond perks like lower down payments and more flexibility in choosing a repayment window, you can rest assured your servicer actually understands the intricacies of owning an RV! (That’s not something you can always say for banks and credit unions.) This understanding translates to a better all-around experience. After all, your RV dealership’s goal is to sell you an RV, which means they’re strongly incentivized for finding the best possible financing options for you. 

    Our financing office works with drivers to find the best possible options for their unique circumstances. Learn more about the different financing options available at NIRVC.